
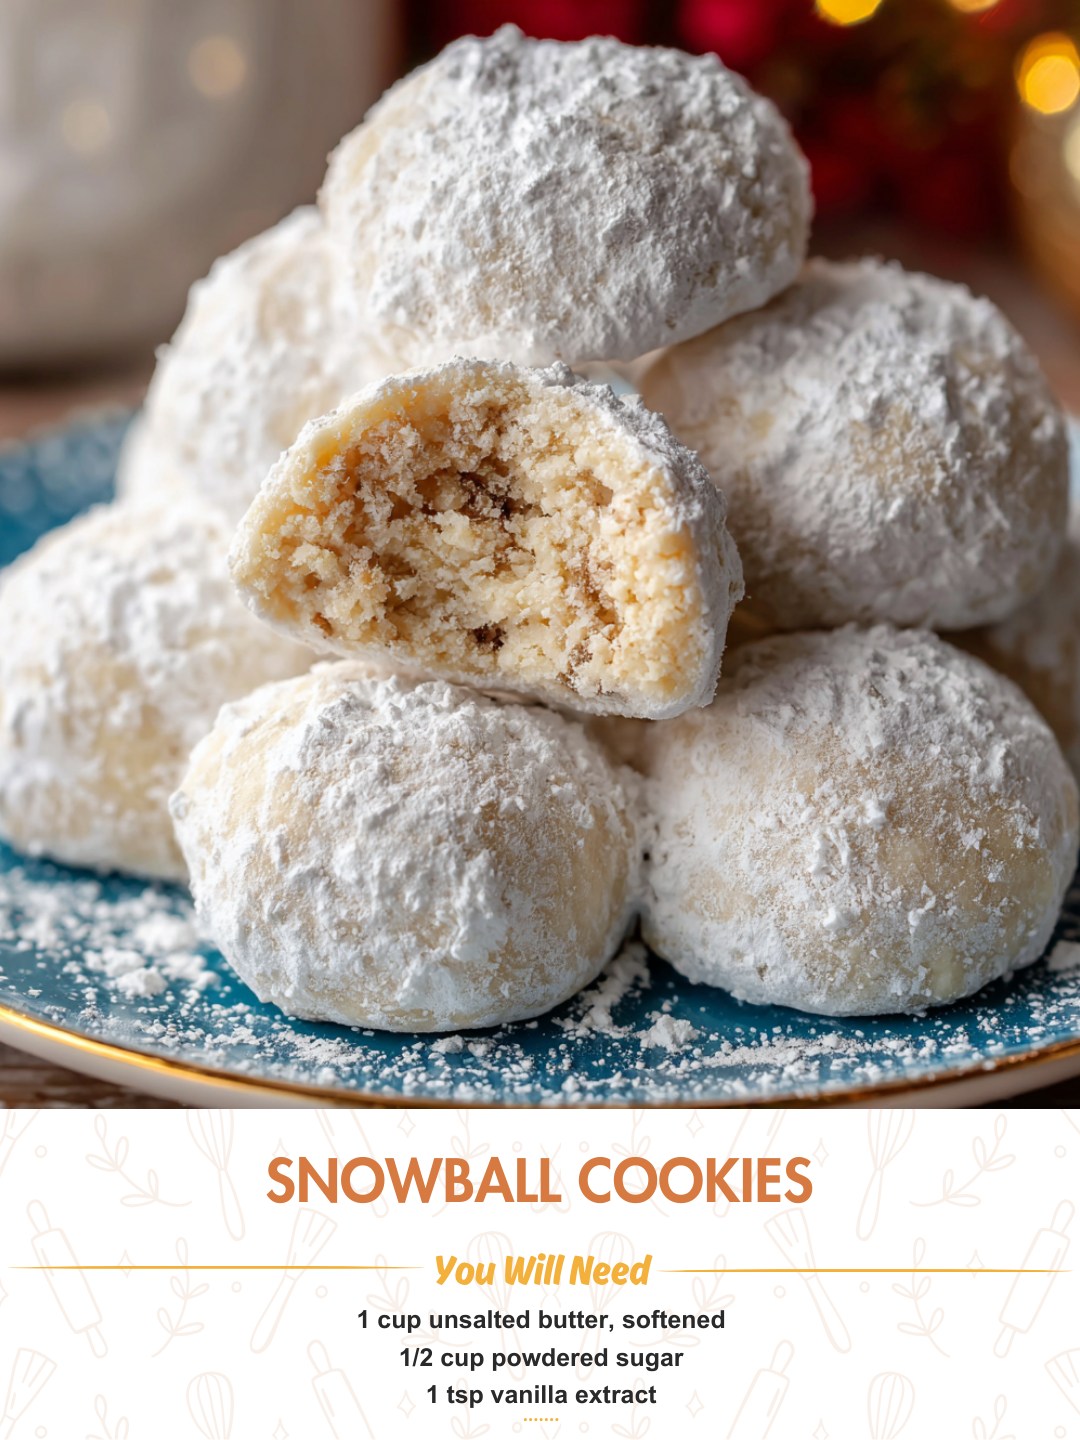
I baked my first batch of Snowball Cookies alongside my grandmother, her hands flour-dusted and steady as she showed me how to roll the warm, fragile dough into clouds of powdered sugar. The scent that filled her kitchen was pure, buttery comfort, a toasty-nutty aroma that promised sweetness in every crumbly bite. I remember the quiet sizzle of pecans in her cast iron skillet and the soft thud of the rolling pin as we crushed them. When I pulled my own first tray from the oven and saw the pale golden spheres waiting to be transformed, I felt a rush of pride. That initial, impossible-to-eat-just-one cookie—melting on my tongue with its tender, sandy texture—was a revelation. They’ve been my non-negotiable holiday tradition ever since, a little bite of edible snow and memory.
Why You’ll Love This Recipe
You are going to love this recipe because it produces the most tender, melt-in-your-mouth cookie imaginable, one that feels both elegantly simple and deeply nostalgic. With a short ingredient list and straightforward steps, they’re approachable for any baker, yet the result—those perfectly round, snow-dusted jewels—looks incredibly impressive on any cookie platter. They’re buttery, not overly sweet, and have that magical, crumbly texture that makes them utterly addictive. Whether you’re continuing a family tradition or starting a new one, these cookies are a guaranteed way to spread a little edible winter joy.
Ingredients
- 1 cup unsalted butter, softened
- 1/2 cup powdered sugar, plus 1 1/2 cups extra for rolling
- 1 teaspoon pure vanilla extract
- 2 1/4 cups all-purpose flour
- 3/4 cup very finely chopped pecans or walnuts, toasted
- 1/4 teaspoon salt
Let’s talk about these ingredients, because a few details are the difference between a good cookie and a legendary one. The unsalted butter must be truly softened—it should leave a deep indent when you press it with a finger but not be greasy or melted. I leave mine out for a solid two hours. Room temperature butter creams perfectly, creating the airy base for that tender crumb. For the nuts, toasting is non-negotiable. I toast my pecans in a dry skillet until fragrant, then let them cool before chopping them very finely. This intensifies their flavor and ensures they blend seamlessly into the dough. That tiny bit of salt is your secret weapon; it balances the sweetness and heightens every other flavor. Don’t skip it!(See the next page below to continue…)
Equipment Needed
- Electric hand mixer or stand mixer
- Medium and small mixing bowls
- Baking sheets
- Parchment paper or silicone baking mats
- Wire cooling rack
- Small sieve or fine-mesh strainer (for powdered sugar)
Step-by-Step Instructions
My process always begins with the nuts. I toast 3/4 cup of pecan halves in a dry skillet over medium-low heat for 5-7 minutes, stirring often, until I can smell their rich, toasty aroma. Then, I let them cool completely on a cutting board before chopping them as finely as I can—almost to the consistency of coarse sand. This fine chop is crucial; large chunks make the dough harder to roll and can cause the cookies to crack while baking. While the nuts cool, I preheat my oven to 350°F (175°C) and line my baking sheets with parchment paper. This little step prevents any sticking and makes cleanup a breeze.
Now, for the heart of the cookie: creaming the butter and sugar. In the bowl of my stand mixer, I combine the softened butter and 1/2 cup of powdered sugar. I beat them together on medium speed for a full 2-3 minutes. This isn’t just mixing; it’s about incorporating air and creating a light, fluffy, and pale mixture. I once rushed this step, and my cookies were dense and heavy instead of light and crumbly. After the butter and sugar are perfectly creamed, I beat in the vanilla extract until just combined. The kitchen starts to smell amazing at this point.
With the mixer on low speed, I gradually add the flour and salt to the wet ingredients. I mix only until the flour is just incorporated and the dough begins to pull away from the sides of the bowl. Then, I gently fold in the finely chopped, cooled nuts with a spatula. The dough will be soft and a bit crumbly, but it should hold together when pinched. If it seems too dry, that’s okay—it’s meant to be sandy. I then use my hands to bring the dough together into a cohesive mass in the bowl, taking care not to overwork it.(See the next page below to continue…)
Using a small cookie scoop or a tablespoon, I portion the dough, rolling each piece between my palms to form a smooth, 1-inch ball. I place them about 2 inches apart on the prepared baking sheets—they don’t spread much, but they need space for heat circulation. I bake them for 12-15 minutes, just until the bottoms are lightly golden and the tops look dry and set. They should remain pale on top. The most important step happens the moment they come out of the oven: while still very warm, I carefully roll each cookie in the remaining powdered sugar. This first coat melts slightly into a glaze. After they cool completely on a wire rack, I give them a second, generous roll in powdered sugar for that iconic, thick, snowy finish.
Pro Tips for Best Results
I tested the nut preparation three different ways: raw and coarse, toasted and coarse, and toasted and very fine. Toasted and very fine was the clear winner. The toasting unlocks deep flavor, and the fine texture allows the nuts to be distributed evenly, acting almost like a flour and contributing to the cookie’s signature sandy, meltaway texture. Large chunks interrupt that perfect crumble.
Here’s what I learned the hard way about the powdered sugar coating: the temperature of the cookie is everything. Roll them too hot, and the sugar melts into a thin, clear glaze. Wait until they’re stone cold, and the sugar won’t stick properly. The magic window is when they are still warm to the touch but have firmed up enough to handle, about 5-8 minutes out of the oven. That first coat acts like a glue for the second, final snowy layer.
For the most uniform and tender cookies, avoid overmixing once the flour is added. Mix on low just until no dry streaks remain. Overmixing develops the gluten in the flour, which can make the cookies tough instead of tender. I also recommend chilling the dough for 30 minutes if your kitchen is very warm, as it makes rolling much easier. A cool, firm dough results in perfectly round spheres that hold their shape beautifully in the oven.
Common Mistakes to Avoid
My biggest first-time mistake was using butter that was too soft, almost melted. I thought it would cream faster, but it created a greasy dough that spread terribly in the oven. My snowballs looked like sad, flat puddles. The butter should be cool to the touch but yield easily—about 65°F. If you press it, your finger should leave a clear indent without sinking straight through. This consistency is key for structure.(See the next page below to continue…)
Another error is overbaking. These cookies are done when the bottoms are just lightly golden and the tops look matte and set. They will not brown on top like a chocolate chip cookie. I overbaked my first batch by just two minutes, waiting for a color change that never came, and they were dry and crumbly instead of melt-in-your-mouth tender. Set a timer for 12 minutes and check them; they often need just a minute or two more.
Do not skip the second roll in powdered sugar. After the first warm roll and cooling, the sugar coat looks thin, wet, and a bit messy. That second roll is what gives them their iconic, lush, snowy, dry-powder appearance. I tried serving them after just one roll once to save time, and while they tasted fine, they lacked that magical wintery look everyone loves. The final dusting makes all the difference.
Finally, avoid storing them before they are completely cool and have their final sugar coat. If you put warm cookies in a container, they will steam, the sugar will dissolve into a sticky mess, and they’ll lose all their delightful texture. Let them cool fully on the rack, apply the second sugar coating, and only then pack them away. Patience ensures each cookie is a perfect, powdery little snowball.
Serving Suggestions
I love serving these cookies on a simple white platter or in a rustic wooden bowl—their snowy appearance is decoration enough. They are the perfect companion to a cup of strong black coffee, hot cocoa, or a pot of spiced tea. The slight bitterness of the coffee cuts through the sweet powder and highlights the buttery, nutty flavor beautifully. For a festive holiday tray, I intersperse them with darker cookies like chocolate crinkles or gingerbread for a stunning visual contrast.
These are also my top choice for cookie boxes and edible gifts. Because they are so sturdy and not overly moist, they pack and travel incredibly well. I nestle them in festive tins or clear cellophane bags tied with a ribbon, separating layers with parchment paper. They always earn rave reviews and are often the first treat people reach for, evoking instant nostalgia.
For a more composed dessert during the holidays, I’ll sometimes crumble a snowball cookie over a bowl of vanilla ice cream or a warm poached pear. The cookie pieces soften slightly and add a wonderful buttery, crumbly texture that feels decadent and special. It’s a fantastic way to use up any that might have broken (though that’s a rare occurrence in my house!).
Variations & Customizations
While pecans are the classic, walnuts work beautifully for a slightly earthier flavor. For a nut-free version, you can replace the nuts with an additional 1/4 cup of flour and use 1/2 cup of rolled oats that have been pulsed in a food processor until fine. This creates a different but still deliciously tender cookie. I’ve also made them with toasted, skinned hazelnuts for a sophisticated twist that tastes like a cookie version of Nutella.
You can play with the flavoring, too. Replacing the vanilla extract with an equal amount of almond extract gives a lovely marzipan-like note. For a citrusy winter twist, add the finely grated zest of one lemon or orange to the dough along with the vanilla. The bright, fragrant zest cuts through the richness in the most delightful way.
For a truly decadent version, after the cookies have their final sugar coating, you can drizzle them with a little melted dark or white chocolate. Or, for a “dirty snowball” effect, roll the cooled cookies in a mixture of powdered sugar and a tablespoon of unsweetened cocoa powder. It’s a fun and delicious variation that chocolate lovers adore.
How to Store, Freeze & Reheat
Storing these cookies is easy thanks to their dry sugar coating. Once completely cool, I layer them in an airtight container with parchment paper between layers. They will keep perfectly at room temperature in a cool, dry place for up to 10 days. The powdered sugar may settle and absorb a bit over time, but the flavor remains stellar. Do not store them in the fridge, as humidity can make the sugar sticky.
These cookies freeze like a dream, which is why I always make a double or triple batch during the holidays. I place the fully cooled and sugared cookies in a single layer on a baking sheet to flash freeze until solid (about 2 hours), then transfer them to a freezer-safe bag or container. They will keep for up to 3 months. Thaw them, still covered, at room temperature for about an hour. If the powdered sugar looks a bit dull after thawing, a gentle roll in a little fresh powdered sugar will revive their snowy look.
There’s no need to reheat snowball cookies—they are meant to be enjoyed at room temperature. The delicate, crumbly texture is their hallmark. If they’ve been in the freezer, simply let them thaw. Microwaving is not recommended, as it can melt the sugar coating and make the cookies greasy.
Conclusion
These Snowball Cookies are more than just a holiday recipe to me; they’re a little bite of buttery, powdered-sugar-dusted magic that carries the warmth of tradition and the simple joy of homemade goodness. They’ve been my constant through countless holiday seasons, a reliable treat that never fails to delight. I hope this recipe finds its way into your kitchen and becomes a cherished part of your own celebrations, creating sweet memories with every crumbly, melt-in-your-mouth bite. Now, go preheat that oven and get ready to make it snow (sugar) in your kitchen.