
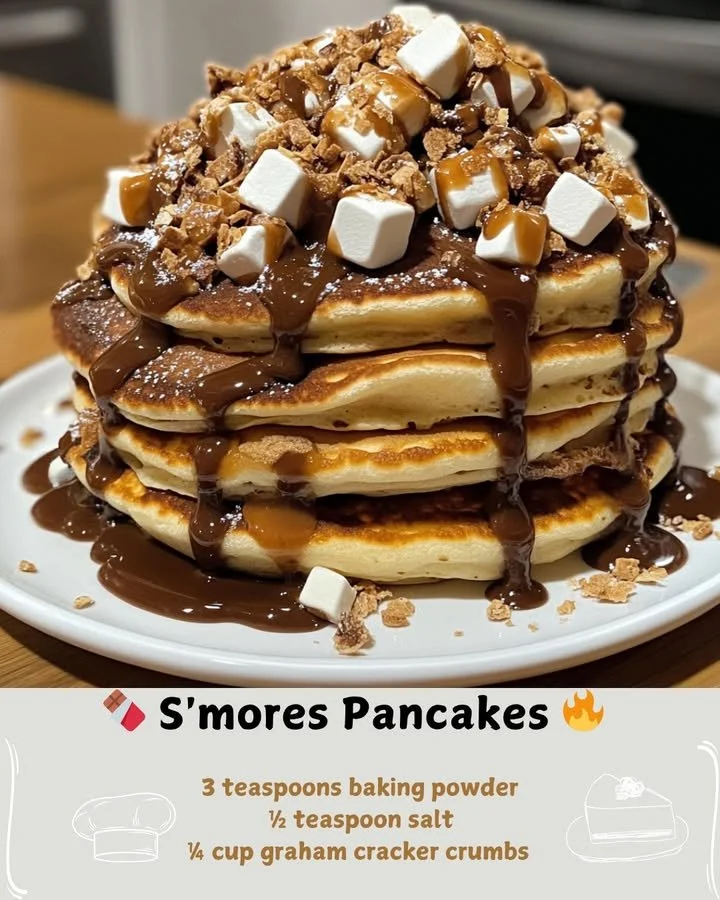
There’s something undeniably magical about the combination of chocolate, marshmallows, and graham crackers that brings me back to summer camp nights by the fire. When I think of S’mores, I can almost taste the gooey sweetness and smell the smoky air mingling with laughter and camaraderie. So, why not bring this delightful treat into my breakfast routine? That’s exactly what led me to create these scrumptious S’mores Pancakes. In this blog post, I’ll walk you through my favorite recipe for these indulgent pancakes that will transport you to those cozy campfire moments with every bite.
Why You’ll Love This Recipe
These S’mores Pancakes are more than just a delicious breakfast; they are a playful twist on a beloved classic that puts a smile on everyone’s face. Fluffy pancakes laced with chocolate chips and bits of graham cracker, topped with toasted marshmallows—what’s not to love? They’re perfect for lazy weekend mornings or special occasions when you want to impress your family or friends. Plus, they’re quick to whip up and can even be customized to cater to different tastes! (See the ingredients in the next page below…)
Ingredients
– 1 cup all-purpose flour
– 2 tablespoons granulated sugar
– 1 tablespoon baking powder
– 1/2 teaspoon salt
– 1 cup milk
– 1 large egg
– 2 tablespoons melted butter
– 1/2 cup mini chocolate chips
– 1/2 cup crushed graham crackers
– 1 cup marshmallows (mini or regular)
Equipment Needed
– Mixing bowls
– Whisk
– Measuring cups and spoons
– Non-stick skillet or griddle
– Spatula
– Baking sheet (for toasting marshmallows)
Step-by-Step Instructions
To make these delightful S’mores Pancakes, start by mixing the dry ingredients in a large bowl, which includes the flour, sugar, baking powder, and salt. In a separate bowl, combine the wet ingredients: milk, egg, and melted butter. It’s important to whisk them together well until everything is nicely blended. Once the wet ingredients are incorporated into the dry mixture, fold in the mini chocolate chips and crushed graham crackers. You’ll notice the inviting scent of chocolate wafting through my kitchen. (See the next page below to continue steps…)
Next, preheat your non-stick skillet or griddle over medium heat. I like to use a non-stick spray or a little additional butter to ensure the pancakes come out golden brown and fluffy. Pour about 1/4 cup of the batter onto the heated surface and let it cook until you see bubbles forming on the top, about 2-3 minutes. Then, flip the pancake and cook for another minute or until golden brown. While the pancakes are cooking, I like to toast marshmallows on a baking sheet in the oven set to broil for 1-2 minutes until they’re light golden and puffy.
Once all the pancakes are stacked and the marshmallows are toasted to perfection, it’s time to assemble your masterpiece! Layer your pancakes with the toasted marshmallows, drizzle with chocolate syrup, and sprinkle some additional crushed graham crackers for a fun crunch. The sight of this towering deliciousness is absolutely irresistible, and trust me, your kitchen is going to smell amazing!
Pro Tips for Best Results
I tested this recipe three ways: using different types of chocolate chips, with and without adding cocoa powder to the batter, and letting the batter rest versus using it immediately. My favorite was adding dark chocolate chips for a rich flavor that perfectly balanced the sweetness of the marshmallows. Also, allowing the batter to rest for about 10 minutes made the pancakes fluffier and lighter.
Another great tip is to keep your pancakes warm while you’re making the rest of the batch. I pop them into a warm oven (around 200°F) on a baking sheet. This way, everyone can enjoy a stack of warm pancakes without having to wait!
Lastly, don’t skimp on the graham crackers. When you crush them, make sure to leave some larger chunks for delightful little bites of crunch throughout your pancakes. Trust me; it makes a difference!
Common Mistakes to Avoid
A common mistake I encountered was overmixing the batter. It was so tempting to keep stirring, but that led to tough pancakes instead of fluffy ones. I learned that it’s okay to have a few lumps in the batter; they help keep the texture just right. (See the next page below to continue…)
Another thing to be cautious about is the heat of your skillet. If it’s too hot, the pancakes can burn on the outside while remaining raw in the center. I found that medium heat is perfect for achieving that golden-brown exterior while allowing the inside to cook thoroughly.
Make sure to use a non-stick surface or enough grease; pancakes can easily stick, causing a mess and ruining that perfect fluffy texture. I usually use a good quality non-stick spray or butter as a preventive measure.
Lastly, don’t forget to toast your marshmallows! I once skipped this step and dumped plain marshmallows on top of the pancakes, and while they were still enjoyable, toasting adds that crucial element of flavor and texture.
Serving Suggestions
I love serving these S’mores Pancakes with a dollop of whipped cream on top. It adds a light airy texture that perfectly complements the richness of the chocolate and sweetness of the marshmallows. You can also drizzle them with chocolate syrup for an extra decadent touch!
Fresh fruit, particularly strawberries or bananas, makes a lovely pairing as well. The tartness from the strawberries cuts through the sweetness of the pancakes, creating a delightful balance. Plus, they add a beautiful pop of color to your breakfast plate!
If you want to make this meal truly special, you could serve it alongside some crispy bacon or maple sausage. The salty, savory elements are a fantastic contrast to the sweet pancakes, making for a wonderfully balanced breakfast spread.
Variations & Customizations
Feel free to get creative with this recipe! For a peanut butter twist, you could add spoonfuls of creamy peanut butter to the batter before cooking. The warm peanut butter and chocolate combination is simply divine and reminiscent of a beloved childhood treat.
If you prefer a different kind of chocolate—like white chocolate or even butterscotch chips—don’t hesitate to substitute! Customizing the flavor profile according to your taste is one of the joyful aspects of cooking, and these pancakes are a wonderful base to experiment with.
Additionally, if you want to make a healthier version, consider substituting whole wheat flour and using honey or maple syrup instead of granulated sugar. You can add in some protein powder for a boost, too. Breakfast can be delicious and nutritious at the same time!
How to Store, Freeze & Reheat
If you happen to have leftovers, which I highly doubt, you can store the pancakes in an airtight container in the refrigerator for up to three days. Just allow them to cool completely before sealing them. When ready to eat, you can gently reheat them in the microwave, though keep in mind that they might lose some of their fluffiness.
For longer storage, I recommend freezing the pancakes. Just layer them with parchment paper in a freezer-safe bag or container, and they’ll be good for up to two months! To reheat, pop them in the toaster or in the microwave until heated through; pancakes never tasted so good from the freezer!
Reheating them in the toaster makes a big difference! The edges get that crispy texture again, reminiscent of when they were freshly cooked. A drizzle of chocolate syrup upon reheating really revives those flavors too!
Conclusion
So there you have it—my go-to recipe for S’mores Pancakes! I hope you enjoy making these as much as I have and that they bring a touch of nostalgia and joy to your breakfast table. Whether it’s a lazy Sunday morning or a special brunch gathering, these pancakes are bound to be a hit. Happy cooking, and may your kitchen always smell of chocolate and marshmallows!