
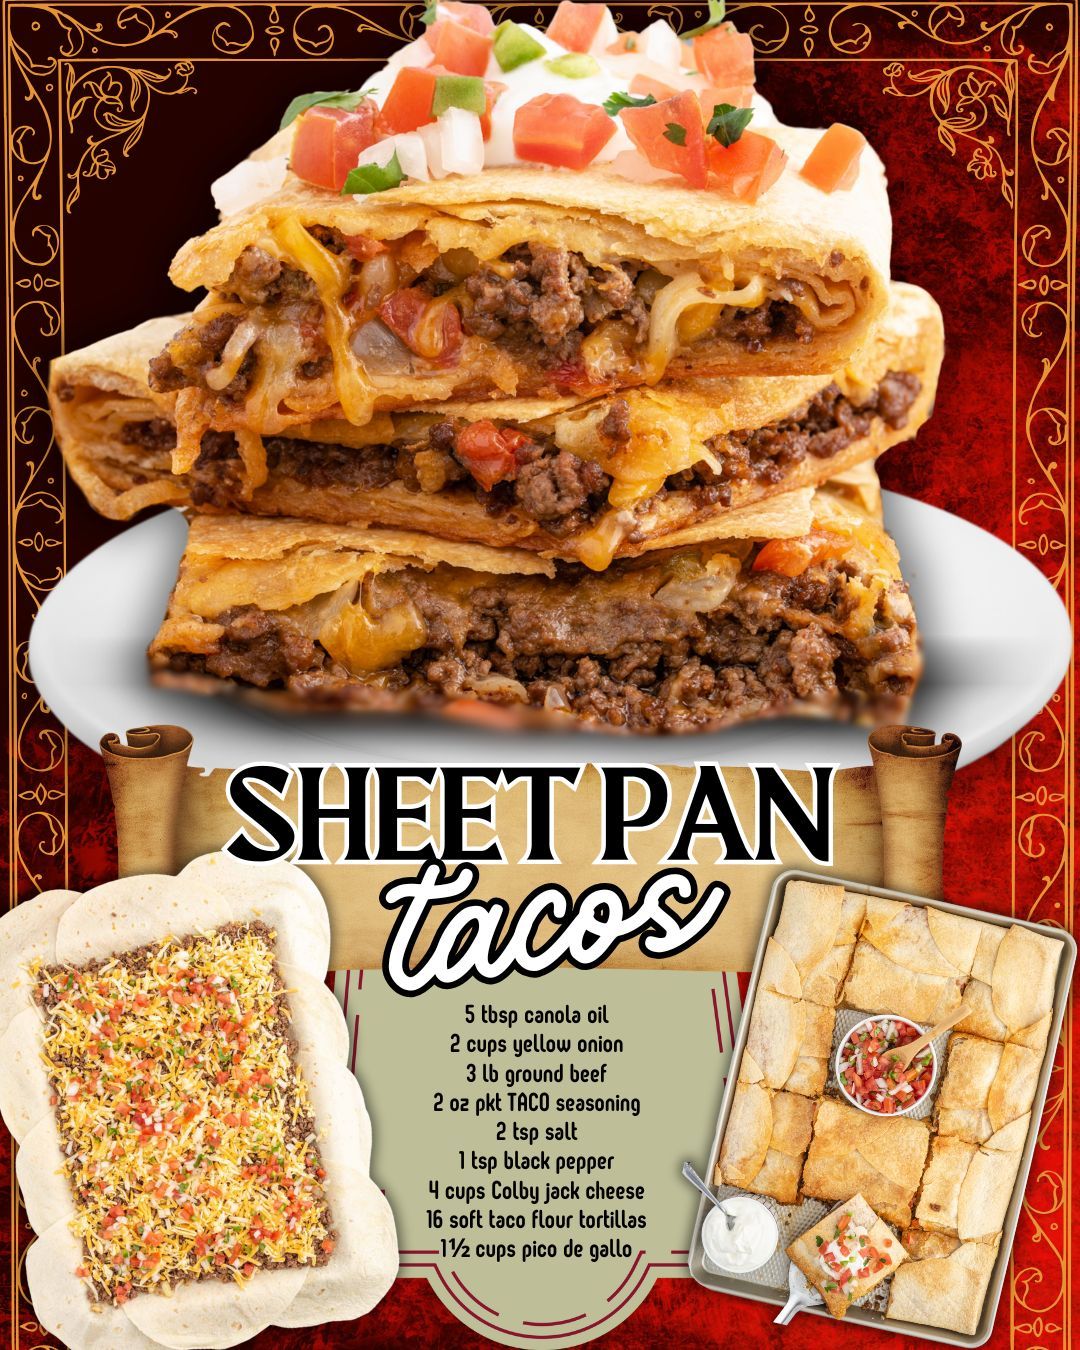
The idea for these Sheet Pan Tacos came to me on a Tuesday night when the very thought of standing over the stove, assembling individual tacos while my hungry family waited, felt like too much. I wanted all the flavor of taco night with none of the frantic assembly-line pressure. I remember lining the tortillas on a sheet pan, smelling the ground beef and onions sizzling with taco seasoning, and the feeling of pure possibility. When I pulled the pan from the oven to reveal a landscape of perfectly crisp, cheese-glued tortilla shells, I did a little dance. Loading them up was a joy, not a chore. They were a revelation—a fun, communal, and incredibly delicious taco night revolution.
Why You’ll Love This Recipe
You are going to be obsessed with this recipe because it transforms taco night from a chaotic, hands-on cooking event into a simple, streamlined, and wildly fun meal. It delivers maximum flavor with minimal effort and even less cleanup. Everyone gets to build their own perfect bites straight from the pan, and the method guarantees you a crispy, cheesy, perfectly sturdy shell every single time. It’s a genius solution for feeding a crowd, pleasing picky eaters, and injecting some playful, hands-on fun into your weekly dinner routine.
Ingredients
- 2 cups diced yellow onion (about 1 large onion)
- 5 tablespoons canola oil, divided
- 3 lbs ground beef (I use 80/20 for flavor)
- 1 (2 oz) packet taco seasoning
- 1 teaspoon black pepper
- 1/2 cup water
- 16 soft taco-size flour tortillas (8-inch)
- 4 cups shredded Colby Jack cheese
- For serving: shredded lettuce, diced tomatoes, sour cream, salsa, guacamole, sliced jalapeños, etc. (See the next page below to continue…)
Equipment Needed
- Large rimmed sheet pan (half-sheet pan, 18×13 inches)
- Large skillet
- Cutting board and sharp knife
- Measuring cups and spoons
- Brush or spoon for oil
- Spatula
Step-by-Step Instructions
We start by building a flavor-packed foundation. In your large skillet, heat 2 tablespoons of the canola oil over medium-high heat. Add the diced onions and sauté them for about 5-7 minutes, until they’re soft and starting to turn translucent. You’re not aiming for deep caramelization here, just to sweeten them and take the raw edge off. This step is crucial—I’ve tried skipping it and just adding raw onion to the beef, and the texture was too harsh. Next, add the ground beef to the skillet with the onions. Break it up with your spoon and cook until it’s fully browned and no pink remains. Drain any excess grease if there’s a lot.
Now, it’s time for the seasoning. Sprinkle the taco seasoning packet and black pepper over the beef. Pour in the 1/2 cup of water. Stir everything together and let it simmer for 3-5 minutes, until the liquid is mostly absorbed and the mixture is thick and fragrant. That little bit of water is key—it helps rehydrate the dried spices and lets them coat every morsel of beef evenly. Remove the skillet from the heat and let the beef mixture cool slightly while you prep the pan. This cooling step is important; piping hot filling will make the tortillas soggy before they even hit the oven.
While the beef cools, grab your sheet pan. Pour the remaining 3 tablespoons of canola oil onto the pan. Using a brush or the back of a spoon, spread the oil to coat the entire surface evenly. This is what creates that gloriously crisp, fried-like bottom on your taco shells. Trust me, don’t skimp on this oil! Now, arrange your tortillas on the pan. They will overlap slightly in the center, and that’s perfectly fine—it creates those wonderful, cheese-filled seams. I gently press each tortilla down so the bottom gets coated in the oil. (See the next page below to continue…)
Assembly is a breeze. Evenly divide the slightly cooled beef mixture among the tortillas, spreading it in a line down the center of each one. Then, the grand finale: sprinkle all 4 cups of shredded Colby Jack cheese generously over the beef, making sure to cover the filling and get cheese in the spaces between the tortillas. This melted cheese is what fuses everything together into one glorious, sliceable sheet of tacos. Bake in a preheated 425°F (220°C) oven for 12-15 minutes, until the tortilla edges are golden and crisp and the cheese is completely melted and bubbly. The smell is absolutely intoxicating.
Pro Tips for Best Results
My biggest tip is about the tortilla placement. I’ve tested this by laying them flat, folding them, and overlapping them. The overlapping method is the winner. Lay them so they overlap by about an inch in the center of the pan, with the edges fanning out to the sides. This creates a natural “cup” for the filling and allows the cheese to melt between them, acting as a delicious glue that turns 16 individual tortillas into one cohesive, easy-to-serve masterpiece. It also means no filling falls out the sides!
The second tip is all about the beef-to-cheese ratio and oven temperature. You need a generous amount of cheese—it’s not just a topping, it’s the structural component. And that high oven heat of 425°F is non-negotiable. It’s what crisps the tortillas quickly before they have a chance to dry out or become tough. I tried it at 375°F once, and the tortillas were pale and slightly chewy instead of crisp. The high heat gives you that perfect textural contrast between the crunchy bottom and the soft, cheesy top.
Finally, let the baked taco sheet rest for 5 minutes before diving in. I know it’s hard—it looks and smells so good. But this short rest allows the melted cheese to set just slightly, making it much easier to cut between the tortillas with a pizza cutter or sharp knife for clean servings. It also lets the fillings cool from molten-lava temperature to perfectly enjoyable. I use this time to put all the fresh toppings in bowls on the table.
Common Mistakes to Avoid
The first mistake I made was using cold, straight-from-the-fridge filling. I was in a rush and spooned the hot beef right onto the tortillas. The steam immediately made the tortillas soggy in the center, and they never crisped up properly in the oven. Now, I let the beef cool for at least 10-15 minutes before assembling. A warm filling is fine, but a scalding hot one is the enemy of a crisp shell. (See the next page below to continue…)
Another error is not using enough oil on the pan. That layer of oil is what fries the bottom of the tortilla in the oven, giving you that delightful crunch. If you just give the pan a light spray, you’ll end up with dry, baked tortillas that can be tough. Measure out those 3 tablespoons—don’t just eyeball it. Spread it to every corner. This ensures every single bite has that perfectly crisp base. It seems like a lot, but it’s the secret to the texture.
Overloading the tortillas with too much filling is a common pitfall. You want a hearty line down the center, not a mountain. If you pile it too high, the weight can prevent the tortilla from crisping underneath, and it becomes difficult to fold or eat. It also makes the final product harder to cut neatly. A moderate, even layer is perfect. Remember, you’re adding lots of fresh toppings after baking, so the beef and cheese are just the warm, melty foundation.
Finally, using pre-shredded bagged cheese can be a problem. I know it’s convenient, but it’s often coated with anti-caking agents like cellulose that prevent it from melting as smoothly and cohesively. For the best, silkiest melt that truly acts as “glue,” take two extra minutes to shred a block of Colby Jack yourself. The difference in melt quality and flavor is noticeable and worth the tiny bit of extra effort.
Serving Suggestions
I love serving these right on the sheet pan, placed in the center of the table on a trivet. It’s a fun, communal, and visually impressive way to eat. I provide a pizza cutter or a large sharp knife so everyone can cut out their own section of tacos. I put all the cold, fresh toppings—shredded lettuce, diced tomatoes, sour cream, salsa, guacamole, jalapeños—in separate bowls so everyone can customize their plate exactly how they like it. It turns dinner into an interactive experience.
For a complete fiesta meal, I’ll serve the sheet pan tacos with a couple of simple sides. A big bowl of cilantro-lime rice or a pot of seasoned black beans is perfect for filling out the plates. A zesty corn and black bean salad or a simple side of tortilla chips with queso also complements the flavors beautifully. For a lighter option, a simple cabbage slaw with a lime vinaigrette adds a fantastic crunchy contrast.
When I’m serving this for a casual party or game day, I cut the entire baked sheet into smaller, square “taco bites” using a pizza cutter before bringing it out. I arrange them on a platter with bowls of dipping sauces like salsa, queso, and crema on the side. They become the ultimate finger food—easy to grab, perfectly portioned, and incredibly delicious. They always disappear first.
Variations & Customizations
This recipe is a fantastic canvas. If you prefer other meats, ground turkey, chicken, or even a plant-based crumble work wonderfully—just use the corresponding seasoning. For a “supreme” version, I sometimes add a can of drained black beans and a cup of frozen corn to the beef mixture after it’s seasoned. You can also swap the Colby Jack for a Mexican cheese blend, pepper jack for heat, or even a sharp cheddar.
Don’t be afraid to change up the tortillas. While flour tortillas give that perfect pliable crispness, you can use corn tortillas for a gluten-free option (just note they might be a bit more fragile). For a fun twist, I’ve used the small “street taco” size tortillas and arranged them in a grid—they make perfect appetizer-sized portions. You can even use this method with naan or pita for a completely different fusion meal.
The topping possibilities are endless. Beyond the classics, I love offering pickled red onions, crumbled cotija cheese, fresh cilantro, a squeeze of lime juice, or a drizzle of chipotle mayo. For a “taco salad” version, I’ll serve each crispy taco section on a big bed of chopped romaine lettuce. Let your pantry and preferences guide you—the basic method is so reliable, you can’t go wrong.
How to Store, Freeze & Reheat
Leftovers store surprisingly well! Once cooled, you can place sections of the baked tacos in an airtight container in the refrigerator for up to 3 days. To reheat, the oven or toaster oven is your best friend to retain crispness. Place them on a sheet pan and heat at 375°F for about 8-10 minutes, until hot and crispy again. The microwave will work in a pinch but will make the tortillas soft and chewy.
You can freeze the assembled but unbaked sheet pan. Assemble the tacos completely on the oiled pan, then wrap the entire pan tightly in a double layer of plastic wrap and then foil. Freeze flat. They will keep for up to 2 months. To bake from frozen, remove the wrappers and bake in a 425°F oven, adding 5-10 minutes to the baking time, until heated through and crisp.
I do not recommend freezing the baked tacos, as the texture of the reheated tortillas becomes compromised. For the best make-ahead strategy, you can cook and season the beef filling up to 2 days in advance and store it in the fridge. When you’re ready to eat, simply assemble with the cold filling and cheese and bake as directed. This cuts the active prep time on busy nights down to just minutes.
Conclusion
These Sheet Pan Tacos are more than just a recipe; they’re a game-changing approach to a beloved classic that gives you back your time and sanity without sacrificing an ounce of flavor or fun. They’ve transformed taco night in my home from a chore into a celebration, and I know they’ll do the same for you. So grab that sheet pan, embrace the overlap, and get ready for the easiest, crispiest, most communal taco night you’ve ever had. Your family will thank you, and your future self will, too.