
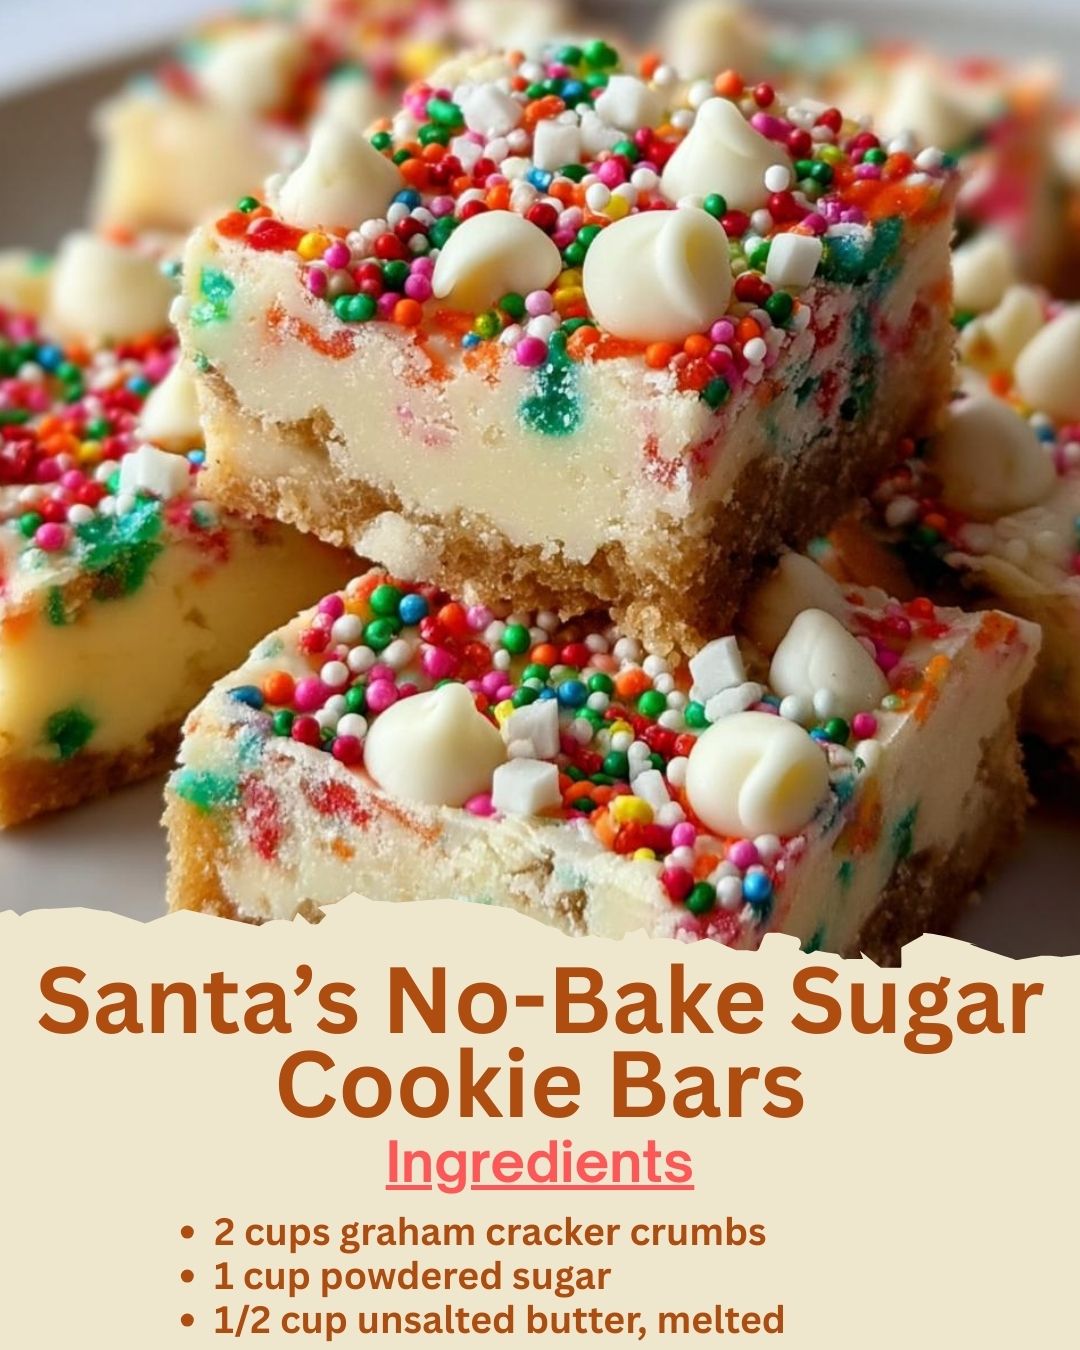
The first time I pressed this simple, crumbly mixture into a pan, I was skeptical. Could three main ingredients really transform into something magical? But as the sweet, buttery scent of graham crackers and melted butter filled my kitchen, mingling with the snowy cloud of powdered sugar, I felt a wave of childhood Christmas nostalgia. No oven required, just a little patience while they set in the fridge. When I finally sliced into the firm slab, the texture was a revelation—densely sweet, subtly crumbly, and meltingly tender, like the heart of a perfect sugar cookie. Dipped in chocolate and sprinkled with red and green, they weren’t just easy; they were utterly enchanting. Santa might need these on his plate this year.
Why You’ll Love This Recipe
You will adore this recipe because it’s the ultimate holiday hack. In about 15 minutes of hands-on time, with zero baking skills required, you create a treat that tastes like you fussed for hours. It’s incredibly forgiving, perfect for making with kids, and the ideal base for endless festive decorations. When the oven is overflowing with other goodies, these bars are your delicious, no-stress secret weapon, offering pure, simple sweetness that appeals to every age.
Ingredients
- 2 cups graham cracker crumbs (from about 16 full sheets)
- 1 cup powdered sugar (confectioners’ sugar)
- 1/2 cup (1 stick) unsalted butter, melted
- 1 teaspoon pure vanilla extract
- 1/4 teaspoon fine sea salt (trust me, this balances the sweetness perfectly)
- 1 1/2 cups semi-sweet or white chocolate chips, for dipping/drizzling
- 1 teaspoon coconut oil or shortening (for smoother melting chocolate)
- Festive sprinkles, crushed candy canes, or edible glitter for decoration (See the next page below to continue…)
Equipment Needed
- 8×8 inch square baking pan
- Parchment paper
- Food processor or rolling pin and zip-top bag (for making crumbs)
- Medium mixing bowl
- Fork or spatula for mixing
- Small microwave-safe bowl
- Spoon or piping bag for drizzling
Step-by-Step Instructions
I always start by lining my pan. I place a full sheet of parchment paper in my 8×8 pan, letting the edges hang over the sides like little handles. This isn’t just for easy cleanup; it’s the only way to lift the entire slab of bars out perfectly for clean slicing later. I learned this the hard way after trying to pry my first batch out with a spatula—it crumbled into a delicious but messy heap. Once my pan is prepped, I make my graham cracker crumbs. If I’m using a food processor, I pulse the sheets until they’re fine, sandy crumbs. If I’m going old-school, I put them in a sturdy zip-top bag and roll them with a rolling pin until finely crushed. The consistency should be like coarse sand, with no big pieces.
In my mixing bowl, I combine the graham cracker crumbs, powdered sugar, and salt. I whisk them together with a fork until they’re fully married and no streaks of white sugar remain. This ensures every bite is evenly sweet. Now, I pour in the melted butter and vanilla extract. Here’s my key tip: use the butter when it’s just melted and slightly cooled, not piping hot. I stir everything together with my fork, and then I switch to using my hands. I mix and knead gently right in the bowl until the mixture resembles damp sand and holds together when I pinch it. It should feel like moldable playdough, not dry or greasy.
Next, I transfer the crumb mixture into my prepared pan. Using the bottom of a flat glass or my clean hands, I press it down firmly and evenly into every corner. This firm press is the secret to bars that hold their shape and don’t fall apart when you bite into them. I press until the surface is completely smooth and compact. I don’t just pat it; I really put some weight into it. Then, I pop the whole pan into the refrigerator to chill and set for at least 2 hours. This chilling time is non-negotiable—it allows the butter to re-solidify, binding everything into a solid, sliceable bar. (See the next page below to continue…)
While the base chills, I prepare the chocolate topping. When I’m ready, I melt the chocolate chips with the teaspoon of coconut oil in a microwave-safe bowl in 30-second bursts, stirring thoroughly between each. The oil gives the chocolate a beautiful gloss and makes it easier to drizzle. Once the base is firm, I use the parchment paper “handles” to lift it onto a cutting board. I slice it into bars or squares. Then, I dip each bar halfway into the melted chocolate or drizzle it lavishly over the top with a spoon, immediately adding festive sprinkles or crushed candy canes before the chocolate sets. The contrast of the sweet, crumbly base with the crisp chocolate shell is pure magic.
Pro Tips for Best Results
For the absolute best texture and flavor, make your own graham cracker crumbs from the full sheets. I tested this with store-bought pre-crumbed crackers once, and the texture was finer and dustier, resulting in a denser, less flavorful bar. The slight variance in crumb size from processing them yourself gives the bars a more interesting, melt-in-your-mouth texture that feels homemade.
The quality of your vanilla extract makes a huge difference here. With so few ingredients, each one shines. I use a pure vanilla extract, not imitation. That warm, fragrant vanilla note is the soul of the “sugar cookie” flavor. For a truly special twist, a teaspoon of almond extract (or half vanilla, half almond) adds a wonderful, nostalgic depth that reminds me of classic holiday baking.
When pressing the base into the pan, line the bottom of your pressing glass with a small piece of parchment paper. This prevents the mixture from sticking to the glass and ensures you get a perfectly smooth, even surface without any messy cleanup. It’s a tiny trick that makes the process so much smoother.
Common Mistakes to Avoid
My biggest first-time mistake was not pressing the mixture firmly enough into the pan. I just patted it down, thinking it looked flat. When I went to slice it, it was crumbly and fell apart. Don’t do what I did! You need to apply real, even pressure. I now press with all my might, going over every inch several times. A firmly packed base is the difference between a crumbly mess and a perfect, neat bar. (See the next page below to continue…)
Do not skip the salt. It might seem odd in a sweet bar, but it’s the secret weapon that keeps the treat from tasting one-dimensionally sugary. It enhances the butter and vanilla flavors and balances the sweetness of the powdered sugar and chocolate. Just a quarter teaspoon makes all the other flavors pop.
Avoid adding extra butter to make the mixture stick together. If your mix seems too dry after adding the melted butter, just keep mixing and kneading with your hands. The heat from your hands will help distribute the butter. Adding more will make the bars greasy and prevent them from setting properly. If it truly won’t hold a shape when pinched, add more butter one teaspoon at a time, not tablespoons.
Finally, don’t try to slice the bars before they are fully chilled. Impatience leads to crumbling. The two-hour chill in the fridge is essential for the butter to set. For the cleanest cuts, I sometimes even freeze the whole pan for 30 minutes before slicing, especially if my kitchen is warm. A sharp knife wiped clean between cuts gives you those beautiful, sharp edges.
Serving Suggestions
I love presenting these bars on a festive platter lined with parchment or a doily. Arranging them in a simple grid or stacking them slightly offset looks beautiful. They’re perfect for cookie exchanges, holiday parties, or as a sweet little gift tucked into a cellophane bag tied with a ribbon.
For a cozy night in, I’ll serve them with mugs of rich hot chocolate or strong coffee. The sweetness of the bar pairs wonderfully with the slight bitterness of the drinks. They also make a lovely, light dessert after a heavy holiday meal when everyone is too full for pie but still wants a little something sweet.
These are my favorite treat to leave out on Christmas Eve with a glass of milk. They’re less crumbly than cookies, so they’re neater for Santa, and their simple, sweet flavor is a universal pleaser. Packaging a few with a note for neighbors or teachers is also a heartfelt, homemade touch.
Variations & Customizations
For a “Christmas Magic” version, I’ll divide the base mixture and tint one portion with a few drops of green food coloring and another with red before pressing them in alternating sections into the pan. When sliced, you get beautiful red and green layered bars. You can also use holiday-themed sprinkles mixed right into the crumb base.
If you love texture, stir 1/2 cup of mini chocolate chips, chopped toasted pecans, or even crushed pretzels into the crumb mixture before pressing it into the pan. This adds little bursts of flavor and crunch. A layer of dulce de leche or caramel sauce spread over the chilled base before dipping in chocolate is also decadently delicious.
For different dipping options, use white chocolate and sprinkle with crushed candy canes for a peppermint bark effect. Or, use dark chocolate and a light dusting of flaky sea salt for a sophisticated sweet-and-salty combination. The base is so versatile, it can match any holiday color scheme or flavor preference.
How to Store, Freeze & Reheat
To store these bars, I keep them in a single layer in an airtight container in the refrigerator. They will stay fresh and hold their perfect texture for up to 7 days. The cool environment keeps the chocolate firm and the base intact. They can sit out at room temperature for a few hours for serving.
Yes, you can freeze them! Once the chocolate topping is fully set, I place the bars in a single layer on a parchment-lined baking sheet to flash-freeze for an hour. Then, I transfer them to a freezer-safe bag or container. They will keep for up to 2 months. Thaw in the refrigerator for a few hours before serving.
There is no need to reheat these bars. They are meant to be enjoyed cool or at room temperature. If you try to warm them, the chocolate will melt and the buttery base will soften too much. They are the perfect make-ahead, grab-and-go holiday treat.
Conclusion
Santa’s No-Bake Sugar Cookie Bars are proof that the most magical holiday treats don’t have to be complicated. They’ve brought so much joy and simplicity to my Christmas kitchen, and I love that they’re a recipe I can share with bakers of any age or skill level. I hope they bring a little extra sweetness and a lot less stress to your holiday season. Now, go make some magic—no oven mitts required.