
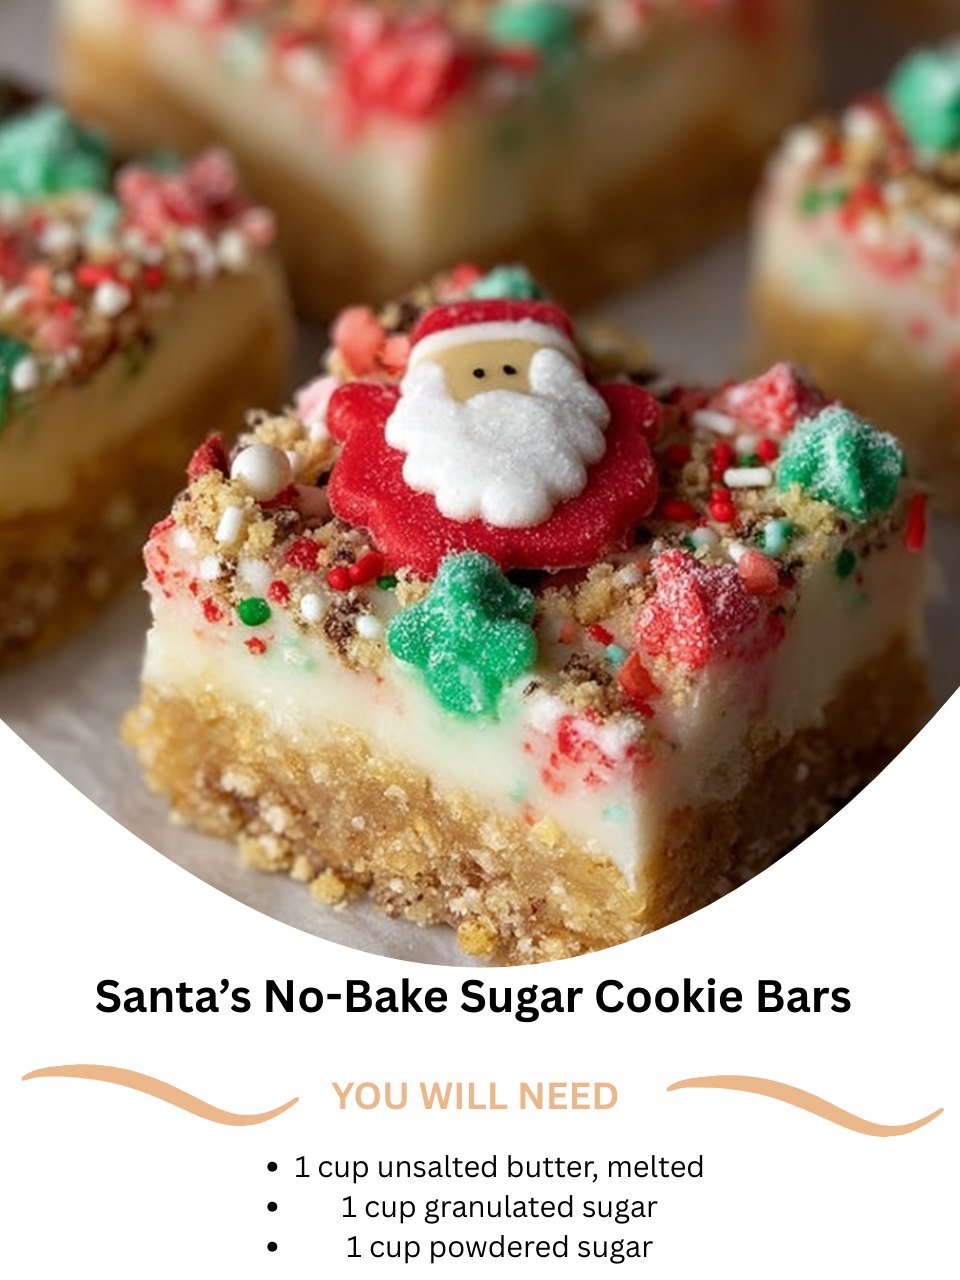
I discovered the magic of these No-Bake Sugar Cookie Bars during a frantic holiday week when my oven decided to give up the ghost. Panic turned into pure delight as I melted butter, stirred in sugars, and watched a dough come together right in my mixing bowl—no heat required! The scent of butter and vanilla that filled my kitchen was just like the real thing, but without any of the waiting. Pressing that soft, sweet dough into the pan felt like playing with edible sand, and the moment I bit into a chilled, frosted square, I was hooked. They’re my secret weapon for instant holiday cheer, a recipe that feels like a Christmas miracle when you’re short on time or oven space.
Why You’ll Love This Recipe
You will absolutely love this recipe because it captures the soul-satisfying flavor of a classic sugar cookie in a fraction of the time and with zero baking stress. It’s the perfect solution for hot summer days, busy holiday schedules, or kitchen emergencies. With just a bowl and a spoon, you can create a treat that’s buttery, sweet, and endlessly customizable, all while keeping your kitchen cool and calm. It’s a foolproof recipe that delivers maximum joy with minimal effort, making you look like a holiday baking hero without ever turning on the oven.
Ingredients
- 1 cup (2 sticks) unsalted butter, melted and slightly cooled
- 1 cup granulated sugar
- 1 cup powdered sugar, plus more for dusting or frosting
- 1 tablespoon pure vanilla extract (don’t use imitation; it makes a huge difference)
- ½ teaspoon salt
- 3 cups all-purpose flour, spooned and leveled
- For the Vanilla Frosting (Optional but recommended):
- 3 cups powdered sugar
- ⅓ cup unsalted butter, softened
- 1 ½ teaspoons vanilla extract
- 2-3 tablespoons milk or cream
- Sprinkles for decorating (See the next page below to continue…)
Equipment Needed
- 9×13 inch baking pan
- Parchment paper
- Large mixing bowl
- Whisk and rubber spatula
- Measuring cups and spoons
- Electric mixer (for frosting, optional)
- Small offset spatula or knife for spreading
Step-by-Step Instructions
I start by lining my 9×13 pan with parchment paper, leaving a little overhang on the sides—this is my golden ticket for easy removal later. Then, in my large mixing bowl, I combine the melted (but not piping hot) butter, granulated sugar, and that one cup of powdered sugar. I whisk them together vigorously for a good minute or two. I watch as the mixture transforms from separated and grainy into a smooth, glossy, pale paste. This step is crucial for dissolving the sugars and creating the right texture. Next, I stir in the vanilla extract and salt, and the kitchen instantly smells like cookie dough paradise.
Now, it’s time for the flour. I add all three cups at once. At first, it seems like too much, but I trust the process. I switch to a sturdy rubber spatula and begin to fold it in. The mixture will go from wet to crumbly to finally coming together into a soft, pliable dough. I use my clean hands at the very end to give it a few gentle kneads right in the bowl, ensuring there are no dry pockets of flour left. The dough should hold together when squeezed and have the texture of a firm, moist Play-Doh.
Here’s where the fun happens. I turn the dough out into my prepared pan. Using my fingers and then the flat bottom of a measuring cup, I press the dough firmly and evenly into every corner. I’ve learned that applying even, firm pressure is key to getting bars that hold together when cut. I don’t just pat it down; I really press to compact it. Once it’s perfectly smooth and level, I place the whole pan, uncovered, into the refrigerator. I let it chill for at least two hours, but I’ve found that overnight is even better. This sets the butter and firms everything up for the cleanest slices.(See the next page below to continue…)
Once the dough base is rock-solid, I decide on the finish. Sometimes, for a simple look, I just dust the top liberally with powdered sugar using a fine-mesh sieve. But for the full festive effect, I make the easy vanilla frosting. I beat the softened butter, powdered sugar, vanilla, and milk together until it’s smooth and spreadable. I slather it over the chilled base, scatter on a blizzard of colorful sprinkles, and then return the pan to the fridge for another 30 minutes to let the frosting set. Finally, I use the parchment paper “handles” to lift the entire slab onto a cutting board for slicing.
Pro Tips for Best Results
The temperature of your melted butter is more important than you think. I tested this with boiling hot butter, warm butter, and cooled butter. Using butter that’s just barely warm to the touch (melted and then rested for 10 minutes) gave me the perfect dough consistency. Boiling hot butter made the dough greasy and difficult to work with, while cooled butter didn’t blend with the sugars as smoothly. Aim for that sweet spot of liquid but not hot.
When pressing the dough into the pan, don’t be shy. A firmly packed base is essential for bars that don’t crumble when you bite into them. I use a small piece of parchment paper placed directly on the dough and press with the measuring cup on top of that. This prevents sticking and allows me to apply serious, even pressure without making a mess. A loosely pressed base will yield a crumbly, messy bar.
For the frosting, if you’re using it, consistency is everything. You want it thick enough to hold its shape and not soak into the bar, but spreadable enough to create a smooth layer. If it’s too thin, add more powdered sugar. If it’s too thick, add milk a half-teaspoon at a time. I always frost the bars while the base is cold from the fridge. A cold base helps the frosting set quickly and cleanly.
Common Mistakes to Avoid
The biggest mistake is not measuring the flour correctly. Scooping the flour directly from the bag with your measuring cup packs it in, leading to an excess of dry ingredients. This will give you a dry, crumbly dough that’s impossible to press. Always spoon the flour lightly into your measuring cup and level it off with a knife. I made this mistake the first time and ended up with a sandy, powdery mess that wouldn’t hold together—don’t do what I did!(See the next page below to continue…)
Don’t try to skip or shorten the chilling time. The chilling step is what allows the butter to re-solidify, giving the bars their firm, sliceable texture. If you try to cut them too soon, they will crumble and fall apart. I know it’s hard to wait, but trust me, letting them set for a full two hours (or overnight) is non-negotiable for perfect, clean squares.
Another error is using cold ingredients for the frosting on a cold base. If your butter for the frosting is hard, it won’t cream properly and your frosting will be lumpy. Conversely, if you try to spread warm frosting on a firm, cold base, it can cause the top layer of the base to soften and become messy. Have your frosting ingredients at room temp, and spread it on a thoroughly chilled base for the best results.
Finally, avoid over-mixing the dough once the flour is added. You just want it to come together. Overworking it can make the bars tough. Once you see no more dry flour, stop mixing and use your hands to gently bring it into a ball. The less you handle it from that point on, the more tender your bars will be.
Serving Suggestions
I love serving these bars cut into small, neat squares on a festive holiday platter. They look adorable next to more traditional baked cookies. For a really pretty presentation, I sometimes cut them into triangles or use holiday-shaped cookie cutters on the chilled slab before frosting for fun shapes like trees or stars.
They are the ultimate potluck or school party treat because they travel so well and don’t require temperature control. I layer them in a container with parchment paper between layers. Paired with a cold glass of milk or a cup of hot cocoa, they are the perfect sweet, creamy bite that both kids and adults go crazy for.
For a more elegant adult gathering, I might skip the colorful sprinkles and instead top the frosting with a delicate drizzle of melted white chocolate or a light dusting of edible gold dust. Served with coffee or espresso, they feel sophisticated while still delivering that wonderfully familiar sugar cookie flavor.
Variations & Customizations
The flavor base is a perfect canvas for creativity. For a lemon sugar cookie bar, I’ve replaced the vanilla extract with lemon extract and added a teaspoon of lemon zest to the dough. I then top it with a simple lemon glaze instead of frosting. The bright, citrusy flavor is incredibly refreshing and feels a bit more grown-up.
You can also mix fun things into the dough itself. I’ve stirred in ½ cup of rainbow sprinkles for a “funfetti” version, or ⅔ cup of finely chopped pecans or toasted coconut for a little texture. For a chocolate twist, replace ½ cup of the all-purpose flour with unsweetened cocoa powder for a chocolate sugar cookie base—it’s fantastic with vanilla or chocolate frosting.
Play with the frosting and toppings too! A cream cheese frosting is divine on these. For a peppermint bark effect, I’ll frost with vanilla icing, drizzle with melted dark chocolate, and sprinkle with crushed candy canes. You can also press whole mini M&M’s or holiday-themed chocolates into the frosting before it sets for a colorful, embedded decoration.
How to Store, Freeze & Reheat
Once frosted and cut, I store these bars in a single layer in an airtight container in the refrigerator. They will keep beautifully for up to 5 days. The fridge keeps the frosting firm and the bar base perfectly chilled. If you’ve only dusted them with powdered sugar, you can store them at room temperature in an airtight container for 3-4 days.
These bars freeze exceptionally well, making them a fantastic make-ahead treat. I freeze them unfrosted or frosted in a single layer on a parchment-lined baking sheet until solid, then transfer them to a freezer-safe bag or container. They’ll keep for up to 2 months. Thaw frosted bars in the refrigerator overnight; thaw unfrosted bars at room temperature and then frost as desired.
Since they are no-bake, “reheating” isn’t necessary. However, if you prefer a softer, room-temperature texture, simply let a refrigerated bar sit on the counter for 15-20 minutes before serving. Do not microwave them, as this will melt the frosting and soften the base too much, creating a gooey mess.
Conclusion
Santa’s No-Bake Sugar Cookie Bars have earned a permanent spot in my holiday recipe arsenal. They are the embodiment of easy, joyful baking—proof that sometimes the simplest methods yield the most delightful results. I hope this recipe brings a little stress-free magic to your kitchen and becomes a cherished, easy tradition for your family, too. After all, the best holiday memories are often the ones made with a little extra time to spare and a plate full of sweet, buttery goodness to share.