
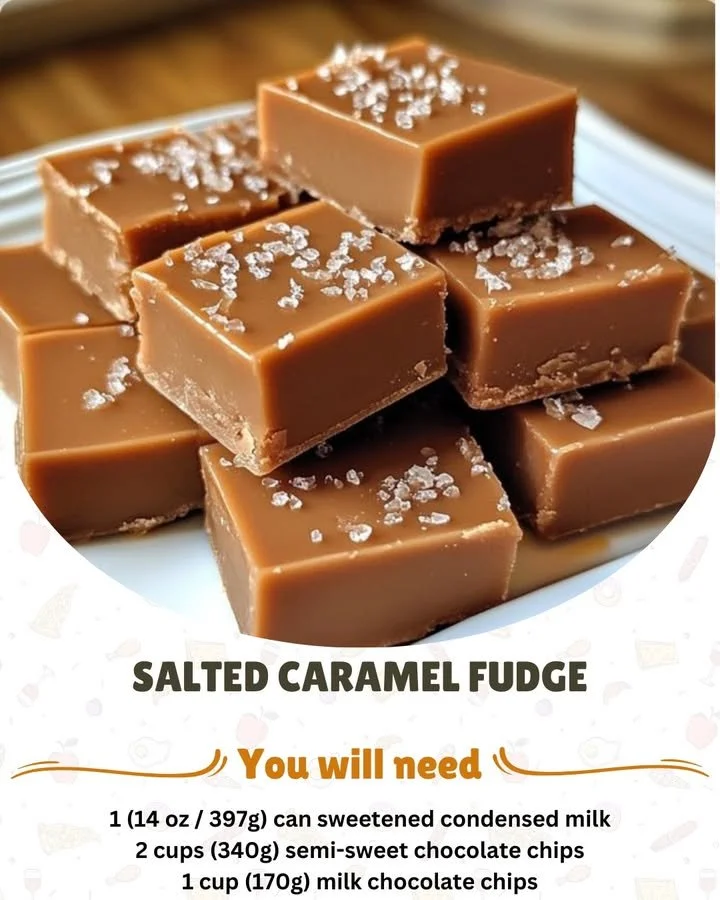
There’s something magical about the combination of sweet and salty, and when it comes to desserts, salted caramel fudge is undoubtedly one of my favorites! As I whisk together melting chocolate and creamy caramel in my kitchen, the aroma wafts through the air, making it hard to resist sneaking a taste or two (or three!). It’s a dessert that feels indulgent yet manageable, and it brings a smile to anyone who gets a bite.
Why You’ll Love This Recipe
What I adore about this salted caramel fudge recipe is how simple it is, yet it feels luxurious. The rich flavor of the fudge paired with the hint of salt creates a perfect balance that keeps you coming back for more. Plus, it’s a great treat to make ahead for holidays or special gatherings! Once you try it, you’ll understand why I find it hard to resist. (See the ingredients in the next page below…)
Ingredients
- 1 cup granulated sugar
- 1/2 cup unsalted butter
- 1/2 cup heavy cream
- 1 cup semi-sweet chocolate chips
- 1 teaspoon vanilla extract
- 1/2 teaspoon flaky sea salt
- Optional: chopped nuts or sea salt for topping
Equipment Needed
- Heavy-bottom saucepan
- Wooden spoon or spatula
- Candy thermometer (optional, but helpful)
- 8-inch square baking dish
- Parchment paper
Step-by-Step Instructions
To get started, I prepare my baking dish by lining it with parchment paper, making it super easy to lift the fudge out once it’s set. Then, in a heavy-bottom saucepan, I combine the granulated sugar, butter, and heavy cream. Over medium heat, I stir constantly until the mixture is smooth and starts to boil. The color begins to deepen, and the rich smell of caramel fills my kitchen—my favorite part! I always keep a close eye on the mixture, as it can go from perfect to burnt very quickly. (See the next page below to continue steps…)
Next, I allow the mixture to boil for about 5 minutes without stirring, keeping an eye on the color. Afterward, I like to remove it from the heat and add the chocolate chips. Stirring gently, I watch as the chocolate melts beautifully into the caramel mixture, creating a silky, glossy fudge base. Once everything is well combined, I stir in the vanilla extract and half of the flaky sea salt, giving it that signature salty kick.
Now, it’s time for the fun part! I pour the fudge mixture into the prepared baking dish and spread it evenly. To finish it off, I sprinkle the remaining sea salt on top, which adds a delightful crunch and flavor contrast. I then cover the dish with plastic wrap and place it in the refrigerator to set for at least 2 hours. The hardest part is waiting as the fudge cools, but the anticipation only makes it taste better!
Once the fudge has set, I remove it from the refrigerator, lift it out of the dish using the parchment paper, and cut it into squares. The first slice often makes me feel like a kid on Christmas morning, and the moment I pop a piece into my mouth, my taste buds do a happy dance!
Pro Tips for Best Results
When I first started making this fudge, I tested three different cooking times to see how it affected the texture. What I discovered is that the 5-minute boil time creates that perfect silky texture without being too grainy. If you’re unsure, using a candy thermometer can help ensure you reach the soft ball stage at around 235°F.
I find that letting the fudge cool slowly in the refrigerator, rather than rushing it into the freezer, allows it to firm up properly. It keeps the texture smooth and creamy. Trust me, you’ll want to avoid a freezer disaster that ends with a rock-hard fudge block!
Lastly, if you happen to have leftover fudge (which is rare in my house!), I recommend wrapping each piece individually in wax paper to keep them fresh longer. These little treats are perfect for gifting, and you can even dress them up with some nice ribbon for a personal touch!
Common Mistakes to Avoid
One common mistake I made when I first attempted making salted caramel fudge was not stirring enough during the initial melting phase. It may seem harmless, but leaving the mixture unattended can result in burnt sugar at the bottom, which ruins the entire batch! Staying attentive and stirring continuously will save you from that challenge. (See the next page below to continue…)
Another pitfall is not letting the fudge cool completely before cutting. I usually let it set for at least 2 hours, but if you can spare a bit more time, doing so makes a world of difference in achieving cleaner cuts. Warm fudge can be messy, and no one wants an accidental fudge blob!
Also, be mindful of the type of chocolate you use. I prefer semi-sweet, but if you opt for milk chocolate, it may end up too sweet. I’ve made that mistake before, and believe me, the balance of sweet and salty is what makes this fudge shine!
Lastly, when sprinkling the sea salt on top, don’t be shy! The right amount of sea salt can elevate the overall flavor, but if you skimp on it, you’ll miss out on that lovely contrast that makes each bite special.
Serving Suggestions
Served on a platter, my salted caramel fudge always gets rave reviews. I often pair it with a few fresh fruits, like strawberries or apple slices, to balance the rich sweetness. A drizzle of chocolate on the side doesn’t hurt either, for those who want an extra touch of decadence!
If I’m entertaining, I love to create a DIY dessert bar. I set out the fudge alongside pretzels, crispy rice treats, and even some whipped cream for dipping. It encourages guests to get creative, and it’s a great way to enjoy the fudge beyond just eating it straight!
And of course, just because it’s fudge doesn’t mean it can’t be enjoyed as part of a cozy movie night. Pair it with some popcorn and your favorite beverage, whether it’s a warm cup of hot chocolate in winter or a refreshing iced coffee in summer. It’s all about enjoying the moment!
Variations & Customizations
While I absolutely love the classic salted caramel flavor, I’ve played around with variations that are equally delicious. One of my favorites is adding a hint of espresso powder to the chocolate mixture for a mocha version. The slight bitterness complements the sweetness perfectly and adds depth to the fudge.
Another magical twist is incorporating nut butter, like almond or peanut butter, into the base before it sets. It not only adds a delightful creaminess but also a nutty flavor that works beautifully with the salty caramel. Plus, who doesn’t love chocolate and nut butter together?
If you’re looking to add a fruity note, I’ve experimented with a swirl of raspberry puree. I simply pour a thin layer of fudge, then drizzle the puree, swirling it gently before adding the rest. The tartness of the raspberry balances the sweetness of the fudge, making for a fun visual and flavor contrast.
How to Store, Freeze & Reheat
After making this fudge, I always store it in an airtight container at room temperature. It can last up to a week, but I find that the flavor is best enjoyed within the first few days. In my kitchen, however, it rarely lasts that long!
If you’d like to make a double batch to savor later, you can freeze the fudge. I wrap it tightly in plastic wrap and then place it in a freezer bag. When I’m ready to indulge again, I let it thaw in the refrigerator or at room temperature. Just remember, freezing doesn’t affect the flavor, but the texture can be slightly altered, so it’s best enjoyed fresh.
Reheating isn’t necessary for fudge, but if you do prefer it warm, just pop a piece in the microwave for about 10-15 seconds. It softens nicely without losing its delightful flavor, giving you that fresh-out-of-the-kitchen vibe.
Conclusion
I hope you give this salted caramel fudge recipe a try in your kitchen! It’s one of those desserts that’s perfect for any occasion—whether it’s a quiet night in or celebrating with friends and family. The warm, gooey fudge satisfies the sweet tooth, while the sprinkle of sea salt adds that delightful touch of mystery. Enjoy the process and, most importantly, enjoy the delicious results! Happy baking!