
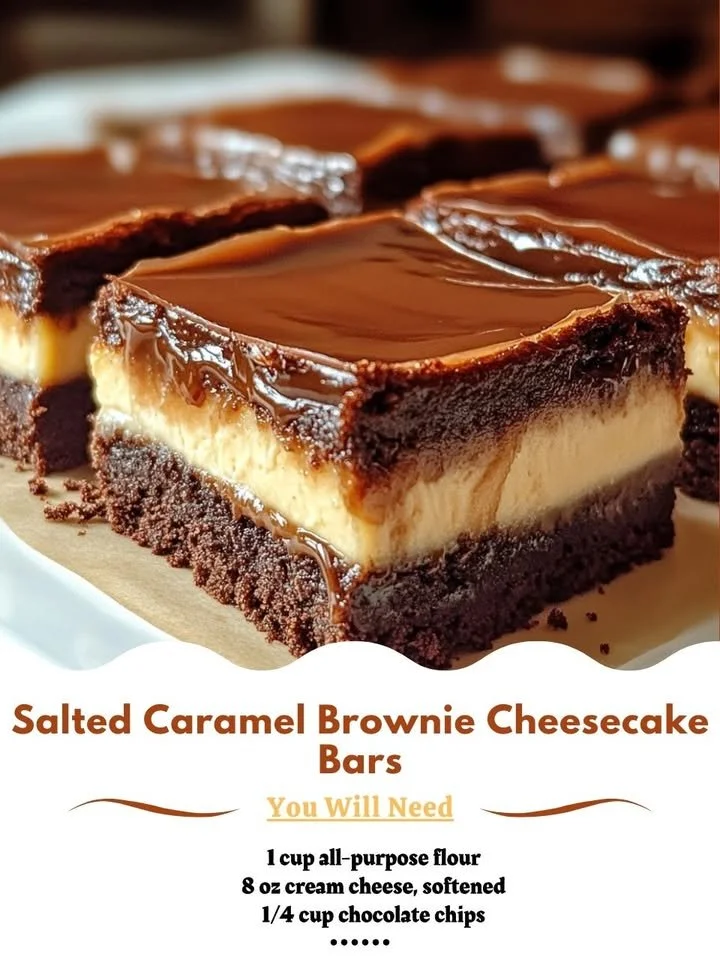
Salted Caramel Brownie Cheesecake Bars have a special place in my heart and kitchen. The blend of rich chocolatey brownie, creamy cheesecake, and that delightful burst of salted caramel creates an indulgence that is hard to resist. I remember the first time I made these; the delightful aromas filled my home and set my taste buds tingling in anticipation. They are perfect for any occasion, whether it’s a family gathering, a cozy night in, or just an afternoon treat for myself. Let me take you through the process to whip up these decadent bars that will leave you craving for more!
Why You’ll Love This Recipe
Not only is this recipe easy to follow, but the outcome is purely magical. I adore how the layers of brownie, cheesecake, and salted caramel come together to create a symphony of flavors. The brownie base is fudgy, the cheesecake is creamy and smooth, and the salted caramel adds that perfect touch of balance. These bars are an impressive dessert yet simple enough to make on a weekday. Your friends and family will absolutely love them, and you’ll adore the smiles they bring! It’s one of those recipes that makes my heart happy. (See the ingredients in the next page below…)
Ingredients
– 1 cup unsalted butter, divided
– 1 ¼ cups granulated sugar
– 1 cup packed light brown sugar
– 1 ½ cups all-purpose flour
– 1 cup unsweetened cocoa powder
– 4 large eggs
– 1 teaspoon vanilla extract
– 1 (8 oz) package cream cheese, softened
– ½ cup powdered sugar
– 1 cup salted caramel sauce, store-bought or homemade
– Sea salt, for sprinkling
Equipment Needed
– 9×13 inch baking pan
– Mixing bowls
– Electric mixer (or a whisk and some elbow grease!)
– Rubber spatula
– Measuring cups and spoons
– Parchment paper (for easy removal)
Step-by-Step Instructions
To kick things off, I preheat my oven to 350°F (175°C). While it’s warming up, I take a 9×13-inch baking pan and line it with parchment paper for easy lifting later. In my favorite mixing bowl, I melt ½ cup of the butter and whisk in the granulated sugar and brown sugar until well combined. After that, I mix in two of the eggs and vanilla extract, followed by the flour and cocoa powder until everything is just combined into a thick batter. It smells so good already! The brownie batter is just one part of this heavenly creation. (See the next page below to continue steps…)
Next, I pour half of this luscious brownie batter into the prepared baking pan, smoothing it out with a spatula. This layer is the foundation for my cheesecake layer. In a separate bowl, I beat the cream cheese until it’s fluffy, then gradually add in the powdered sugar and the remaining eggs. The creaminess is heavenly! Gently, I fold in ½ cup of the salted caramel sauce until it’s swirled in beautifully. Once it’s ready, I spread this delightful cheesecake mixture over the brownie layer, ensuring it’s evenly distributed. Now, the last step for my brownie layer! I scoop the remaining brownie batter and dollop it over the cheesecake layer for a stunning marbled effect.
Finally, I finish it off with the remaining salted caramel sauce, drizzling it gracefully across the top. A light sprinkle of sea salt heightens the rich flavors. Into the oven it goes for about 35-40 minutes, and while it bakes, my kitchen fills with the most appetizing scents that make it impossible to wait! After removing it from the oven, I let it cool in the pan for a bit before refrigerating it for at least two hours. The patience is worth it!
Pro Tips for Best Results
When I first made these, I played around with the baking time. I found that underbaking slightly allows for a fudgier brownie texture that I just love. Keep an eye on your bars in the last five minutes to get them just right! Also, using room-temperature cream cheese is crucial. I learned the hard way that if it’s too cold, the mixture can be lumpy and not mix well with the sugar.
I also recommend making your own salted caramel if you have the time. It adds that personal touch and a more intense flavor right into your bars. I took a simple recipe of sugar, butter, and cream, and it knocked my previous versions out of the park!
Lastly, don’t skip the sea salt on top; it’s the cherry on top of this delicious sundae. The contrast of sweet and salty makes all the difference in enhancing the flavors throughout the bar. Every bite becomes an adventure for your taste buds!
Common Mistakes to Avoid
One common mistake I made when I first started baking these was not greasing the pan properly. Trust me, it is crucial to use parchment paper for easy removal; otherwise, you’ll be left with sad, stuck-on messes. I’ve been there, and it’s no fun trying to salvage broken pieces! (See the next page below to continue…)
Another thing I learned is to be cautious when mixing the batter. Over-mixing the brownie layer can lead to a cake-like texture instead of the fudgy delight we want. Be gentle and mix until just combined—the less work, the better in this case!
Also, watch the oven temperature. If your oven runs hot, you might want to reduce the baking temperature. I’ve had to make adjustments because I kept getting overbaked edges while the center was still soft. It’s all about knowing your oven!
Lastly, resist the temptation to cut into those bars too soon! The cooling process helps the layers to set and blend together beautifully. Trust me, they taste even better after chilling in the fridge for a few hours or even overnight!
Serving Suggestions
These Salted Caramel Brownie Cheesecake Bars are heavenly on their own, but I love serving them alongside a scoop of vanilla ice cream. The warm, gooey brownie paired with the cool ice cream creates a perfect harmony that is out of this world! You could even drizzle a little more salted caramel sauce on top for extra decadence.
For gatherings, I like to cut them into bite-sized pieces and place them on a decorative platter. The layers are so pretty that they make an impressive dessert table. You can even garnish with some additional sea salt or chocolate shavings for a pop of color and flair.
When sharing with friends, I also love to tuck these bars into pretty boxes tied with twine as sweet, homemade gifts. They’re a fantastic treat that shows you care, and who wouldn’t appreciate a taste of this delight?
Variations & Customizations
If you’re feeling adventurous, you can play around with the flavors in these bars. I’ve tried adding different flavored extracts, like almond or coconut, into the cheesecake mixture. It’s a fun way to mix up the taste profile while still sticking to that rich base.
You can also swap out the salted caramel for a fruity twist! Try swirls of raspberry sauce in place of the caramel: the tartness works wonderfully with the sweetness of the brownie and cheesecake. It’s a delightful change that showcases the versatility of this recipe.
For those who love nuts, adding chopped pecans or walnuts to the brownie layer provides an extra crunch factor. I usually toast them a bit for an added flavor dimension, and it pairs beautifully with the chocolate.
How to Store, Freeze & Reheat
If you have any leftovers (which is often not the case in my house!), simply store these bars in an airtight container in the refrigerator. They can last about a week, but trust me—they’re often gone long before that!
For longer storage, you can freeze them. I like to wrap individual bars in plastic wrap and then place them in a zip-top freezer bag. They freeze well for up to three months. When I need a sweet fix, I just pull one out and let it thaw in the fridge overnight.
To reheat, simply place a bar in the microwave for about 15-20 seconds. It’s heavenly when warm, and those flavors will come back to life, making it feel like you just baked them fresh!
Conclusion
Baking has always brought me joy, especially when I can share delicious treats like these Salted Caramel Brownie Cheesecake Bars with the people I love. There’s something incredibly satisfying about watching others enjoy a creation that came from my heart and kitchen. I hope you give this recipe a try and find as much happiness in it as I do! Whether for a special occasion or just a cozy night in, these bars are sure to satisfy your sweet tooth and leave you smiling. Happy baking!