
The first time I made Roasted Red Peppers at home, I couldn’t believe how much better they tasted compared to the jarred ones I usually bought. I had a few red bell peppers sitting on my counter and decided to roast them in the oven just to see what would happen. As they cooked, the skins blistered and the peppers released this incredible sweet, smoky aroma that filled my kitchen. When I peeled off the charred skins and tasted one, it was soft, slightly caramelized, and bursting with flavor. Since then, roasting red peppers has become one of my favorite simple kitchen tricks.
Why You’ll Love This Recipe
Whenever I roast red peppers, I’m reminded how something so simple can add so much flavor to everyday meals. If you enjoy sweet, smoky vegetables that can be used in dozens of dishes, you’re going to love this recipe. Roasted red peppers are incredibly versatile—you can add them to sandwiches, salads, pasta, or even blend them into sauces. Plus, once you try making them yourself, you’ll realize how easy and affordable it is compared to buying them pre-made. (See the ingredients in the next page below…)
Ingredients
- 4 large red bell peppers
- 1 tablespoon olive oil
- ½ teaspoon salt
- ¼ teaspoon black pepper
- 1 clove garlic, minced (optional)
- 1 teaspoon balsamic vinegar (optional)
Equipment Needed
- Baking sheet
- Parchment paper or foil
- Tongs
- Knife
- Cutting board
- Bowl with lid or plastic wrap
Step-by-Step Instructions
When I start roasting red peppers, the first thing I do is preheat the oven to 450°F. While the oven heats up, I rinse the peppers and pat them dry. I place them whole on a baking sheet lined with parchment paper, which makes cleanup much easier later. (See the next page below to continue steps…)
Next, I drizzle a little olive oil over the peppers and roll them around so they’re lightly coated. Then I place the tray in the oven and let them roast for about 25–30 minutes. Every 8–10 minutes I use tongs to rotate the peppers so all sides blister evenly.
As the peppers roast, their skins start to darken and bubble. That charred skin is exactly what you want because it adds smoky flavor. Once the peppers look nicely blistered, I remove them from the oven and immediately transfer them to a bowl.
Finally, I cover the bowl with plastic wrap or a lid and let the peppers steam for about 10 minutes. This step loosens the skins and makes them incredibly easy to peel off. After peeling, I remove the seeds and slice the peppers into strips.
Pro Tips for Best Results
One thing I learned after roasting peppers several times is that high heat is essential. Roasting at a lower temperature can soften the peppers, but it won’t create that beautiful charred skin that gives them their signature flavor.
Another tip is to let the peppers steam after roasting. The first time I skipped this step, peeling them was much harder. The steam helps separate the skin from the flesh.
I also like adding a little garlic, olive oil, and balsamic vinegar after slicing the peppers. It turns them into a quick marinade that tastes amazing in salads or sandwiches.
Common Mistakes to Avoid
The first mistake I made when roasting peppers was not turning them while they cooked. The side touching the pan burned too much while the other sides stayed pale.
Another mistake is roasting peppers that are too small or thin. Larger, thick-skinned red peppers work best because they become tender and sweet during roasting. (See the next page below to continue…)
I also learned not to rinse the peppers after peeling. It may seem like a quick way to remove the skins, but it washes away a lot of the smoky flavor.
Finally, avoid overcrowding the baking sheet. When peppers are too close together, they steam instead of roast.
Serving Suggestions
When I serve roasted red peppers, one of my favorite ways is simply drizzling them with olive oil and sprinkling a little salt on top. The flavor is so good that they hardly need anything else.
Sometimes I add them to sandwiches or wraps. The sweet, smoky flavor pairs beautifully with grilled chicken or fresh mozzarella.
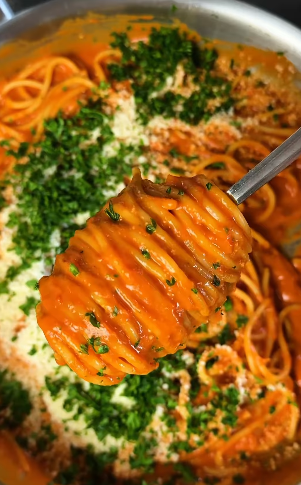
I also love tossing roasted red peppers into pasta or grain bowls. They instantly add color and a burst of flavor to simple dishes.
Variations & Customizations
One variation I enjoy is roasting the peppers with sliced onions and garlic. The vegetables caramelize together and create a flavorful mix that works well in many recipes.
I’ve also tried adding herbs like thyme or oregano after roasting. The herbs infuse the peppers with even more Mediterranean-style flavor.
Another version I love is blending roasted red peppers into a creamy sauce for pasta or soup. It creates a rich, slightly smoky flavor that’s incredibly comforting.
How to Store, Freeze & Reheat
Whenever I roast peppers, I usually make extra because they store well. I keep them in an airtight container in the refrigerator for up to five days.
For longer storage, I place the roasted pepper strips in freezer bags and freeze them. They hold up surprisingly well and can be used straight from the freezer.
If I need to reheat them, I usually warm them gently in a skillet or add them directly to hot dishes like pasta or soups.
Conclusion
Every time I make roasted red peppers, I’m reminded how simple cooking techniques can transform ordinary ingredients into something truly special. The sweet, smoky flavor and soft texture make them incredibly versatile and delicious. Whether you’re adding them to sandwiches, salads, or pasta, homemade roasted red peppers are a simple recipe that can elevate so many meals.