
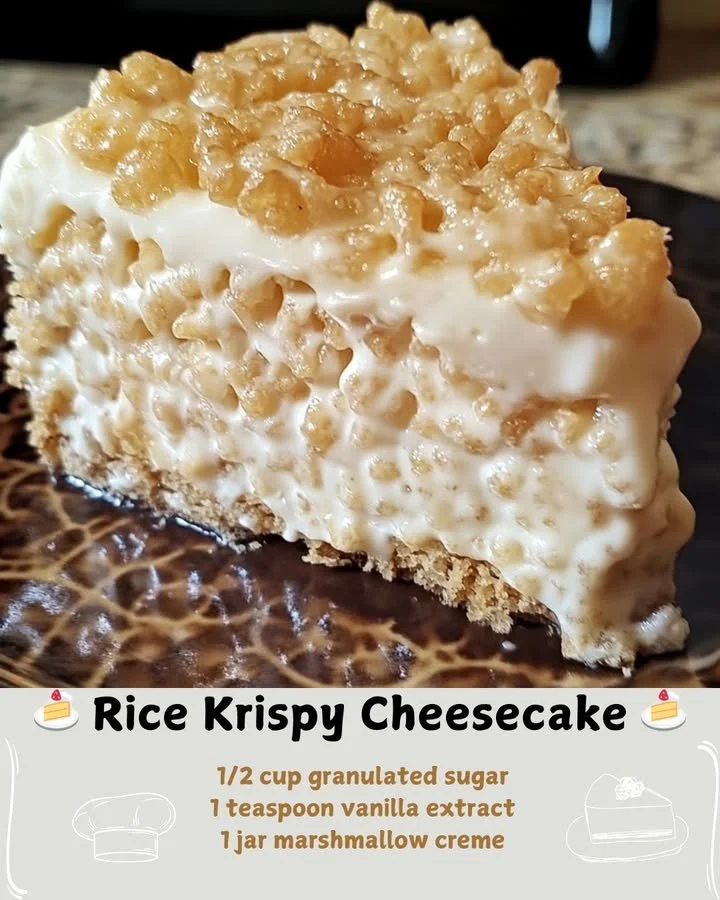
Today, I want to share a delightful dessert that’s not just easy to make but also brings back so many sweet memories of childhood. Yes, I’m talking about a mouthwatering Rice Krispy Cheesecake. Imagine the crispy, crunchy texture of Rice Krispies layered with creamy, rich cheesecake filling. It’s the perfect fusion of two classic treats that will surely impress your family and friends!
Why You’ll Love This Recipe
This Rice Krispy Cheesecake will steal your heart and satisfy your sweet tooth! It’s a unique twist on traditional cheesecake, combining the best of both worlds into one luscious dessert. Each bite offers a delightful crunch from the Rice Krispies, balanced perfectly with the smooth creaminess of the cheesecake. Trust me; this dessert is sure to become a staple in your home. I also love making it ahead of time for gatherings and parties—it always gets rave reviews! (See the ingredients in the next page below…)
Ingredients
– 4 cups Rice Krispies
– 1/2 cup unsalted butter
– 10 ounces marshmallows
– 2 cups cream cheese, softened
– 1 cup powdered sugar
– 1 teaspoon vanilla extract
– 1 cup heavy cream
– Optional toppings: chocolate drizzle, fresh berries, or caramel sauce
Equipment Needed
– Large mixing bowl
– Saucepan
– 9-inch springform pan
– Electric mixer
– Rubber spatula
– Measuring cups and spoons
Step-by-Step Instructions
Let’s dive into making this delightful dessert! First, start by preparing your base. In a saucepan over medium heat, melt the butter and marshmallows together, stirring frequently until smooth and gooey. This aroma takes me straight back to childhood, with that familiar sweetness wafting through the kitchen. Once melted, pour in the Rice Krispies and mix until they’re evenly coated. Transfer this mixture to your springform pan, pressing it firmly into the bottom to form a solid base. Let it cool while we make the cheesecake filling. (See the next page below to continue steps…)
Next, in a large mixing bowl, beat the softened cream cheese until it’s creamy and smooth. You can use an electric mixer to speed up the process, which is what I always do because it gives such a lovely airy texture! Gradually add the powdered sugar and vanilla extract, mixing until it’s beautifully combined. In another bowl, whip the heavy cream until soft peaks form; this will give your cheesecake a light, fluffy texture that pairs wonderfully with the crunch of the Rice Krispies.
Now, gently fold the whipped cream into the cream cheese mixture until everything is just combined. It’s important to be gentle here so that you don’t deflate that lovely airiness. Pour this cheesecake filling over the cooled Rice Krispy base and spread it evenly. For an extra touch, I often sprinkle some more Rice Krispies on top for added crunch and visual appeal.
Finally, cover the cheesecake with plastic wrap and place it in the refrigerator to set for at least 4 hours, or overnight if you can wait! The longer it sits, the more the flavors meld together, making your dessert even more delicious. Once ready to serve, I love to add a drizzle of chocolate or some fresh berries on top for a pop of color and flavor!
Pro Tips for Best Results
I tested this recipe three ways, and let me tell you, the secret to the perfect Rice Krispy Cheesecake is all in the setting. Make sure you give it enough time in the fridge! I’ve rushed it before, thinking it would be fine, but it’s always better after a nice, long chill.
Also, when melting the marshmallows, keep an eye on the heat—too high, and they might burn. Trust me, no one wants burnt marshmallows! Stirring constantly is key, and if you want to mix things up, try using flavored marshmallows for a twist!
Finally, don’t skip the whipped cream folding part. This is what makes your cheesecake incredibly light and fluffy. Using a spatula to gently fold is essential to keep that texture—it’s a simple step that makes a world of difference in the finished dessert.
Common Mistakes to Avoid
One of the biggest mistakes I’ve made when first making a Rice Krispy Cheesecake was not pressing the Rice Krispies firmly enough into the pan. I ended up with a base that crumbled apart when I tried to serve it. Don’t rush this step; make sure you’re really packing those Rice Krispies down well!
Another pitfall is under-mixing the cream cheese with the sugar. I remember my first attempt resulted in a lumpy cheesecake. You want it to be silky smooth, so don’t be shy with your mixer for this one!
I also learned the hard way that adding too much heavy cream can lead to a runny cheesecake filling. Make sure to measure carefully; you want just enough to create that perfect fluffy texture without compromising the stability of the cheese layer! Lastly, always use room temperature cream cheese. Cold cream cheese will result in a lumpy filling—something I had to discover the hard way myself. (See the next page below to continue…)
Serving Suggestions
When it comes to serving this Rice Krispy Cheesecake, I love to slice it into generous pieces and use a warm chocolate sauce drizzled on top. The chocolate and cheesecake pairing is simply divine, and the warm sauce creates a lovely contrast with the cool cheesecake.
You could also serve it with a side of fresh berries, like strawberries or raspberries, to give it that vibrant, fruity touch. The tartness of the berries balances the sweetness of the cheesecake beautifully, making every bite a treat!
For a more festive presentation, I enjoy topping it with some whipped cream and a sprinkle of more Rice Krispies. It not only looks stunning but also adds a lovely hit of crunch. Trust me; your guests will be coming back for seconds!
Variations & Customizations
The beauty of Rice Krispy Cheesecake is its versatility. One of my favorite variations is adding a swirl of fruit puree into the cheesecake filling. Whether it’s strawberry, mango, or blueberry, incorporating fruit not only enhances the flavor but also creates a stunning visual appeal!
You can also create a chocolate version by adding cocoa powder to the cheesecake filling. Just a few tablespoons can transform the taste and deepen the richness of the dessert. If you’re a chocolate lover like me, this one is an absolute must-try!
If you’re feeling adventurous, try adding some crushed cookies to the Rice Krispies base. Oreos or graham crackers blend beautifully with the Rice Krispies and elevate the overall flavor profile. You can really make this recipe your own—I love experimenting in my kitchen!
How to Store, Freeze & Reheat
After you’ve enjoyed the Rice Krispy Cheesecake, any leftovers can be stored in the refrigerator for up to 3-4 days. Just make sure it’s covered tightly, so it doesn’t dry out. I personally use plastic wrap and then pop a lid on top for extra security.
If you want to freeze it—which I have done when I made it in advance—simply wrap it tightly in plastic wrap and then cover it with aluminum foil. It should last in the freezer for about 1-2 months. When you’re ready to enjoy it again, move it to the fridge to thaw overnight.
As for reheating, I recommend serving it cold or at room temperature for the best texture and taste. If you prefer a warm cheesecake, you can microwave individual slices for about 10-15 seconds. Just be careful not to overdo it; we don’t want that creamy goodness to lose its charm!
Conclusion
I hope you’re as excited to make this Rice Krispy Cheesecake as I am to share it with you! It really is a delightful dessert filled with nostalgia, flavor, and texture. Whether you’re serving it at a family gathering, a birthday party, or just because it’s Tuesday (because why not?), this cheesecake is bound to impress. Happy baking, and enjoy your time in the kitchen!