
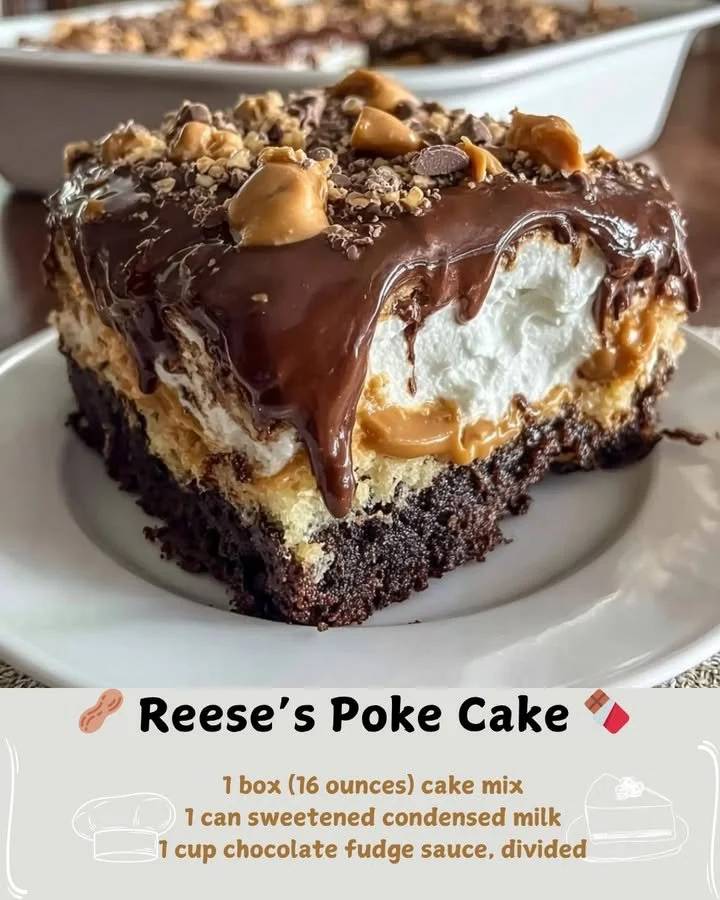
Cake and Reese’s Peanut Butter Cups. This Reese’s Poke Cake is a delightful indulgence that is sure to bring a smile to your face and happiness to your taste buds. With the combination of chocolate cake soaked in a luscious peanut butter filling, topped with creamy whipped topping and crushed Reese’s, it’s a dessert that you won’t be able to resist!
Why You’ll Love This Recipe
I love this recipe because it’s incredibly simple to make, yet it delivers an impressive punch of flavor that feels gourmet. The texture is a delightful mix of soft, moist cake and rich, creamy toppings. Plus, it’s great for gatherings, birthday parties, or simply satisfying a craving. Trust me, every spoonful feels like a heavenly treat! (See the ingredients in the next page below…)
Ingredients
– 1 box chocolate cake mix (plus ingredients required on the box)
– 1 cup creamy peanut butter
– 1 can (14 oz) sweetened condensed milk
– 1 tub (8 oz) whipped topping (like Cool Whip)
– ½ cup milk
– 1 cup mini chocolate chips
– 1 cup crushed Reese’s Peanut Butter Cups
– Extra Reese’s for decoration (optional)
Equipment Needed
– 9×13 inch baking pan
– Mixing bowls
– Whisk or electric mixer
– Measuring cups and spoons
– Toothpick or skewer
– Rubber spatula
Step-by-Step Instructions
To start, preheat your oven to 350°F (175°C). Then, prepare the chocolate cake mix according to the package directions, pouring it into a greased 9×13 inch baking pan. Bake for about 30-35 minutes, or until a toothpick inserted into the center comes out clean. This is the key part where your kitchen will fill with a decadent chocolate aroma that sets the stage for the deliciousness to come. Once the cake is baked, let it cool for about 10 minutes. This is where the “poking” comes in, so get that toothpick ready! (See the next page below to continue steps…)
Next, using a toothpick or skewer, poke holes all over the top of the cake—about every inch or so. You’ll want these holes to be deep enough to let the peanut butter filling seep in. In a separate bowl, mix together the creamy peanut butter and sweetened condensed milk until it’s smooth and creamy. This mixture is where the magic happens; the peanut butter flavor truly shines! Pour this mixture all over the cake, ensuring it seeps into the holes. Allow the cake to sit for about 30 minutes so the filling can fully absorb into the cake.
Once the time is up, it’s time to finish our masterpiece. Spread the whipped topping evenly over the top of the cake. Then, sprinkle the mini chocolate chips and crushed Reese’s over the whipped topping. At this point, I might sneak a piece just to ensure it’s as delicious as I remember! Chill the cake in the refrigerator for at least an hour before serving; this will help all the flavors meld together beautifully.
Pro Tips for Best Results
First and foremost, I always recommend using room temperature ingredients for a smoother batter and better texture. When I tested this recipe, I found that letting my eggs and milk sit out for about 30 minutes made a noticeable difference in the final cake’s fluffiness.
Also, feel free to adjust the amount of peanut butter you use based on your taste preferences. When I made this cake for a gathering, I decided to double the peanut butter filling, and let me tell you, it took it to another level in the flavor department! Just remember, it’s about finding that balance so that the cake’s moisture doesn’t get overly dense.
Lastly, don’t be afraid to experiment with other toppings! I tried adding some crushed pretzels for an extra crunch, and it was a delightful surprise! Finding the perfect combination is half the fun—so get creative!
Common Mistakes to Avoid
One of the most common mistakes I’ve made when making poke cakes is undercooking the base cake. I remember one time, I pulled my cake out of the oven a minute too soon, thinking it would “set” while cooling. Instead, it turned out gooey and disappointing. Just keep an eye on it as it approaches the baking time, and trust your toothpick test—it’s a lifesaver! (See the next page below to continue…)
Another pitfall is not poking enough holes in the cake. If there aren’t enough holes, the filling won’t have a chance to soak in, and you’ll end up with a dry cake. When I made this cake for the first time, I was worried I’d overdo it, but trust me, the more holes, the better!
Also, be careful not to skip the chilling time. I initially thought it was okay to serve it right after assembling, but the flavors combined during that hour really added to the cake’s creaminess and taste. It was worth the wait!
Serving Suggestions
When it comes to serving this Reese’s Poke Cake, I love to add a little extra flair. A drizzle of chocolate sauce on top before serving not only looks appetizing but adds that extra chocolatey punch. I also enjoy pairing it with a scoop of vanilla ice cream on the side—it’s a match made in heaven.
For gatherings, you might consider serving it in individual cups for a fun twist. Layer some cake, peanut butter filling, and whipped topping in clear cups, making it easy for guests to enjoy. Plus, it gives a delightful presentation that I find people love.
If you’re feeling particularly generous, you can always double the recipe and have a cake ready for later or for a bigger crowd. Trust me, it won’t last long; this cake is usually the star of the show!
Variations & Customizations
As I mentioned earlier, this cake is already pretty customizable. You can swap out the chocolate cake mix for a vanilla or even a red velvet mix if you’re feeling adventurous. I tried a chocolate-vanilla swirl once, and it was absolutely delicious!
For those who like a bit of fruity flavor in their desserts, you could mix in some raspberry or strawberry sauce between the layers. It creates a lovely contrast of flavors, especially if you love that balance of sweet and slightly tart.
And if you’re a fan of crunch, adding chopped nuts or crushed cookies into the peanut butter filling can give it the additional texture that makes every bite even more exciting. It’s all about making this cake your own!
How to Store, Freeze & Reheat
This Reese’s Poke Cake can be stored in the refrigerator, where it will stay fresh for about 3 to 4 days. I usually cover it with plastic wrap to prevent it from drying out. The flavors seem to get even better as it sits, making leftovers a delightful treat!
If you find yourself with extra cake and want to save it for later, it freezes surprisingly well. Just slice the cake into individual portions, wrap them tightly in plastic wrap and aluminum foil, and pop them in the freezer. When you’re ready to enjoy a piece, let it thaw in the refrigerator overnight.
Reheating is simple too. Just grab a piece, pop it in the microwave for about 15-20 seconds to get it nice and warm. The combination of warm cake and the chilled toppings is simply divine!
Conclusion
I hope you get as much joy out of making and enjoying this Reese’s Poke Cake as I do. It’s such a simple yet indulgent dessert that combines the warmth of chocolate and the richness of peanut butter in every bite. Whether you’re celebrating a special occasion or just treating yourself, this cake is sure to impress. So grab your ingredients and let’s get baking! Happy cooking!