
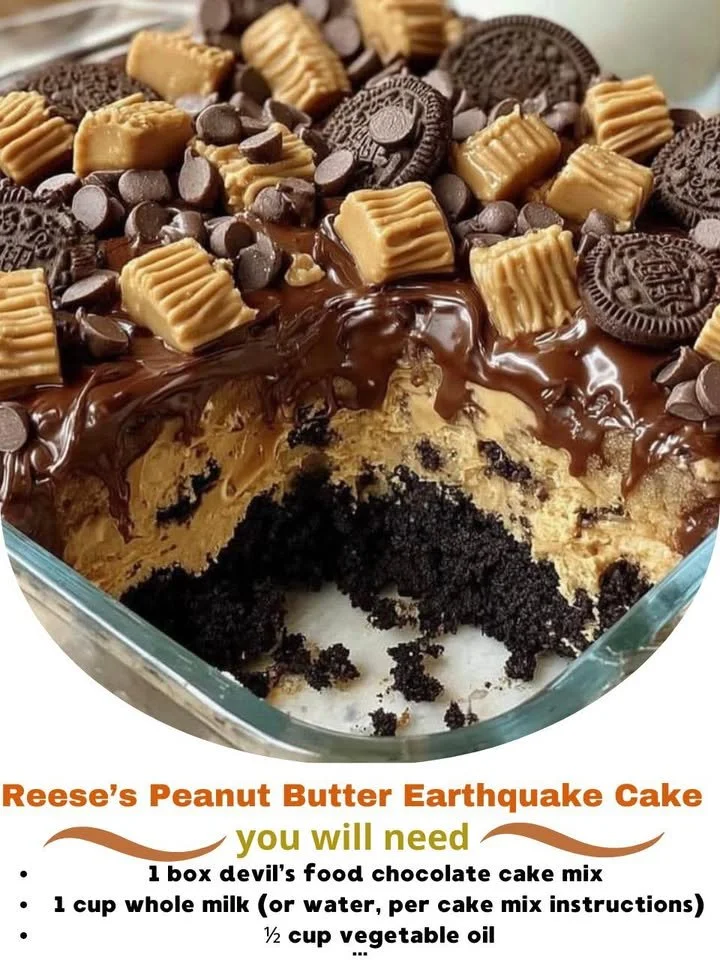
I can hardly contain my excitement as I share this delightful recipe for Reese’s Peanut Butter Earthquake Cake! It’s an indulgent dessert that combines moist chocolate cake with creamy peanut butter swirls, topped with chunks of delicious Reese’s cups. Trust me, it’s a chocolate-lover’s dream come true. Not only is it delectably rich, but it’s also incredibly easy to prepare. Grab your apron, and let’s get started on this sweet adventure together!
Why You’ll Love This Recipe
One of the many reasons I adore this cake is the perfect combination of textures and flavors. The fudgy chocolate cake pairs beautifully with the smooth peanut butter and crunchy Reese’s pieces, creating a true explosion of taste in every bite! The best part is that it’s a one-pan wonder, so clean-up is a breeze. You’ll want to make this gem time and time again, whether it’s for family gatherings, a potluck, or just a treat for yourself. There’s simply nothing quite like it! (See the ingredients in the next page below…)
Ingredients
- 1 box chocolate cake mix
- 1 cup water
- 1/3 cup vegetable oil
- 3 large eggs
- 1 cup creamy peanut butter
- 1 cup powdered sugar
- 1 cup Reese’s Peanut Butter Cups, chopped
- 1/2 cup chocolate chips
- 1/2 cup hot fudge sauce
Equipment Needed
- Mixing bowls
- Electric mixer or whisk
- Measuring cups and spoons
- 9×13 inch baking pan
- Rubber spatula
Step-by-Step Instructions
Let’s jump right in! Start by preheating your oven to 350°F (175°C). Then, in a large mixing bowl, combine the chocolate cake mix, water, vegetable oil, and eggs. I love using an electric mixer for this step, but if you don’t have one, a whisk works just fine. Beat the mixture until it’s smooth and well combined, then pour it into a greased 9×13 inch baking pan. Now, here comes the fun part! In a separate bowl, mix the peanut butter and powdered sugar until creamy. Take spoonfuls of this delightful mix and dollop it on top of the cake batter. Don’t worry about being neat – the chaos will create that lovely earthquake effect! (See the next page below to continue steps…)
Next, gently swirl the peanut butter mixture through the chocolate batter using a rubber spatula or a knife. Try not to overmix, as we want those beautiful ribbons of peanut butter to showcase themselves. Now, sprinkle the chopped Reese’s cups and chocolate chips evenly over the top of the batter, allowing all that goodness to sink into the cake as it bakes. Pour your hot fudge sauce over everything, feeling free to drizzle generously. This cake is meant to be decadent, after all!
Pop the cake in the oven and bake for 30-35 minutes. You will know it’s done when a toothpick inserted into the center comes out with a few moist crumbs but no wet batter. Your kitchen will smell simply heavenly by this point! Once it’s baked, let it cool in the pan for about 10 minutes before slicing into it. Just remember to savor every bite, as the chocolatey, peanut buttery goodness is worth the wait!
Pro Tips for Best Results
I tested this three ways: using creamy peanut butter, crunchy peanut butter, and even a natural peanut butter. While all of them tasted great, I found that creamy peanut butter yielded the best texture for the swirls. You want that smooth, rich mouthfeel that complements the fudgy cake.
Another tip I learned through practice is to make sure your Reese’s cups are chopped evenly. If they’re too big, they won’t melt into the cake as beautifully. A good chop ensures that every bite has that iconic peanut butter flavor, which is what I genuinely crave in this cake.
And let’s talk about the hot fudge sauce! Homemade is fabulous, but if time is short, I recommend a quality store-bought version. You’ll want that ooey-gooey goodness, and the right sauce can make all the difference in elevating this cake to the next level!
Common Mistakes to Avoid
One common mistake I made in my early attempts was to not grease the baking pan sufficiently. Trust me, you want to prevent any sticky situations! I now use a mix of cooking spray and a dusting of cocoa powder for extra assurance. This way, the cake releases beautifully without losing any of that delectable topping. (See the next page below to continue…)
Another error is forgetting to let the cake cool before trying to slice it. While the smell is tempting, cutting into a hot cake can lead to a gooey mess. I recommend letting it rest longer than I initially thought was necessary; about 10 to 15 minutes is just right.
Finally, be careful not to overmix the cake batter. It’s so easy to get carried away, but overmixing can lead to a denser cake. Lightly mixing until combined will give you that delightful, fluffy texture we all love.
Serving Suggestions
This Reese’s Peanut Butter Earthquake Cake pairs beautifully with a scoop of vanilla ice cream on top, creating a delightful contrast of temperatures and flavors. I can just picture a spoonful of warm cake melted into that cold ice cream – pure bliss! You can also drizzle extra hot fudge sauce over the top or sprinkle some crushed peanuts for that extra crunch.
For a fun twist, serve it with a dollop of whipped cream and a dusting of cocoa powder. It adds a touch of elegance that’s perfect for special occasions or a cozy dinner with friends. I love how easy it is to elevate this cake with such simple additions!
Additionally, you might consider serving it alongside a cup of coffee or a cold glass of milk. This cake is rich enough that a small piece goes a long way, so a hot beverage is a great complement to the sweetness.
Variations & Customizations
If you want to experiment, try swapping out the Reese’s cups for other chocolate candies, like Snickers or Milky Way, for a completely different flavor experience. I once made a version with almond butter instead of peanut butter, and honestly, it was delicious! It could be a fun way to switch things up if you’re exploring dietary restrictions or just want something a little different.
You could also add a layer of crushed Oreos on top for an added crunch and an extra chocolate kick. The more flavors, the merrier, right? Plus, it makes for a visually stunning cake, which is always a hit at gatherings!
For those who enjoy a bit of spice, adding a pinch of cayenne pepper or cinnamon to the cake batter provides an unexpected warmth that beautifully contrasts with the sweetness. I’ve tried this on a whim, and it was a delightful surprise!
How to Store, Freeze & Reheat
Storing this lovely cake is simple! I recommend keeping it covered at room temperature if you plan to enjoy it within a couple of days. Just make sure it cools completely before covering to prevent condensation from sogging up that delicious top layer.
If you have leftovers, you can freeze the cake! Just make sure to wrap it tightly in plastic wrap and then in aluminum foil to prevent freezer burn. It will keep well for up to three months. When you’re ready to enjoy a slice, let it thaw in the fridge overnight, and you can pop it in the microwave for a few seconds to warm it up again.
Reheating slices is super easy too! I usually place a slice on a microwave-safe plate and heat it for about 20-30 seconds. This way, the chocolate and peanut butter become soft and gooey again, just like fresh out of the oven!
Conclusion
I hope you feel inspired to try your hand at making this Reese’s Peanut Butter Earthquake Cake! It’s a crowd-pleaser that is bound to win everyone over with its chocolatey richness and creamy peanut butter goodness. Plus, it’s a fun and rewarding baking project that’s sure to fill your kitchen with fantastic smells! Happy baking, dear friends! Enjoy every delightful bite!