
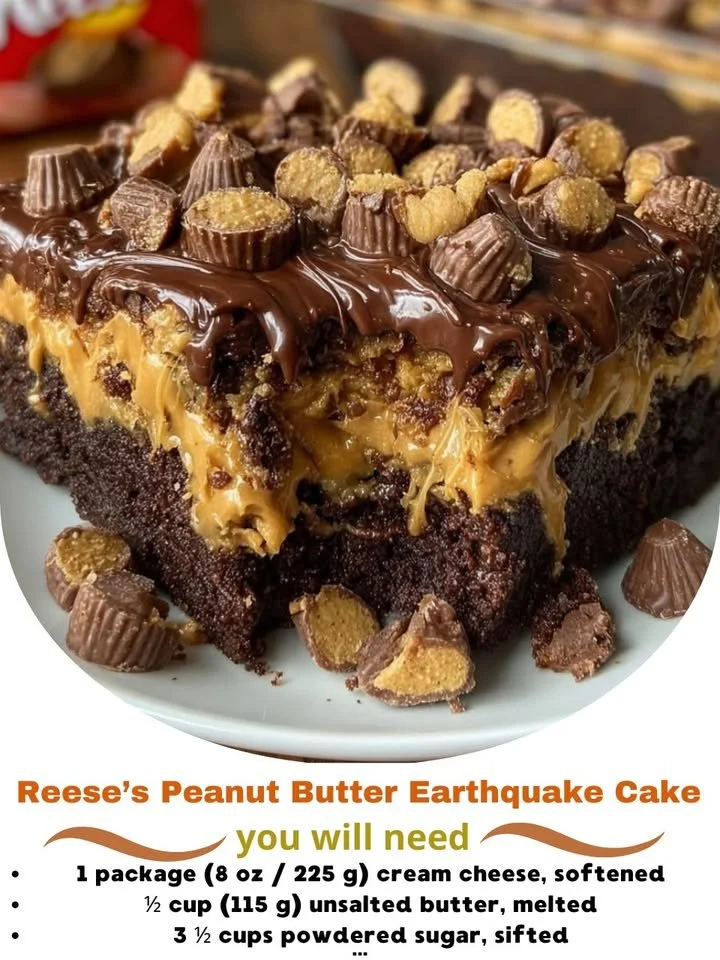
There’s something undeniably delightful about the combination of chocolate and peanut butter that brings a smile to my face every time. Today, I want to share one of my all-time favorite desserts: Reese’s Peanut Butter Earthquake Cake. This rich and decadent cake is a treat that has quickly become a staple in my kitchen. Picture a moist chocolate cake, gooey peanut butter swirls, and a luscious cream cheese topping, all baked together in a way that creates an “earthquake” effect of melted goodness. Are you drooling yet? Let’s dive into this recipe!
Why You’ll Love This Recipe
What’s not to love about this cake? It’s a blend of delightful textures and flavors, from the soft, fluffy cake to the velvety peanut butter filling. It’s also incredibly easy to make. In less than an hour, you can whip up something that will impress your family and friends – or simply treat yourself! Every bite is an explosion of flavor that has me reaching for another slice before I even finish my first! Trust me, this cake is a dream come true for any chocolate and peanut butter lover. (See the ingredients in the next page below…)
Ingredients
– 1 box chocolate cake mix
– 1 cup water
– 1/2 cup vegetable oil
– 3 large eggs
– 1 cup creamy peanut butter
– 1 package (8 oz) cream cheese, softened
– 1 cup powdered sugar
– 1 cup chocolate chips
– 1 cup chopped nuts (optional)
Equipment Needed
– Large mixing bowl
– Hand mixer or stand mixer
– 9×13 inch baking pan
– Rubber spatula
– Measuring cups and spoons
Step-by-Step Instructions
Making this Reese’s Peanut Butter Earthquake Cake is as enjoyable as eating it! First, preheat your oven to 350°F (175°C). In a large mixing bowl, combine the chocolate cake mix, water, vegetable oil, and eggs. Mix until well blended; I usually use my hand mixer for about two minutes on low speed. The smell of chocolate wafting through my kitchen at this point is heavenly! Pour half of the batter into the greased baking pan, making sure it’s even. Next, in another mixing bowl, blend the softened cream cheese, peanut butter, and powdered sugar until smooth. Spread this mixture evenly over the first layer of chocolate batter. It’s okay if it looks a little messy; that’s part of the cake’s charm! (See the next page below to continue steps…)
Now, gently pour the remaining chocolate batter over the cream cheese layer. Here’s the best part: take a knife or a skewer and swirl it through the batter to create a beautiful, marbled effect. Remember to be gentle; you want to meld the flavors without completely mixing them together! Sprinkle the chocolate chips and chopped nuts (if you’re using them) evenly over the top. Then, pop it into the preheated oven and allow it to bake for about 40-50 minutes or until a toothpick inserted in the center comes out clean. The aroma that fills my kitchen during this time makes it hard not to dream about that first bite!
Once the cake is done baking, let it cool in the pan for about 15 minutes. I like to dig in right away – the gooey peanut butter and cream cheese filling will still be warm and melty! Carefully slice it into squares and serve it warm or at room temperature. You can enjoy it as is, or with a scoop of vanilla ice cream on top for an extra special treat. Trust me, this cake will disappear quickly!
Pro Tips for Best Results
I tested this cake recipe three ways to find the perfect texture, and I discovered that using room temperature ingredients is key. Make sure your eggs and cream cheese are not cold from the fridge; this makes the mixing process much smoother and creates a fluffier cake.
Also, don’t skip the swirling step! It not only looks beautiful but also ensures that every bite has the perfect blend of chocolate and peanut butter flavors. If you prefer a thicker layer of peanut butter filling, you can increase the amount of cream cheese and peanut butter to 1 ½ cups each.
Lastly, I love adding a touch of sea salt on top before baking; it enhances the sweet and salty contrast that you just can’t get enough of! Just a tiny sprinkle can elevate the whole cake.
Common Mistakes to Avoid
One mistake I made the first time I baked this cake was not greasing the pan well enough. I ended up struggling to get my cake out, and it broke apart. Make sure to use cooking spray or grease the pan with butter to prevent any sticky situations! (See the next page below to continue…)
Another common issue is overbaking the cake. Keep a close eye on the time, and start checking for doneness around the 40-minute mark to ensure it doesn’t dry out. A toothpick should come out clean but might have a few moist crumbs clinging to it.
Finally, I learned to be cautious with the swirling. If you mix the cream cheese layer too much into the chocolate batter, you’ll lose that gorgeous layered effect. Remember – gentle swirls are your friend!
Serving Suggestions
This Reese’s Peanut Butter Earthquake Cake is perfect for any occasion, whether it’s a birthday party or just a cozy night in. I love serving it warm right out of the oven with a scoop of creamy vanilla ice cream. The combination of hot and cold is just pure bliss!
If you’re feeling adventurous, drizzle a little extra melted peanut butter or chocolate sauce over the top before serving. It really adds an indulgent touch that my friends can never resist!
For a more casual vibe, I often slice it into squares and serve it on a festive platter at potlucks. It’s always a hit, and I love seeing everyone’s happy faces when they take that first bite.
Variations & Customizations
I adore this recipe because it’s so versatile! If you want to shake things up, you can swap the chocolate cake mix for a vanilla or even a red velvet mix. The peanut butter layer pairs beautifully with different flavors, creating a whole new experience.
Another variation I’ve tried involves adding crushed Oreo cookies to the chocolate batter. This brings in an extra crunch and a cookie-like flavor that’s just irresistible! Plus, how fantastic do Oreo cookies look against a chocolate background?
For the toppings, consider swapping out traditional nuts for crushed candy like Reese’s Pieces or chopped Snickers bars for a fun candy bar-inspired twist. Each bite will be a surprise!
How to Store, Freeze & Reheat
Storing this cake is super simple! If you have any leftovers (which is rare, but it happens!), just cover the cake tightly with plastic wrap or aluminum foil and keep it in the refrigerator. It stays fresh for about 3-4 days, and it’s just as delicious cold!
If you want to make it ahead of time, you can bake and freeze the cake once it’s cooled completely. Just wrap it tightly in plastic wrap, followed by aluminum foil, and it will keep well in the freezer for up to three months. When you’re ready to enjoy it, let it thaw in the fridge overnight before reheating it gently in the oven.
To reheat, I recommend slicing individual pieces and popping them in the microwave for about 10-15 seconds. You’ll be amazed at how quickly it becomes warm and gooey, just like it’s fresh out of the oven!
Conclusion
I hope you’re as excited to make this Reese’s Peanut Butter Earthquake Cake as I was when I first discovered the recipe. It’s the ultimate dessert that will delight your taste buds while filling your home with the most amazing chocolate and peanut butter aroma. Trust me, once you take that first bite, you’ll be hooked! Happy baking, and enjoy every delicious moment!