
Another pitfall is over-mixing the dough. Once you add the dry ingredients, mix just until combined—this will help your cookies stay tender. Over-mixing can also lead to cookies that are tougher than they should be, and nobody wants that!
Also, be mindful of baking times. Each oven is different, and cookies can go from perfect to burnt in a blink of an eye! I recommend checking them a minute or two before the timer goes off to ensure they’re perfectly baked. A little golden on the edges while remaining slightly soft in the center is the ultimate goal.
Lastly, let them cool properly! If you try to move them too soon, you may end up with some cookie casualties. Patience is a virtue in the baking world!
Serving Suggestions
These cookies are delightful on their own, but serving them warm with a glass of milk or a scoop of vanilla ice cream takes the experience to another level! The combination of warm cookies and cold ice cream is simply magical, and I often find myself indulging on cozy movie nights with friends.
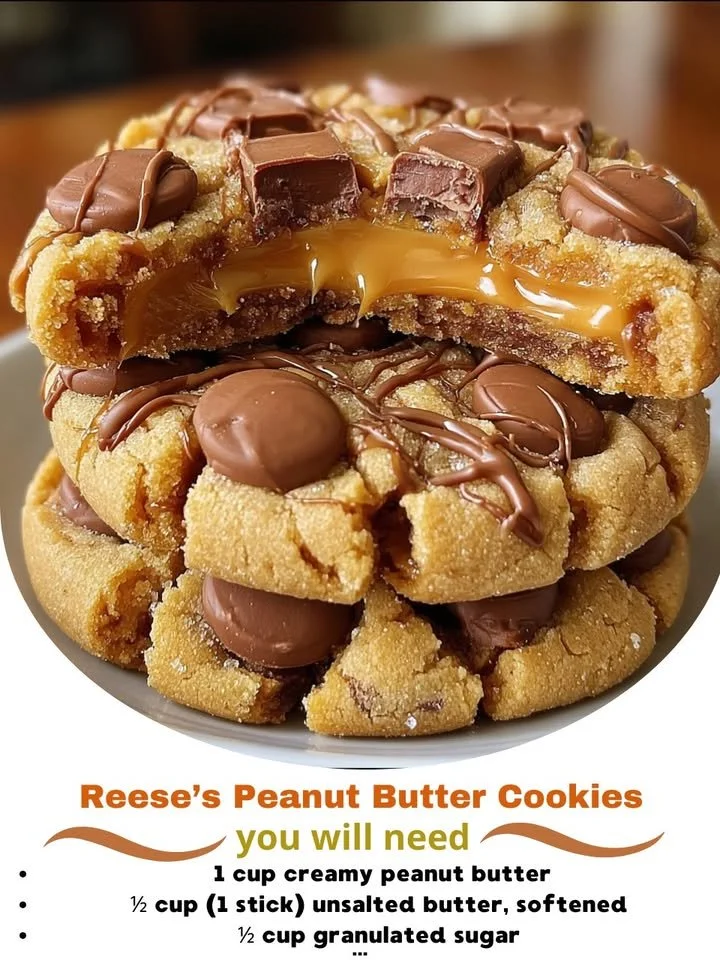
For an extra special touch, you could even drizzle some melted chocolate over the top or sprinkle with a pinch of sea salt. This contrast between sweet and salty pairs perfectly with the richness of the peanut butter and chocolate. Trust me, it’s worth trying!
Lastly, I love packaging these cookies as gifts. They are perfect for holidays or special occasions if you put them in a nice jar with a ribbon. Everyone appreciates a homemade treat, and these cookies are always a hit at gatherings, making them the perfect edible gift!
Variations & Customizations
If you’re feeling adventurous, I encourage you to try mixing in different types of chocolate chips! Dark chocolate chips add a wonderful depth of flavor, while white chocolate can create a nice sweet contrast to the peanut butter. You could even mix in some chopped nuts for added crunch if you enjoy that texture.
For my friends who love coconut, you can fold in some shredded coconut for a tropical twist. It complements the peanut butter beautifully and adds an unexpected surprise in each bite!
Finally, don’t shy away from making these cookies a bit more health-conscious! You can substitute some of the sugars with alternatives like maple syrup or coconut sugar, and if you want to experiment, try using almond flour instead of regular flour for a gluten-free option. I’ve found that these substitutions lead to delicious variations that still hit the sweet spot without feeling too guilty!
How to Store, Freeze & Reheat
To store your Reese’s Peanut Butter Cookies, simply place them in an airtight container at room temperature. They can stay fresh for about a week, but I doubt they’ll last that long once you share them with friends and family!
If you want to freeze them, you can either freeze the unbaked cookie dough or the baked cookies. For the dough, scoop out balls onto a baking sheet, freeze them until solid, then transfer to a zip-top bag. When you’re ready to bake, just pop them in the oven straight from the freezer—just add a couple of extra minutes to the baking time.
For baked cookies, I prefer to wrap them individually in plastic wrap and store them in a freezer-safe container. When I crave that fresh-baked taste, I simply reheat them in the microwave for a few seconds or in the oven at a low temperature. It’s a little taste of heaven any time of day!
Conclusion
I hope you’re as excited to bake these Reese’s Peanut Butter Cookies as I am! They’re incredibly simple and utterly delicious, perfect for sharing with loved ones or enjoying all by yourself. Whether you follow my tips or get creative with your own variations, I know you’ll create something special that will fill your kitchen with warmth and sweet memories. Happy baking!