
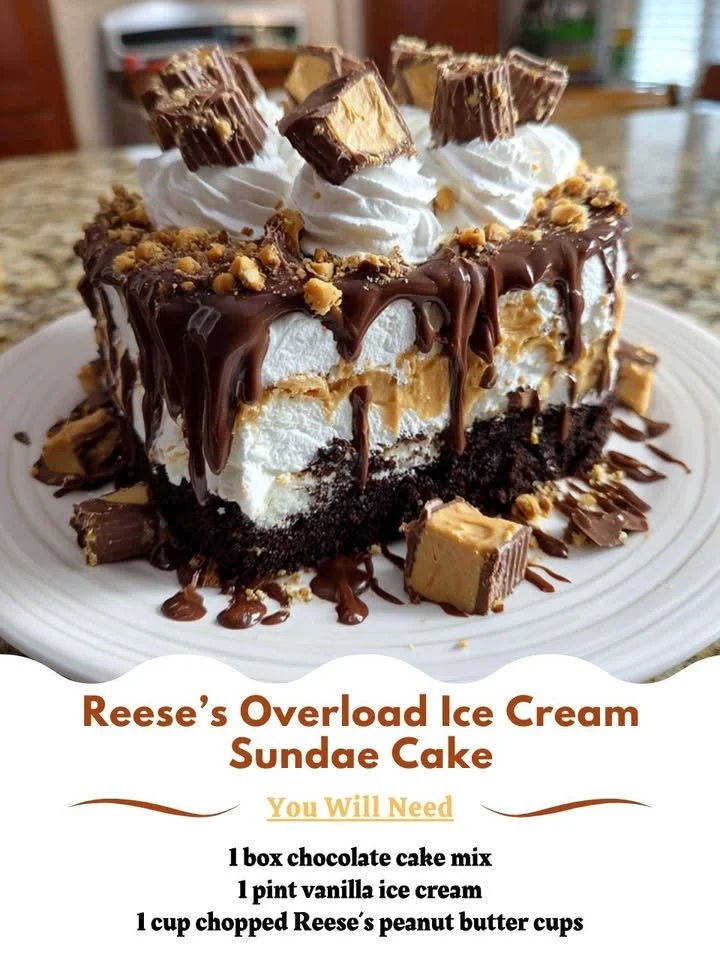
There’s something magical about ice cream sundaes, especially when they come layered with a rich, indulgent cake and all the chocolate and peanut butter goodness you can imagine. I’m talking about the Reese’s Overload Ice Cream Sundae Cake! This divine dessert has quickly become a favorite in my kitchen and for good reason. It’s a showstopper that combines the best flavors of my favorite candy into a delightful cake that’ll have everyone swooning.
Why You’ll Love This Recipe
If you’re a fan of chocolate and peanut butter—or just desserts in general—you’re going to fall head over heels for this recipe. The way the creamy layers of ice cream meld with the rich chocolate cake and crunchy peanut butter cups is simply heavenly. It’s like a dream come true for anyone with a sweet tooth. Plus, it’s perfect for celebrations, gatherings, or even just because you want to treat yourself to something extraordinary! (See the ingredients in the next page below…)
Ingredients
– 1 box chocolate cake mix (plus ingredients called for on the box)
– 1 pint peanut butter ice cream
– 1 pint chocolate ice cream
– 1 cup whipped cream
– 1 cup crushed Reese’s Peanut Butter Cups
– 1/2 cup chocolate syrup
– 1/2 cup peanut butter sauce
– Additional Reese’s for garnish (optional)
Equipment Needed
– 9-inch round cake pans
– Mixing bowls
– Electric mixer (optional, but helpful)
– Rubber spatula
– Cake stand or serving platter
– Measuring cups and spoons
Step-by-Step Instructions
First, I start by baking the chocolate cake according to the instructions on the box. I love the simplicity of this approach—no need to fuss about making a cake from scratch when the cake mix tastes fabulous! Once it’s baked and cooled completely, I slice it into two even layers. This step is crucial for the layering later on, so take your time and make sure you have neat slices. (See the next page below to continue steps…)
Now, it’s time for the fun part—layering! I spoon a generous layer of peanut butter ice cream onto the first chocolate cake layer, then spread it out evenly. The ice cream softens just enough to make this step easier, and I can’t resist sneaking a spoonful while I work! Next, I add the second layer of cake on top and repeat the same with the chocolate ice cream, spreading it smooth. After, I pop the layered cake into the freezer for about an hour. This sets the ice cream and makes sure everything holds together when it’s time to frost.
Once the hour is up, I bring the cake back out and smear whipped cream all around the sides and on top. I love how fluffy and light the whipped cream is; it contrasts the denser elements beautifully! Then comes the best part—the toppings! I drizzle chocolate syrup and peanut butter sauce all over the cake, followed by a sprinkle of crushed Reese’s Peanut Butter Cups. The sight is nothing short of mouth-watering!
Finally, before serving, I let the cake chill in the freezer for another 30 minutes to make sure everything is beautifully set. Just a little patience here pays off in a cake that holds its shape well, and there’s nothing quite like the thrill of cutting into a slice that reveals those glorious layers underneath.
Pro Tips for Best Results
I tested this recipe three ways when perfecting it, and I found the cake mix method saves time without sacrificing flavor. If you want a truly rich chocolate experience, consider adding a splash of espresso to the cake batter—it enhances the chocolate flavor tremendously!
When it comes to the ice cream, let it sit out for about 10 minutes before scooping. It makes spreading it over the cake a breeze! Plus, I realized that alternating the ice cream layers instead of stacking them adds a nice contrast in flavor with each bite.
Lastly, if you want to keep everything intact for serving, use a warm knife to slice the cake. Soak a knife in hot water, wipe it dry, and then cut through the cake. It creates clean slices and makes your guests even more impressed with your presentation.
Common Mistakes to Avoid
If you’re anything like me, you might rush through the cooling process and assemble the cake too soon. Trust me—this only leads to melted ice cream spilling out everywhere! Allowing the cake layers to cool completely is essential; this will give you better structure when you layer the ice cream. (See the next page below to continue…)
Another mistake I made in my early tries was not letting the ice cream soften before spreading. Spreading hard ice cream will tear through the cake layers, making for a messy appearance. Take that time to let the ice cream soften slightly.
When it comes to frosting with whipped cream, a whipped topping can be easier to work with if whipping cream makes you nervous. I learned that a mix can hold up better, especially if you’re making this ahead of time. If you’re not careful, real whipped cream can deflate!
Finally, don’t skimp on the toppings! I initially thought less was more and ended up with a less decadent experience. The toppings bring this cake to life, so load them up!
Serving Suggestions
This cake is impressive enough to be the star of any dessert table, so I tend to serve it at birthdays, family gatherings, or just because I’m feeling generous! I recommend slicing it into generous wedges, allowing everyone to truly indulge in the layers.
Pair slices of the Reese’s Overload Ice Cream Sundae Cake with a scoop of extra chocolate or vanilla ice cream for those who want to up the ante. Just imagine the creaminess next to that cake—pure bliss!
To make it even more special, I like to serve each slice with a drizzle of extra peanut butter sauce and a sprinkle of crushed Reese’s on top. It elevates the presentation and makes each bite feel luxurious!
Variations & Customizations
If you’re not a fan of chocolate cake, vanilla works wonderfully as a base too! Just think of the beautiful contrast it brings with the chocolate ice cream. You can also experiment with different ice cream flavors and fillings; cookie dough or mint chocolate chip could make for exciting twists that keep this recipe fresh every time.
If you want to go a healthier route, consider using yogurt-based ice cream or making a homemade ice cream substitute with banana and peanut butter. It’s fun to convert this indulgent treat into something slightly lighter without losing the creamy goodness!
Also, for those who love a crunch, adding a layer of crushed graham crackers or even waffle cone pieces in between the ice cream layers can give the cake a delightful texture that’s simply irresistible.
How to Store, Freeze & Reheat
Storing this cake is quite simple! If you have any leftovers (though I doubt you will), simply cover it tightly with plastic wrap or place it in an airtight cake container to keep the flavors locked in.
For long-term storage, you might want to freeze slices separately in individual containers. It makes grabbing a sweet treat on-the-go easy and fun! Just let them thaw for a bit at room temperature before diving in for the best texture.
Reheating isn’t really a thing for this cake, given its frozen nature. Instead, I like to serve it directly from the freezer. If it gets too hard, just leave it to rest for about 10 minutes at room temperature, so it’s at the perfect consistency for that first delicious forkful.
Conclusion
The Reese’s Overload Ice Cream Sundae Cake has become a staple in my kitchen, and I cannot tell you how much joy it brings to my family and friends. It’s the perfect blend of rich chocolate, creamy ice cream, and crunchy peanut butter, and every bite brings a smile. I hope you enjoy making and sharing it as much as I do! Happy baking!