
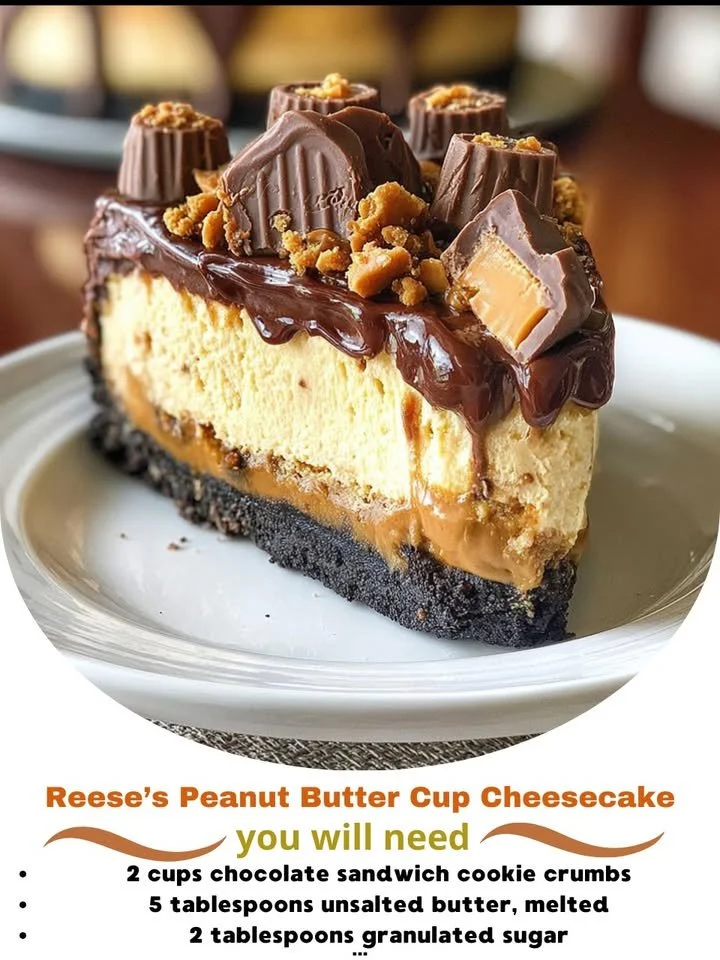
I still remember the first time I had the idea to create a Reese’s Peanut Butter Cup Cheesecake in my kitchen; the thought alone made my mouth water! The subtle sweetness of the cheesecake, intertwined with the nutty goodness of the peanut butter and surprise bits of chocolate, is truly a dessert lover’s dream come true. If you’re ready to impress family and friends with a dessert that’ll steal the show, then let’s dive in!
Why You’ll Love This Recipe
This Reese’s Peanut Butter Cup Cheesecake not only looks stunning but tastes even better! It features a rich, creamy filling that melts in your mouth, combined with a crunchy graham cracker crust and chunks of Reese’s throughout, creating a delightful texture and flavor in every bite. Plus, it’s relatively easy to make; it’s the perfect combination of indulgence and straightforwardness for any home baker. Trust me; your taste buds will thank you later! (See the ingredients in the next page below…)
Ingredients
– 2 cups graham cracker crumbs
– 1/2 cup unsalted butter, melted
– 1 cup granulated sugar
– 4 packages (8 ounces each) cream cheese, softened
– 1 cup creamy peanut butter
– 4 large eggs
– 1 teaspoon vanilla extract
– 1 cup sour cream
– 1 cup mini Reese’s Peanut Butter Cups, chopped
– Extra mini Reese’s for topping
Equipment Needed
– 9-inch springform pan
– Mixing bowls
– Electric mixer or whisk
– Rubber spatula
– Measuring cups and spoons
– Baking sheet
– Parchment paper
Step-by-Step Instructions
First, preheat your oven to 325°F (163°C) and prepare your springform pan by greasing it lightly and placing a sheet of parchment paper on the bottom. This is a little trick I learned to prevent sticking and make serving a lot easier! Then, in a medium bowl, mix the graham cracker crumbs and melted butter together until it resembles wet sand. Press this mixture firmly into the bottom of the springform pan to create a solid crust. Bake for about 10 minutes, until it’s lightly golden, then let it cool. (See the next page below to continue steps…)
Next, while your crust cools, whip the softened cream cheese and granulated sugar together in a large mixing bowl until the mixture is smooth and creamy—about 3 minutes at medium speed. Add in the peanut butter and beat until well combined. It smells divine already! Now, carefully add the eggs one at a time, mixing on low speed after each addition. Finally, stir in the vanilla extract, sour cream, and the chopped mini Reese’s Peanut Butter Cups. Your cheesecake batter should look luscious and inviting by now!
Pour the creamy batter over your prepared crust, smoothing it out with a spatula. I like to tap the pan gently on the countertop to release any air bubbles trapped inside. Now it’s time to bake! Place the cheesecake in the preheated oven and bake for about 55-60 minutes or until the edges are set but the center still has a slight jiggle to it. Turn off the oven and crack the door open, letting it cool inside for about an hour. This helps prevent cracking!
Once cooled, remove it from the oven and let it chill in the refrigerator for at least 4 hours, or overnight for best results. When you’re ready to serve, top your cheesecake with extra mini Reese’s, and get ready for an explosion of “wow” from your friends and family!
Pro Tips for Best Results
I tested this recipe three ways to find the perfect balance in texture and flavor. First, I tried using a combination of crunchy and creamy peanut butter, and while it was tasty, the creamy peanut butter gave the smoothest texture, perfect for a cheesecake. Second, I played with the amount of sugar. I found that sticking to one cup helped keep the sweetness in check, letting the chocolate shine through.
Another tip: let the cream cheese soften at room temperature for an hour or so before you start. This small step makes it much easier to achieve that velvety smooth filling without any lumps. Lastly, be patient while it cools! That hour in the oven makes a world of difference in preventing cracks on the top.
Common Mistakes to Avoid
One mistake I made early on was not preheating the oven long enough. I learned that baking a cheesecake in an oven that isn’t correctly heated can lead to uneven baking and even a soupy center. Trust me; preheating is crucial! Another mistake to avoid is overmixing the batter once you add the eggs. I found that overmixing can incorporate too much air, leading to cracks during baking. Mixing just enough until combined is key. (See the next page below to continue…)
Don’t overlook the cooling process either. I skipped the step of cooling it in the oven once, and the sudden temperature change caused my cheesecake to crack. It’s a simple step, but allowing the cheesecake to transition gradually helps maintain that perfect top.
Lastly, remember to be mindful of your ingredients’ temperature. If your cream cheese isn’t softened, you may end up with a lumpy filling, which can ruin that smooth texture we’re aiming for. A little bit of planning goes a long way in preventing these common mistakes.
Serving Suggestions
When it’s finally time to serve, I suggest slicing the cheesecake into small pieces; a little goes a long way with this rich dessert! Pairing it with a dollop of whipped cream or a drizzle of chocolate sauce elevates the experience. You could even add a sprinkle of crushed graham crackers on top for that added crunch.
If you want to impress your guests, garnishing with fresh berries can provide a lovely color contrast and a hint of tartness that perfectly complements the sweetness of the cheesecake. Serving it alongside a scoop of vanilla ice cream isn’t a bad idea either; who could resist that?
For a special effect, I like to warm up some peanut butter in the microwave for a few seconds, and drizzle it over the slices before serving. It adds an appealing look and makes for a super indulgent treat; it’s simply irresistible!
Variations & Customizations
So, you might be wondering how to mix it up a little bit! One easy variation is to swap out the graham cracker crust for an Oreo crust. Not only does it pair wonderfully with the flavors of peanut butter and chocolate, but it also adds an extra layer of decadence. You could also play with different flavors of chocolate; instead of just the regular peanut butter cups, experiment with the dark chocolate variety!
If you’re someone who loves substance, how about adding a layer of fudge in between the crust and the filling? This rich addition could be a fabulous surprise when you dig in. Additionally, you can go even further by mixing in some crushed pretzels to the filling for a salty crunch that contrasts perfectly with the sweetness.
How to Store, Freeze & Reheat
Once you’ve made this stunning cheesecake, if by chance you have leftovers (which is rare in my house!), be sure to cover it tightly with plastic wrap or foil and store it in the fridge. It usually stays fresh for about a week. I love sneaking a slice for breakfast sometimes; it’s as indulgent as it is delicious!
If you wish to store it longer, freezing is definitely an option. Just make sure to wrap it well in plastic wrap, then aluminum foil to protect it against freezer burn. It can last up to three months in the freezer. When you’re ready to enjoy it again, let it thaw in the refrigerator overnight before serving it up.
Reheating cheesecake isn’t something I usually recommend as it can alter the lovely texture you’ve created, but if you do want to warm it slightly, pop it in the microwave for about 15-20 seconds. Just be careful not to overdo it!
Conclusion
Making this Reese’s Peanut Butter Cup Cheesecake in my kitchen has brought me such joy, and I hope it brings you the same happiness! With its creamy, rich filling and delicious crust, it’s the kind of dessert that creates lasting memories with every slice. So gather your ingredients, put on your favorite apron, and let’s create a little slice of heaven together! Enjoy every dreamy, peanut buttery bite!