
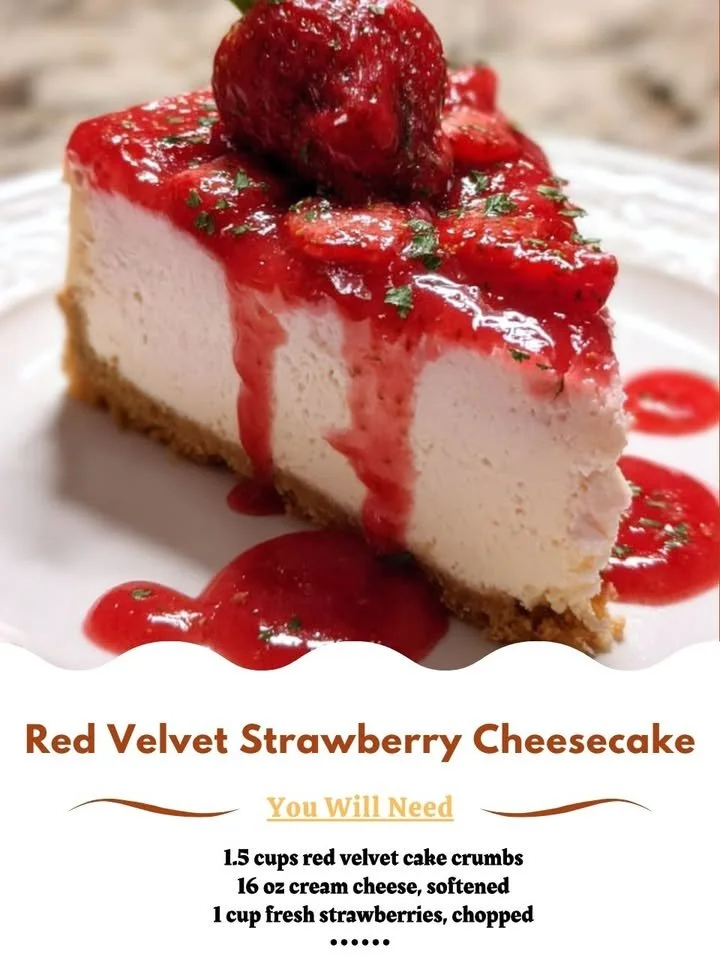
I am excited to share one of my absolute favorite desserts: Red Velvet Strawberry Cheesecake. This delightful treat combines the velvety richness of red velvet cake with the creamy tang of cheesecake and fresh strawberries. The combination of flavors and textures makes it an unforgettable experience, perfect for any occasion or just to treat yourself!
Why You’ll Love This Recipe
There are countless reasons to fall in love with this recipe. Not only does it look stunning with its vibrant colors, but it also tastes heavenly. With every bite, you get the lusciousness of cheesecake paired with the light cocoa flavor of the red velvet—plus, the fresh strawberry topping adds a sweet, fruity finish that ties it all together beautifully. I promise once you try a slice, you’ll be coming back for seconds! (See the ingredients in the next page below…)
Ingredients
– 1 ¼ cups all-purpose flour
– 1 cup granulated sugar
– ¼ cup unsweetened cocoa powder
– 1 teaspoon baking soda
– ½ teaspoon salt
– 1 cup vegetable oil
– 1 cup buttermilk, room temperature
– 2 large eggs, room temperature
– 2 tablespoons red food coloring
– 1 teaspoon vanilla extract
– 8 oz cream cheese, softened
– 1 cup powdered sugar
– 1 cup heavy whipping cream
– 1 teaspoon vanilla extract (for cheesecake)
– Fresh strawberries, for topping
Equipment Needed
– 9-inch springform pan
– Mixing bowls
– Electric mixer
– Measuring cups and spoons
– Rubber spatula
– Parchment paper
– Cooling rack
Step-by-Step Instructions
Let’s start by preheating your oven to 350°F (175°C) and greasing your springform pan. In a large mixing bowl, whisk together the flour, granulated sugar, cocoa powder, baking soda, and salt. This step sets up the base for our moist cake that will complement the cheesecake perfectly. In another bowl, combine the vegetable oil, buttermilk, eggs, red food coloring, and vanilla extract. Slowly pour the wet ingredients into the dry mixture, stirring gently until just combined, being careful not to overmix. Your batter should be smooth and vibrant! (See the next page below to continue steps…)
Next, pour the red velvet batter into your prepared springform pan, smoothing the top with a rubber spatula. Bake in the preheated oven for about 25-30 minutes or until a toothpick comes out clean. Once baked, let it cool in the pan for about 10 minutes before transferring it to a cooling rack. While that cools, let’s whip up the creamy cheesecake filling! In a mixing bowl, beat the softened cream cheese with an electric mixer until creamy and smooth. Gradually add in the powdered sugar and continue mixing until well combined. In a separate bowl, whip the heavy cream and vanilla extract until stiff peaks form. Gently fold the whipped cream into the cream cheese mixture until smooth and luxurious.
Once the red velvet cake has cooled completely, carefully spread the cheesecake filling over the top. Place the cheesecake back in the refrigerator to chill for about 4 hours or, if you can resist, overnight for the best results. After chilling, top your cheesecake with sliced fresh strawberries—don’t they add the perfect pop of color? Finally, I recommend letting it sit at room temperature for about 15 minutes before slicing, to ensure that clean and delightful slices.
Pro Tips for Best Results
One thing I’ve learned from making this recipe multiple times is the importance of using room temperature ingredients. Whether it’s the buttermilk or the eggs, bringing them to room temperature helps create a nice, uniform batter that bakes evenly. I tested this three ways, and it really does make a difference in the overall texture!
Also, consider using high-quality cocoa powder for that deeper flavor in the cake. I was astonished at how much this little switch elevated my red velvet. Lastly, letting the cheesecake sit overnight in the fridge not only enhances the flavors but also makes the cheesecake easier to slice. Trust me, you want that extra chill time!
Another tip? Don’t skip the fresh strawberries. They not only add beautiful decoration but also balance the sweetness of the cheesecake. When you bite into the cheesecake and hit a slice of strawberry, it’s like a party in your mouth!
Common Mistakes to Avoid
One common mistake I’ve made in the past is not properly greasing the springform pan. This could lead to a disaster when you try to release the cheesecake, so be generous with your greasing. Remember, nobody wants a cake that falls apart!
Another pitfall is overbaking the red velvet cake. Keep a close eye on it after 25 minutes; ovens can vary, and you want just the right texture—not dry. When it comes to the cheesecake filling, avoid overmixing once you fold in the whipped cream. Overmixing can deflate the whipped cream, resulting in a denser cheesecake—definitely not what we’re aiming for! (See the next page below to continue…)
Also, pay attention to the chilling time. I’ve rushed this before and regretted it. A minimum of four hours is essential for everything to set perfectly. Patience is key in baking, and I promise you it’s worth it!
Serving Suggestions
When it comes to serving my Red Velvet Strawberry Cheesecake, I love pairing it with a drizzle of chocolate sauce or a dollop of whipped cream for extra decadence. You could even serve it alongside a scoop of vanilla ice cream—we all know ice cream makes everything better, right?
I also enjoy adding a sprinkle of crushed graham crackers on top of the strawberries for a bit of crunch and added texture. Not only does it taste delightful, but it also adds visual appeal to your dessert spread. If you want to impress your guests (or yourself!), serve it on a beautiful cake stand to show off the layers!
For special occasions, consider adding fresh mint leaves for a beautiful garnish. The combination of green mint and vibrant red strawberries is gorgeous, and it adds an aromatic touch that enhances the overall experience of every bite.
Variations & Customizations
One of the best things about this recipe is its versatility. For a chocolate lover’s dream, you can incorporate some mini chocolate chips into the cheesecake filling for added bursts of chocolatey goodness. Just fold them in gently—this adds an extra layer of flavor and surprise to each slice.
You can also experiment with the fruit topping. While strawberries are delightful, feel free to swap them out for raspberries or blueberries if you prefer another flavor. Each berry will give a different yet equally stunning presentation and taste.
And if you want to shake things up, why not make a red velvet layer cake instead? Simply bake two layers of red velvet and sandwich them with the cheesecake filling in between. It’s a fun twist that’s perfect for birthdays or special gatherings!
How to Store, Freeze & Reheat
If you find yourself with leftovers (and trust me, it’s hard not to want it all for yourself), this cheesecake stores beautifully! Just cover it tightly with plastic wrap or place it in an airtight container and refrigerate. It will stay fresh for up to a week—if it lasts that long!
If you want to prepare ahead of time, you can freeze the cheesecake before adding the strawberry topping. Just wrap it tightly and store it in the freezer for up to three months. When you’re ready to enjoy it, let it thaw in the refrigerator overnight and then top with fresh strawberries before serving.
Reheating isn’t usually necessary, but if you find yourself loving that cheesecake a bit too much, I suggest letting it sit at room temperature for about 30 minutes. This helps to soften it just a bit, making for a perfect slice every time.
Conclusion
I hope you enjoyed this journey through making my Red Velvet Strawberry Cheesecake! There’s something truly magical about combining these flavors and creating a dessert that brings such joy. Whether you’re celebrating a special occasion or simply indulging on a cozy evening at home, I know this recipe will be a hit. Happy baking, and don’t forget to share your delicious results—I would love to hear about your experiences too!