
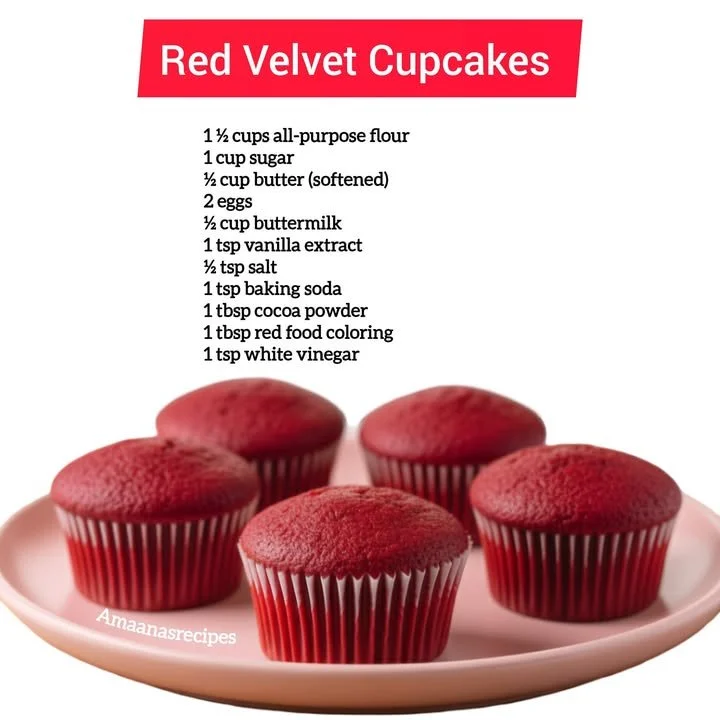
There’s just something so wonderfully enchanting about the rich, deep red hue of red velvet cupcakes. Whenever I whip up a batch in my kitchen, the whole space fills with a blend of cocoa and vanilla that makes my heart sing. They’re not just visually stunning; each bite is a delightful harmony of flavors. Whether you’re celebrating a special occasion or just treating yourself on a quiet afternoon, these cupcakes have a way of making every moment a little sweeter.
Why You’ll Love This Recipe
This red velvet cupcake recipe is incredibly simple yet yields those bakery-style results that you’d expect to find at a fancy café. The cupcakes have a tender crumb, a hint of chocolate, and are perfectly balanced with cream cheese frosting that you just can’t resist. Plus, they’re a hit with everyone—from my neighbors to my family! It’s the kind of recipe that brings people together. The best part? You’ll find yourself making it again and again. (See the ingredients in the next page below…)
Ingredients
- 1 ½ cups all-purpose flour
- 1 cup granulated sugar
- 1 teaspoon baking powder
- 1 teaspoon baking soda
- ½ teaspoon salt
- 1 teaspoon cocoa powder
- 1 cup vegetable oil
- 1 cup buttermilk, room temperature
- 2 large eggs, room temperature
- 2 tablespoons red food coloring
- 1 teaspoon vanilla extract
- 1 teaspoon white vinegar
For the Cream Cheese Frosting:
- 8 oz cream cheese, softened
- ½ cup unsalted butter, softened
- 3-4 cups powdered sugar
- 1 teaspoon vanilla extract
- A pinch of salt
Equipment Needed
- Mixing bowls
- Hand or stand mixer
- Measuring cups and spoons
- Rubber spatula
- Cupcake liners
- Muffin tin
- Cooling rack
Step-by-Step Instructions
To begin, preheat your oven to 350°F (175°C). Line your muffin tin with cupcake liners to ensure those gorgeous red velvet masterpieces come out just right. In a large mixing bowl, I love to sift together the flour, sugar, baking powder, baking soda, salt, and cocoa powder. This helps to ensure everything is evenly combined and gives the cupcakes a lighter texture. Once mixed, I set it aside to focus on the wet ingredients. (See the next page below to continue steps…)
Next, in another bowl, combine the vegetable oil, buttermilk, eggs, food coloring, vanilla, and vinegar. I find that mixing the wet ingredients together thoroughly before incorporating them is key to achieving that electric red color and consistent taste throughout. Gradually add the dry mixture to the wet ingredients using a rubber spatula, and mix until just combined. Be careful not to over-mix; a few lumps are just fine!
Now, fill each cupcake liner about two-thirds full with the batter—this is the perfect amount to let them rise beautifully. I usually use an ice cream scoop for this, as it helps keep everything neat and consistent. Pop them in the preheated oven for about 18-20 minutes or until a toothpick comes out clean. The kitchen will smell divine, and I can hardly wait for them to cool before digging into the frosting!
While the cupcakes cool, it’s the perfect time to whip up that luscious cream cheese frosting. In a bowl, beat the softened cream cheese and butter until smooth, then add the powdered sugar one cup at a time for that dreamy frosting texture. Finally, mix in the vanilla extract and a pinch of salt to balance the sweetness. Once the cupcakes are completely cool (trust me, this is important!), generously frost them with the cream cheese frosting. Now, they’re ready to be devoured!
Pro Tips for Best Results
Over the years, I’ve tested this recipe multiple ways to bring out the best flavor and texture. One of my favorite tips is to let the buttermilk and eggs come to room temperature before using them. This little detail really helps the batter to emulsify better, leading to moist, tender cupcakes.
Another thing I’ve learned is to sift the powdered sugar for the frosting. It seems like a minor step, but trust me, it makes such a difference in avoiding clumps and achieving a smooth, velvety finish. Who wants a lumpy frosting on their gorgeous cupcakes, right?
Lastly, I recommend decorating these cupcakes with some simple sprinkles or grated white chocolate, especially if you want to add a little festive flair. These small touches can take your presentation to the next level, making them even more irresistible.
Common Mistakes to Avoid
One mistake I see often is not measuring the ingredients properly. Baking is a science, so using too much flour or sugar can ruin the balance and texture of your cupcakes. I recommend using a kitchen scale for the best accuracy, or at least using the spoon-and-level method when measuring flour.(See the next page below to continue…)
Another hiccup I’ve experienced is taking the cupcakes out of the oven too soon—trust me, it’s tempting when they smell so good! Be sure to check with a toothpick, and remember that the cupcakes continue to cook slightly after being removed from the oven.
Also, overfrosting is a common pitfall. While it can be tempting to slather on cream cheese frosting, too much can mask the subtle flavors of the red velvet. Start with a generous swirl and see how it looks before adding more; less is often more!
Serving Suggestions
When it comes to serving these delightful red velvet cupcakes, I love to pair them with a nice cup of coffee or a steaming mug of hot cocoa. The rich flavor of the chocolate in the cupcake complements the warmth of the drinks beautifully. You could even try serving them during a small gathering and pair them with a glass of sparkling wine—it’s a fun twist that adds an element of fancy!
I also enjoy breaking out these cupcakes for special occasions like birthdays or holidays. They always stand out on a dessert table and are sure to impress guests. You can even have a little fun by decorating them with themed sprinkles according to the occasion!
If you’re up for it, consider creating a mini cupcake platter with different flavors—red velvet alongside classic vanilla, and chocolate or lemon. It’s a surefire way to cater to everyone’s tastes and make your cupcake spread extra special.
Variations & Customizations
While the classic red velvet is hard to beat, I’ve experimented with some delightful variations that have been a huge hit in my kitchen. For example, I’ve added a hint of espresso powder to the batter, which really enhances the chocolate flavor without making it overly coffee-flavored. It gives the red velvet a complex undertone that’s absolutely delicious.
You can also swap out the cream cheese frosting for a rich chocolate ganache if you’re looking to change things up. Simply melt some dark chocolate and mix in heavy cream to create a decadent topping. It’s a luxurious twist that chocolate lovers will adore.
Another fun idea is to add a filling! I’ve tried injecting the cupcakes with raspberry or strawberry jam, which contrasts beautifully with the rich flavor of the red velvet. It adds a fruity surprise that elevates the experience of biting into each one.
How to Store, Freeze & Reheat
These cupcakes can be stored in an airtight container at room temperature for a couple of days, but when I have extras, I like to freeze them. Just make sure they’re completely cool before wrapping them individually in plastic wrap and placing them in a freezer bag. They can stay fresh for up to three months, allowing me to enjoy them even when I’m not in the mood to bake!
When it’s time to enjoy them again, I usually take them out the night before and let them thaw overnight in the fridge. If you want to enjoy them warm, a quick zap in the microwave for about 10-15 seconds will do the trick. I always recommend adding fresh frosting right before serving for the best texture and flavor!
I’ve also discovered that freezing the cream cheese frosting is a great way to prepare ahead. Just make sure to thaw and re-whip it prior to frosting the cupcakes for that luscious consistency.
Conclusion
Baking red velvet cupcakes has become one of my favorite sweet rituals. The combination of that splendid color, delicious flavor, and fluffy texture always warms my heart. I hope you feel inspired to try this recipe in your own kitchen! Whether you’re celebrating or just want a sweet treat to brighten your day, these cupcakes are guaranteed to bring joy to your table. Happy baking!