
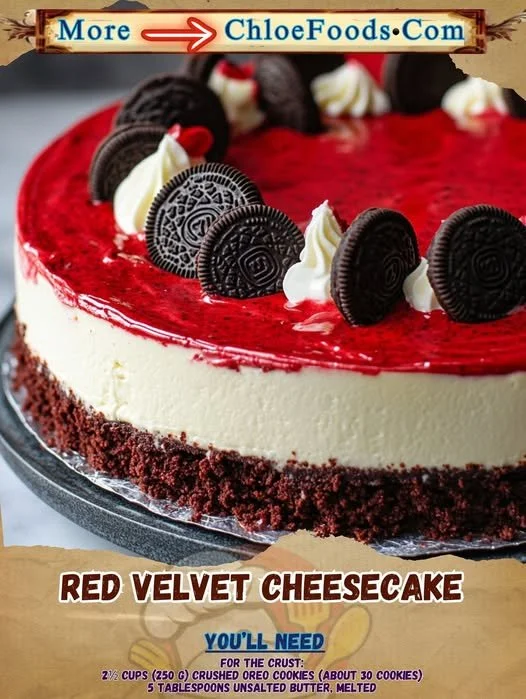
Red velvet cheesecake is one of those desserts that never fails to impress. I remember the first time I made it; the sight of the vibrant red layers contrasted with the rich, creamy cheesecake filling was nothing short of magical. It’s not just a feast for the eyes; it’s a symphony of flavors and textures that keeps everyone coming back for seconds. If you’re looking to elevate your dessert game, you’ve come to the right place!
Why You’ll Love This Recipe
This red velvet cheesecake combines the best of both worlds—a classic red velvet cake and a luscious cheesecake. The tender cocoa-flavored cake layers add a delightful softness, while the creamy cheesecake filling brings a tangy sweetness that perfectly complements the rich cocoa. It’s a showstopper at any gathering, and each slice unveils a beautiful contrast of colors and flavors that will wow your guests. Plus, the process of making it is fun and fulfilling! (See the ingredients in the next page below…)
Ingredients
– 2 ½ cups all-purpose flour
– 1 ½ cups granulated sugar
– 1 teaspoon baking soda
– 1 teaspoon salt
– 1 teaspoon cocoa powder
– 1 ½ cups vegetable oil
– 1 cup buttermilk, room temperature
– 2 large eggs, room temperature
– 2 tablespoons red food coloring
– 1 teaspoon vanilla extract
– 1 cup cream cheese, softened
– 1 ½ cups heavy cream
– 1 cup powdered sugar
– 1 teaspoon vanilla extract
Equipment Needed
– 2 9-inch round cake pans
– Mixing bowls
– Electric mixer or stand mixer
– Rubber spatula
– Parchment paper
– Cooling rack
– Cake stand or serving platter
Step-by-Step Instructions
To begin, preheat your oven to 350°F (175°C). Grease and line the bottoms of your cake pans with parchment paper. This will save you from any sticky situations later on. In a large mixing bowl, whisk together the flour, sugar, baking soda, salt, and cocoa powder. In another bowl, mix the vegetable oil, buttermilk, eggs, food coloring, and vanilla until well combined. Slowly combine the wet and dry mixtures until just blended. It’s important not to over-mix; a few lumps here and there are perfectly fine! (See the next page below to continue steps…)
Next, pour the batter evenly into your prepared cake pans. Bake them in the preheated oven for about 25-30 minutes or until a toothpick inserted into the center comes out clean. While those are baking, let’s move on to preparing the cheesecake filling. In a large bowl, using an electric mixer, beat the cream cheese until it’s smooth and creamy. Add in the powdered sugar and vanilla, mixing until combined. In another bowl, whip the heavy cream until stiff peaks form, and then gently fold it into the cream cheese mixture.
Once the red velvet cakes have cooled completely, level the tops if they have domed up during baking. Place one layer on a serving plate, and spread a generous portion of the cheesecake filling on top. Carefully place the second cake layer on top of this, and then spread the remaining cheesecake filling over the entire cake. Don’t worry about making it perfect; I like the rustic look!
To finish it off, I recommend chilling the cheesecake for at least two hours before serving. This allows those flavors to meld together beautifully and makes it easier to slice. It’s so worth the wait!
Pro Tips for Best Results
One tip that I learned after my first attempt is to ensure all your ingredients are at room temperature. This really helps in achieving a smooth batter and creamy cheesecake layer. I tested this three ways, and the difference was undeniable—trust me, your taste buds will thank you!
Another thing I try to remember is to sift the dry ingredients. This not only aerates the flour but also helps break up any lumps in the cocoa powder, leading to a smoother batter. When I skip this step, I can taste the difference, and I prefer a velvety texture for my cheesecake.
Lastly, if you really want to impress, consider adding some chocolate shavings or fresh berries on top before serving. I’ve done this for gatherings, and it adds an elegant touch that takes the dessert to the next level!
Common Mistakes to Avoid
One mistake I’ve made in the past is not properly measuring the flour. Until I learned to spoon it into my measuring cup and level it off with a knife, my cakes were often too dense. Make sure to take your time with this; it really affects the final texture! (See the next page below to continue…)
Another pitfall is overmixing the batter. I’ve fallen into this trap thinking I needed to smooth everything out perfectly. The key is to mix just until incorporated; overmixing can lead to a tough cake texture which is definitely not what we want.
Also, don’t forget to cool your cakes completely before assembling. I made the mistake of trying to put the cheesecake filling on a warm cake once, and it melted right off. Waiting really helps to keep those layers nice and neat.
Lastly, don’t skip the chilling time! It might seem tempting to dig right in, but letting the cheesecake set allows all the flavors to bond beautifully. A little patience goes a long way for desserts as rich as this one!
Serving Suggestions
When it comes time to serve your red velvet cheesecake, presentation is key! I love to dust a little cocoa powder or powdered sugar on top for a lovely touch. You can also dress it up with a drizzle of chocolate sauce or a dollop of fresh whipped cream on the side—both options are big crowd-pleasers.
If you want to add some textural contrast, consider serving it with a scoop of ice cream. Vanilla or even a raspberry sorbet pairs beautifully and adds a refreshing twist that complements the richness of the cheesecake.
Finally, don’t forget to accompany it with a warm drink. I sometimes serve it with a cup of coffee or a creamy hot cocoa. Trust me, the cozy flavors just enhance the overall experience!
Variations & Customizations
If you’re feeling adventurous, why not try adding some chocolate chips to your cheesecake batter? I’ve done this on occasion, and the little bursts of chocolate make it extra indulgent! Another way to customize is to fold in some crushed nuts or even a swirl of your favorite fruit puree for a delightful surprise with each bite.
You can also play around with the food coloring. While traditional red velvet is iconic, a little twist with other colors like bright pink or even green can be a fun way to suit any occasion! Just be cautious not to add too much coloring, as it can affect the flavor and texture a bit.
Lastly, consider creating a layered effect by alternating layers of cheesecake and cake. It takes a little more time, but the visual impact is worth it, especially if you want to impress guests at a special event!
How to Store, Freeze & Reheat
Storing your red velvet cheesecake is easy! Once it’s completely set, I usually cover it with plastic wrap or store it in an airtight container in the refrigerator. It stays fresh for about a week, but I’ve rarely had it last that long.
If you want to freeze it, make sure to wrap individual slices in plastic wrap and then place them in a freezer-safe container. This way, you can enjoy a slice whenever the mood strikes! Just make sure to let it thaw in the fridge overnight before serving.
When it comes to reheating, I recommend letting it come to room temperature before enjoying again. If it has been frozen, simply let it thaw and then enjoy the creamy texture again; no need for reheating, as it’s lovely served chilled!
Conclusion
Making red velvet cheesecake has truly become one of my favorite baking experiences. The blend of textures, the vibrant colors, and the delicious flavors all come together to create a dessert that’s more than just a treat—it’s a celebration! I hope you enjoy making this recipe as much as I did. Whether it’s for a special occasion or just a sweet indulgence, this cheesecake is guaranteed to bring smiles all around. Happy baking!