
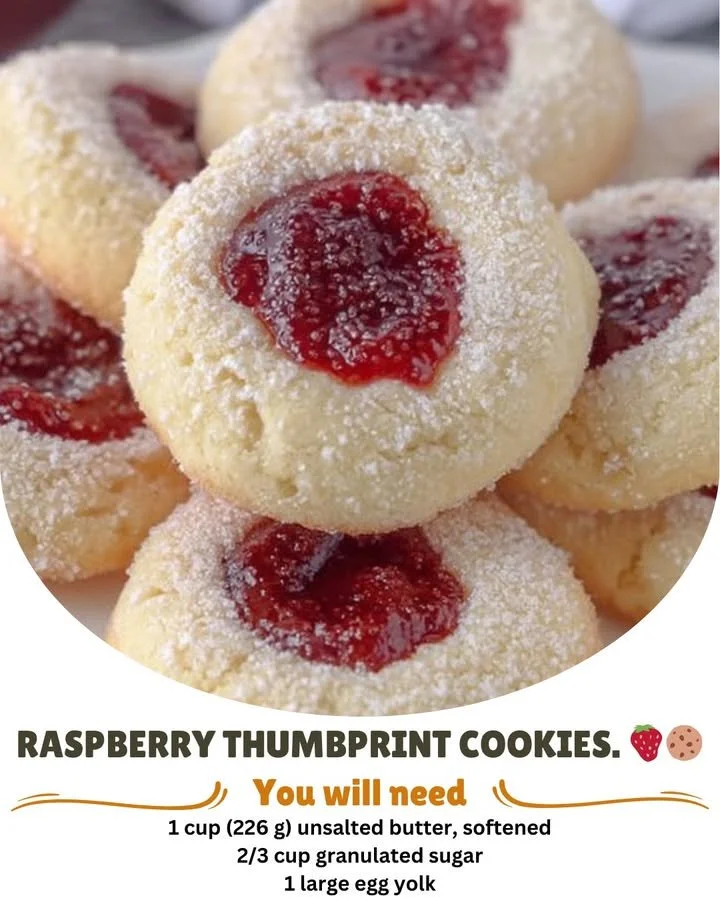
If you’re looking for a sweet treat that combines buttery goodness with fruity flavor, then let me tell you about my Raspberry Thumbprint Cookies! These delightful little confections are not just a feast for the taste buds but also a joy to make. I love baking them during the colder months, and the warm, cozy scent of butter and sugar wafting through my kitchen just adds to the charm. Plus, they are perfect for sharing with friends and family during gatherings—I can’t wait to share this recipe with you!
Why You’ll Love This Recipe
These Raspberry Thumbprint Cookies are truly a crowd-pleaser! Whether you’re an experienced baker or just starting out, this recipe is straightforward and delivers a deliciously satisfying result every time. The combination of the crumbly cookie base with the sweet and slightly tart raspberry jam makes for a delightful contrast that is hard to resist. I promise you, one bite will have you coming back for more! (See the ingredients in the next page below…)
Ingredients
– 1 cup unsalted butter, softened
– 1 cup granulated sugar
– 2 large egg yolks
– 1 teaspoon vanilla extract
– 2 cups all-purpose flour
– 1/2 teaspoon salt
– 1 cup raspberry jam
– Powdered sugar for dusting (optional)
Equipment Needed
– Mixing bowls
– Electric mixer (or whisk)
– Baking sheet
– Parchment paper
– Cookie scoop or spoon
– Small spoon for making thumbprint indents
– Wire rack for cooling
Step-by-Step Instructions
Let’s get started on these delightful cookies! First, I preheat the oven to 350°F (175°C) and line my baking sheet with parchment paper. In a mixing bowl, I cream together the softened butter and granulated sugar until it’s light and fluffy. This step is crucial because it adds air into the mixture, making the cookies tender. Next, I beat in the egg yolks and vanilla extract until well combined. Everything is smelling wonderful already! (See the next page below to continue steps…)
Now, I gently mix in the flour and salt, stirring until just combined. Be careful not to overmix, as this could lead to tougher cookies. Once the dough comes together, I use a cookie scoop to portion out the dough onto the prepared baking sheet, leaving some space between each ball of dough to allow for spreading. With the warmth of my hands, I gently press my thumb into the center of each ball, creating a small well to hold the raspberry jam.
Next, I spoon a dollop of raspberry jam into each well, taking care not to overfill them. The jam will bubble slightly while baking, so I want to keep that in mind. I pop the tray into the oven and let them bake for about 12-15 minutes, or until the edges are slightly golden. As they bake, my kitchen fills with an irresistible aroma that makes my mouth water!
Once the cookies are out of the oven, I let them cool on the baking sheet for a few minutes before transferring them to a wire rack. I often find that they are best enjoyed once they are completely cool, as it allows the cookie to firm up a bit while remaining soft inside.
Pro Tips for Best Results
While I’ve perfected this recipe, I did have to learn a few things along the way! One pro tip I discovered while testing this recipe three ways is to let your butter sit out until it’s room temperature. I’ve found that overly cold butter can result in a denser cookie that doesn’t have that wonderful melt-in-your-mouth consistency.
Another insight I gleaned is to use high-quality raspberry jam. I’ve tried making my own, and it’s delicious, but store-bought can save time, and you can often find artisanal brands that elevate your cookies. It’s worth it—even a small change like this makes a significant difference in flavor!
Lastly, be patient with the cooling process. I know it’s tempting to sample them right out of the oven, but I’ve found that letting them cool for as long as possible allows the jam to set perfectly in the thumbprint, making them much easier to handle and eat.
Common Mistakes to Avoid
As with any recipe, there are some common pitfalls I think we should all avoid. First, don’t skip chilling the dough! Letting the dough rest for even just 30 minutes can significantly improve the texture. I’ve learned this the hard way, and cookies that spread too much end up being misshapen—though they still taste delicious.
Another common mistake is overfilling the thumbprints with jam. It can be tempting to go big on the filling, but too much sauce can create a sticky situation—literally! The jam can overflow and make a mess on your baking sheet.
Lastly, I’ve noticed that some people forget to check their oven temperature. A lot of home ovens can vary quite a bit from what’s stated on the dial. Use an oven thermometer to double-check; I once had a batch that got overbaked simply because my oven was running hot. (See the next page below to continue…)
Serving Suggestions
I love serving these Raspberry Thumbprint Cookies with a cup of tea or coffee for an afternoon treat. They’re also a lovely addition to any dessert platter during holiday parties or family gatherings. Even just adding a light dusting of powdered sugar can elevate the presentation of these cookies, making them feel more festive!
Another fun idea is to package them in a cute box or tin, tie them up with a ribbon, and gift them to a neighbor or a friend. Sharing treats is one of my favorite ways to spread joy, and these cookies are perfect for that—just a few of them make a heartfelt gift.
If I’m feeling adventurous, I will occasionally serve these cookies with vanilla ice cream for an indulgent dessert. The warm cookie combined with cold ice cream creates a delightful contrast that really takes the experience to the next level.
Variations & Customizations
As much as I adore the classic raspberry version, these cookies are just as delightful with different jams! I’ve experimented with strawberry, apricot, and even blueberry filling. Each one brings a unique flavor and can make the recipe feel new and exciting every time.
For those who enjoy a bit of zest, try adding some lemon or orange zest into the cookie dough for a refreshing twist that pairs beautifully with berry fillings. It adds bright notes that cut through the sweetness and gives a lovely aromatic fragrance.
For a nutty version, you can also consider adding finely chopped nuts like almonds or pecans directly into the dough. This adds an extra layer of flavor and texture—though be sure to adjust the flour accordingly to balance things out!
How to Store, Freeze & Reheat
If you have any cookies left over (which is rare in my house!), you can store them in an airtight container at room temperature for up to a week. I’ve found that they’re still quite delicious after a few days—if they last that long!
Freezing these cookies is a great option too. Place them in a single layer on a baking sheet and freeze until firm. Once they’re firm, transfer them to a freezer bag or container, where they can be stored for up to three months. Whenever I’m in the mood for a sweet treat, I pop a few in the oven for a quick warm-up and they taste freshly baked!
To reheat, I like to place them in a 350°F (175°C) oven for about 5-10 minutes or until warmed through. This brings back that beautiful softness that we all love, and the aroma fills the kitchen all over again.
Conclusion
Baking Raspberry Thumbprint Cookies has become a cherished tradition in my kitchen, and I hope you enjoy them as much as I do! The process is comforting and the end result is simply delightful. So gather your ingredients, grab your apron, and let’s get baking. Happy cooking!