
The first time I made Queen of Sheba Cake, it was one of those quiet afternoons where I wanted something deeply chocolatey but not flashy. As the butter and chocolate melted together, my kitchen filled with a rich, comforting aroma that instantly slowed me down. I loved how intentional this cake felt, from separating the eggs to gently folding everything together. When it came out of the oven, delicate and proud, I knew this recipe was something special I would return to again and again.
Why You’ll Love This Recipe
You’ll love this recipe because it delivers elegance without complication, and I say that after testing it more times than I expected. This cake doesn’t rely on frosting or decoration to impress; it wins you over with texture and depth. When you make it, you’ll feel like you’re baking something classic and confident, a dessert that speaks quietly but leaves a lasting impression with every bite.
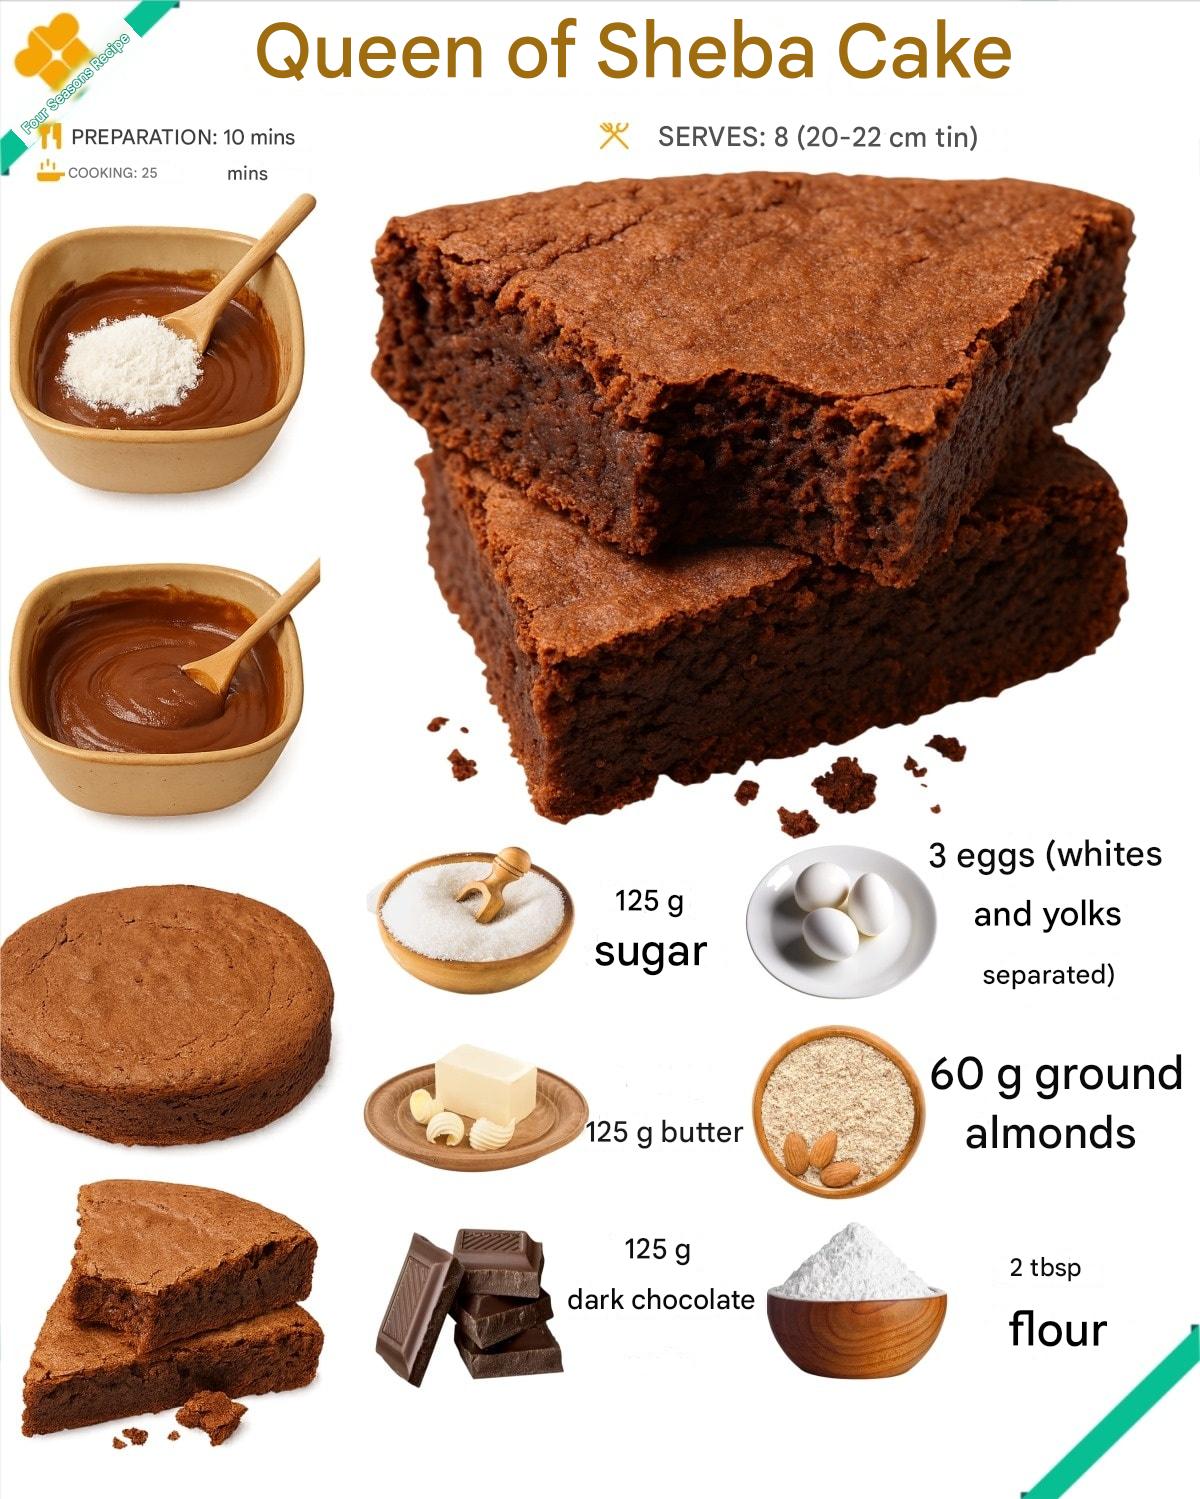
Ingredients
- 125 g dark chocolate
- 125 g unsalted butter
- 125 g granulated sugar
- 3 large eggs, whites and yolks separated
- 60 g ground almonds
- 2 tablespoons all-purpose flour
Each ingredient here serves a purpose, and I’ve learned not to improvise too much with this recipe. The chocolate is the star, so I always choose one with good bitterness and depth. Ground almonds add moisture and structure without heaviness, while separating the eggs creates that signature light-but-dense texture. Trust me, every component matters more than it first appears.
Equipment Needed
- Mixing bowls
- Whisk or electric mixer
- Heatproof bowl
- Saucepan
- Rubber spatula
- Fine mesh sieve
- 20–22 cm round cake pan
- Parchment paper
- Cooling rack
I appreciate that this cake doesn’t require any fancy tools. A whisk works perfectly if you don’t want to use a mixer, and a simple saucepan setup is enough to melt the chocolate gently. The most important tool here is the cake pan size; using the correct one ensures even baking and prevents the cake from drying out or collapsing.
Step-by-Step Instructions
I always start by melting the chocolate and butter slowly over low heat, stirring gently until the mixture becomes smooth and glossy. This step sets the tone for the entire cake, and I’ve learned patience here makes all the difference. Rushing can scorch the chocolate, and once that happens, the flavor is permanently affected.
After removing the chocolate from heat and letting it cool slightly, I whisk in the sugar and egg yolks until the mixture thickens. At this stage, the batter already looks luxurious, and I make sure to scrape the bowl thoroughly so everything blends evenly. This attention to detail keeps the texture consistent later on.
Next, I fold in the ground almonds and flour carefully, keeping the batter smooth but not overworked. In a separate bowl, I whip the egg whites to soft peaks. I’ve tried stiff peaks before, but soft peaks integrate better and preserve the cake’s delicate structure.(See the next page below to continue…)