
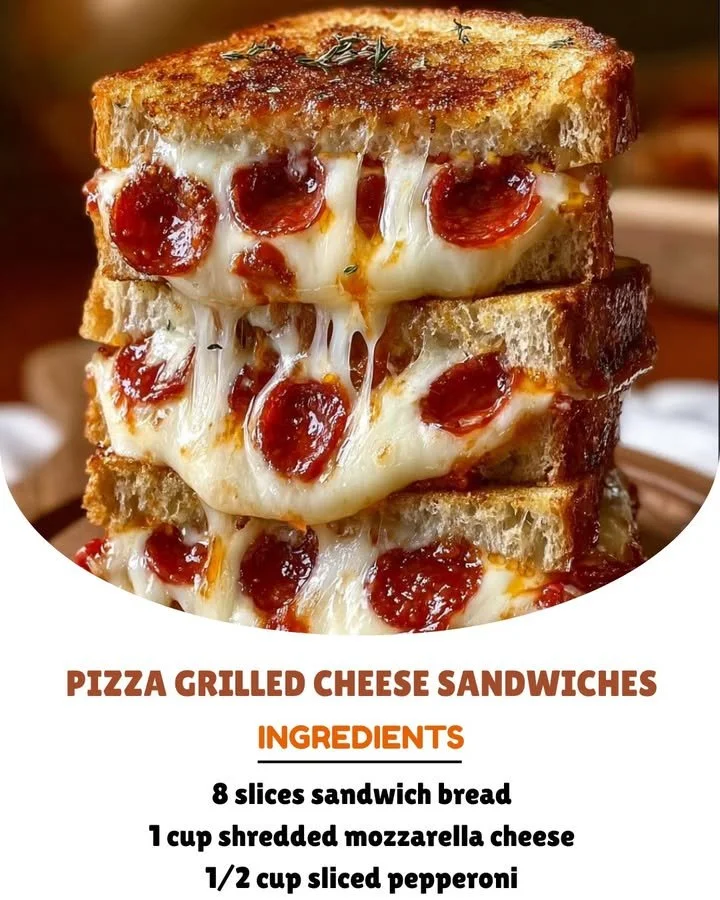
When I first thought about combining two of my favorite comfort foods—pizza and grilled cheese—I could hardly contain my excitement. Imagine the gooey, melty cheese of a grilled cheese sandwich, paired with the bold flavors of pizza toppings, all nestled between two crispy, golden-brown slices of bread. This isn’t just your average sandwich; it’s a Pizza Grilled Cheese Sandwich that’s bound to make your taste buds dance! Join me on this delightful journey as I share my recipe and some secrets for creating this delicious dish in my kitchen.
Why You’ll Love This Recipe
One of the best things about this Pizza Grilled Cheese Sandwich is just how easy it is to whip up after a long day or when you need a snack that feels a bit more indulgent. The combination of flavors and textures creates a cozy meal perfect for lunch or dinner—and let’s not forget that it’s incredibly satisfying! Plus, you can customize it easily based on what you have on hand. Trust me, you’ll definitely want to try this! (See the ingredients in the next page below…)
Ingredients
– 2 slices of bread (I usually opt for sourdough or whole grain)
– 2 tablespoons butter
– 1 cup shredded mozzarella cheese (feel free to mix in other cheeses!)
– ¼ cup pizza sauce (store-bought or homemade works great)
– ¼ cup pepperoni slices (or your favorite toppings—see variations!)
– Italian seasoning (to sprinkle, optional)
Equipment Needed
– Non-stick skillet or frying pan
– Spatula
– Grater (if you’re shredding cheese)
– Small bowl (for mixing seasonings, if using)
Step-by-Step Instructions
Let’s dive into making our Pizza Grilled Cheese Sandwich. Start by heating a non-stick skillet over medium heat. While that warms up, butter one side of each slice of bread. This helps to create the perfect golden crust. Next, place one slice of bread in the skillet, buttered side down. Assemble your pizza goodness by layering half of the mozzarella cheese on top, followed by the pizza sauce, your favorite toppings (like pepperoni or veggies), and then the remaining mozzarella cheese. Finally, top it with the other slice of bread, buttered side facing up. (See the next page below to continue steps…)
Now, let that sandwich sizzle! Cook for about 3-4 minutes or until the bottom is golden brown. Carefully flip the sandwich with a spatula and cook for another 3-4 minutes until that side is also beautifully browned and the cheese has melted. To ensure even cooking, I sometimes press down gently with the spatula—it helps everything meld together nicely. Once it’s done, use the spatula to transfer your sandwich to a cutting board.
Let it sit for a moment before slicing—it’s hard, but trust me, this helps the cheese settle. I often like to sprinkle a little Italian seasoning on top for an extra flavor boost. Slice your sandwich in half and get ready to savor the goodness! You can dip it in warm pizza sauce for an extra kick!
Pro Tips for Best Results
When making this sandwich, I found that letting the cheese sit at room temperature for 15-20 minutes before you start really helps it melt beautifully. Cold cheese can sometimes resist melting. Another tip? Don’t skimp on the butter! A good coat on the outside of your bread ensures that perfect, crispy finish we all crave.
I also recommend experimenting with different cheeses. I tested this three ways—with just mozzarella, a mix of mozzarella and cheddar, and even some provolone. Each combination gives a unique twist to the flavor profile. My favorite? A blend of mozzarella and sharp cheddar!
Lastly, if you’re feeling adventurous, consider using garlic butter instead of regular butter for an extra layer of flavor. Just mix some minced garlic into the butter before spreading it on the bread. The aroma alone will have everyone in the house flocking to the kitchen!
Common Mistakes to Avoid
One common mistake I’ve made (and learned the hard way) is overcrowding the sandwich with toppings. While it’s tempting to pile on all your favorite pizza ingredients, it can make the sandwich difficult to flip and can lead to an uneven cook. Stick to a couple of toppings—it keeps everything balanced! (See the next page below to continue…)
Another thing to watch out for is your skillet temperature. If it’s too high, the bread can burn before the cheese gets a chance to melt. Start with medium heat; you can always crank it up if you need a bit more sizzle. Trust me, there’s nothing worse than burnt bread and unmelted cheese!
Also, be sure to use a good quality, non-stick skillet. I’ve tried making this in a cast-iron skillet, and while it’s possible, it doesn’t always yield that same crispy texture I look for. My trusty non-stick pan gives the sandwich that perfect golden crust every time.
Serving Suggestions
These Pizza Grilled Cheese Sandwiches are delightful on their own, but I love to serve them with a side of warm pizza sauce for dipping. The combination is just heavenly—like a mini pizza party right on your plate! If I’m feeling particularly indulgent, I’ll add a crispy side salad to balance things out; the freshness of greens contrasts beautifully with the ooey-gooey sandwich.
Another fun twist is to serve them as part of a family meal. Pair these sandwiches with some homemade French fries or a crispy potato wedge for a perfect movie night. The crunch of the fries alongside the gooey sandwich creates a comforting and filling meal.
If you’re looking to be a bit healthier, I also enjoy serving these sandwiches with a side of fresh veggies. Crunchy carrot sticks or cucumber slices paired with ranch dressing can offer a crisp refreshment after enjoying this rich sandwich.
Variations & Customizations
The beauty of a Pizza Grilled Cheese Sandwich is in its versatility. I often switch up the toppings based on what I have available. On nights when I have leftover veggies, I might throw in some sautéed mushrooms, bell peppers, or even fresh spinach. It’s a sneaky way to get extra nutrients into a cheesy delight!
For those who love a bit of heat, adding jalapeños or a sprinkle of crushed red pepper flakes can supercharge your sandwich! I also enjoy experimenting with different herbs. Adding fresh basil or oregano can make the sandwich feel even more like a pizza.
Finally, don’t forget about the bread! While I usually stick to sourdough, you can use any type of bread you adore. From soft white bread to hearty whole grain, each one will give the sandwich its unique flair. Consider a garlic loaf for an extra punch of flavor!
How to Store, Freeze & Reheat
If you find yourself with leftover Pizza Grilled Cheese Sandwiches, don’t worry! They store beautifully. Simply wrap them in foil and keep them in the fridge for up to three days. When I reheat mine, I usually opt for the skillet method to ensure they maintain that crispy crust—just set the heat to low and cover it with a lid for a few minutes until heated through.
For longer storage, I’ve successfully frozen these sandwiches. Once they’ve cooled, wrap each sandwich tightly in plastic wrap, followed by aluminum foil, and pop them in the freezer. They can last up to two months! When you’re ready to enjoy, just let them thaw overnight in the fridge and then reheat in the skillet.
The result is just as gooey and delicious as the first time you made them. Just a sprinkle of fresh herbs before eating brings everything back to life!
Conclusion
I hope you give this Pizza Grilled Cheese Sandwich recipe a try because it’s truly a delightful dish that brings all the comfort of both pizza and grilled cheese into one! It’s perfect for casual dinners, quick lunches, or whenever you need a nostalgic bite. Remember, the possibilities are endless, and experimenting with flavors is part of the fun in my kitchen. Happy cooking, and enjoy every gooey, cheesy moment!