
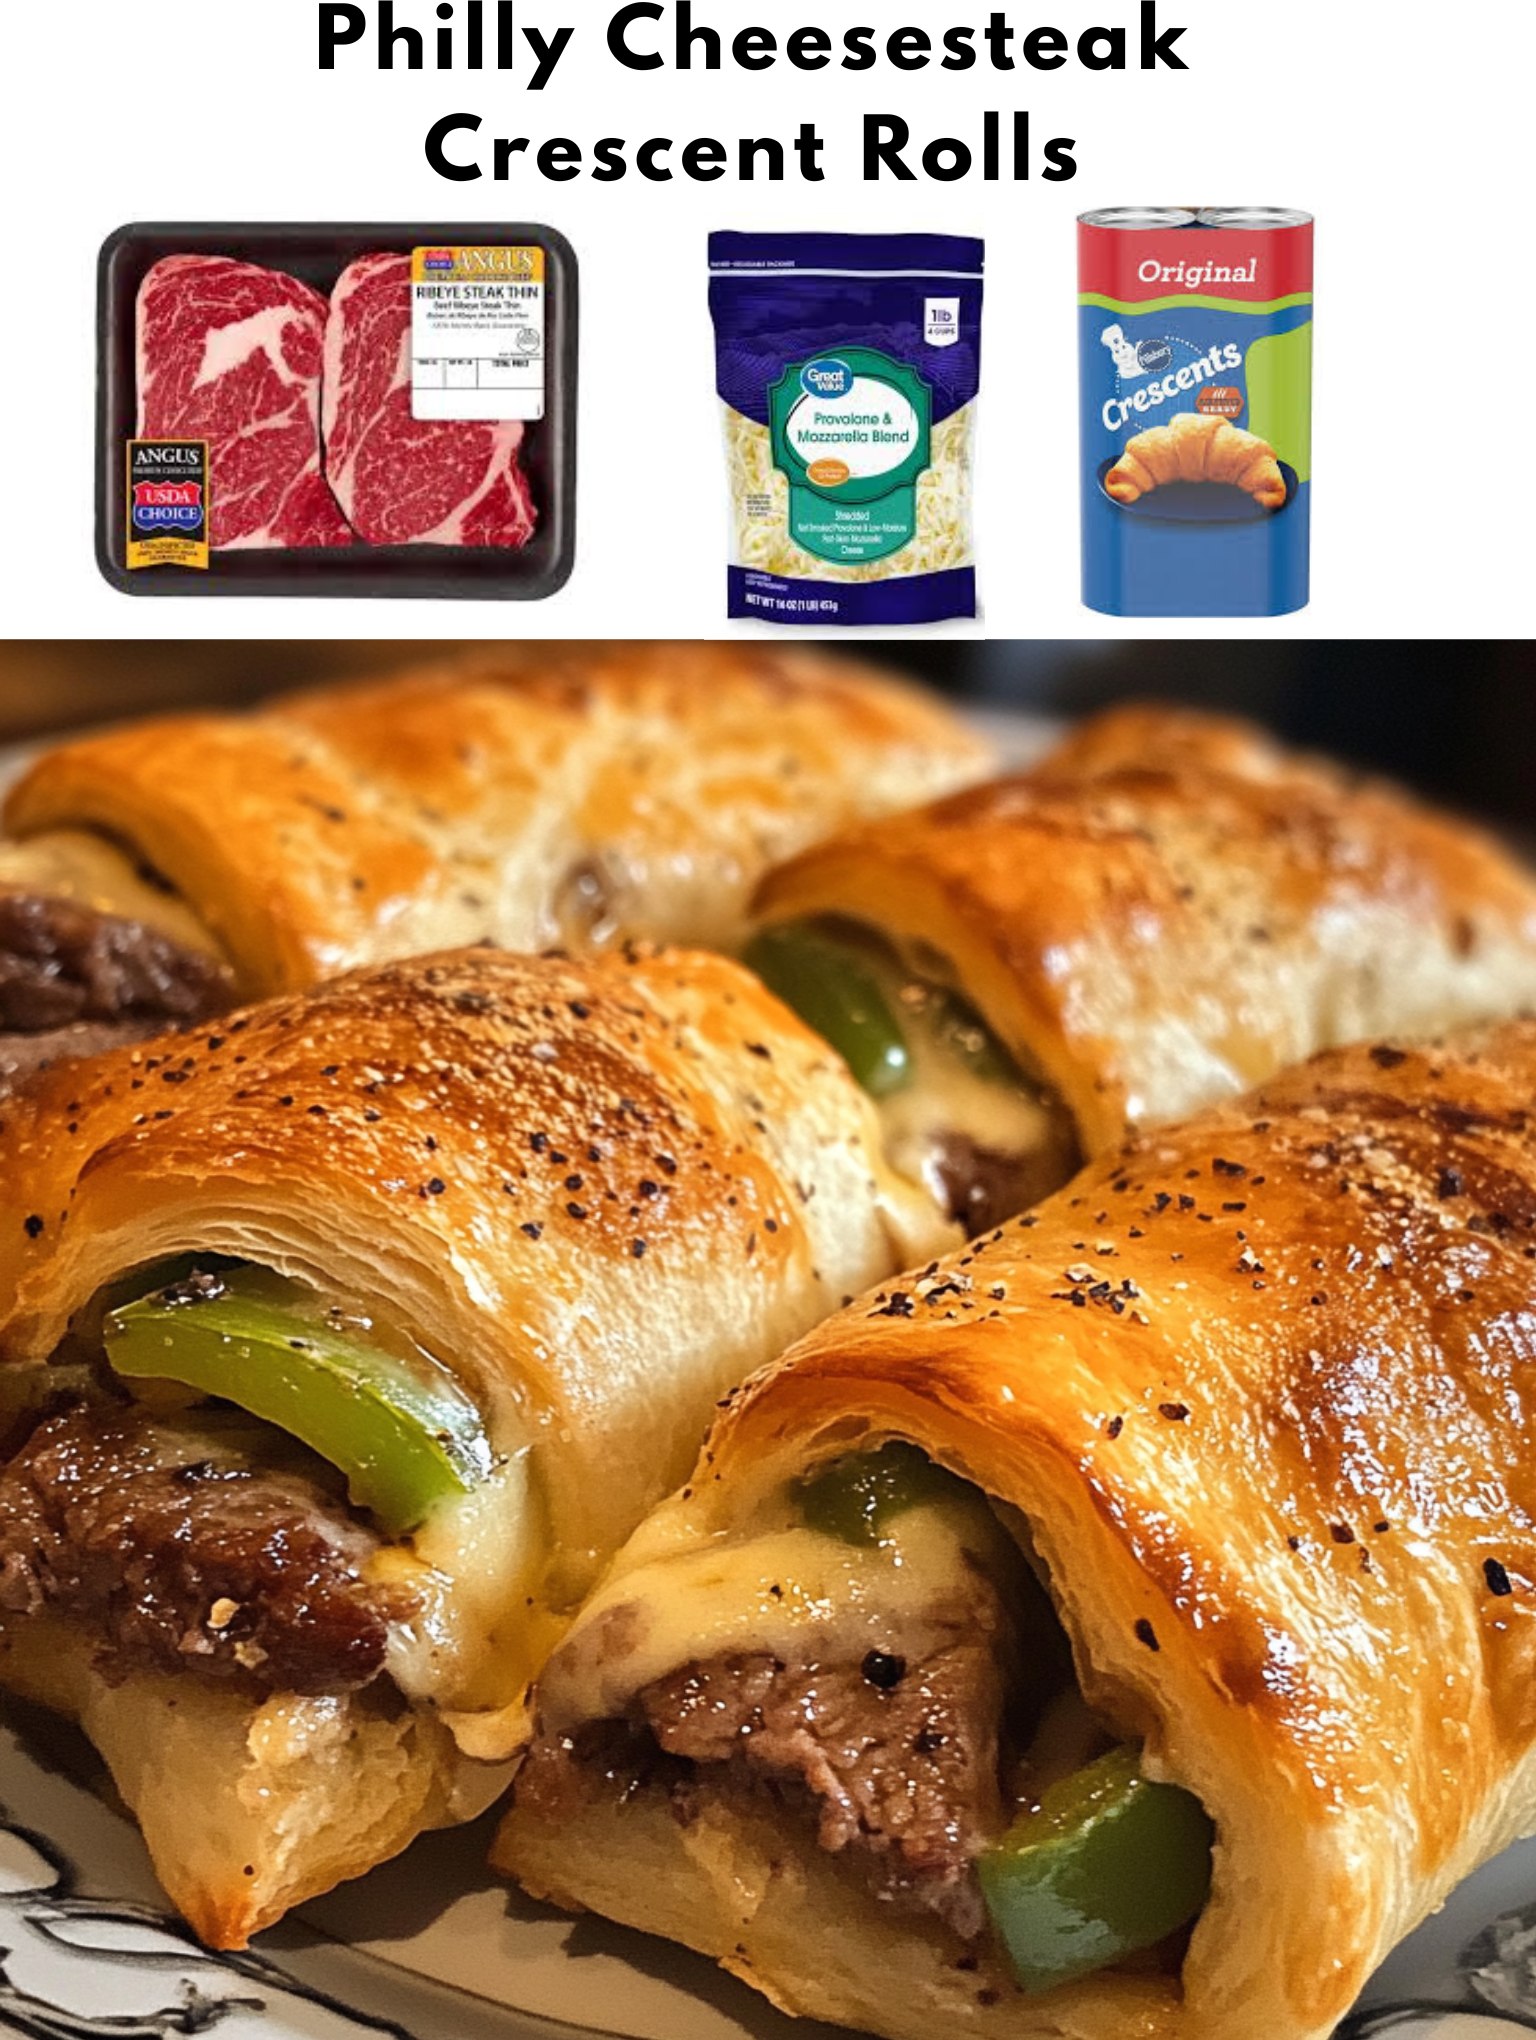
The idea for these Philly Cheesesteak Crescent Rolls struck me during a chaotic weeknight when my family was craving something fun and indulgent, but I had zero time for a complicated recipe. I stared at a roll of crescent dough in the fridge and a pack of shaved steak, and a lightbulb went off. As the onions and peppers sizzled and the steak hit the hot pan, that iconic savory aroma filled my kitchen. When I pulled the golden, puffed rolls from the oven, the cheese bubbling out the sides, I knew I’d created something special. They were an instant, messy, delicious hit—all the soul-satisfying flavor of a Philly cheesesteak, wrapped in a flaky, buttery hug.
Why You’ll Love This Recipe
You are going to flip for this recipe because it takes the legendary flavors of a Philly cheesesteak—the juicy steak, the sweet peppers and onions, the gooey cheese—and packages them into the most fun, dippable, and utterly addictive appetizer or snack. It’s incredibly quick to make, uses simple ingredients, and is guaranteed to be the star of any game day spread, party platter, or even a family dinner. They’re as enjoyable to make as they are to eat, and I promise they’ll disappear faster than you can say “go birds.”
Ingredients
- 1 (8 oz) can original crescent roll dough (8 count)
- 1 tablespoon olive oil or vegetable oil
- 1 small green bell pepper, thinly sliced
- 1 small yellow onion, thinly sliced
- 1/2 lb shaved steak or ribeye (often labeled “sandwich steak”)
- 2 cloves garlic, minced
- 1/2 teaspoon kosher salt
- 1/4 teaspoon black pepper
- 1/4 teaspoon garlic powder
- 6 slices Provolone cheese, cut in half (or 1 cup shredded provolone/mozzarella blend)
- Optional for serving: cheese sauce, marinara, or mayo-ketchup “special sauce” for dipping. (See the next page below to continue…)
Equipment Needed
- Large skillet
- Sharp knife and cutting board
- Mixing bowl
- Baking sheet
- Parchment paper or silicone baking mat
- Tongs or spatula
Step-by-Step Instructions
We start where every great cheesesteak begins: with the peppers and onions. Heat your oil in a large skillet over medium-high heat. Add your thinly sliced peppers and onions. Don’t rush this step—you want them to soften and get some beautiful caramelized edges, which takes about 6-8 minutes. Stir them occasionally, letting them sizzle and sweeten. I’ve learned that cooking them until they’re just translucent isn’t enough; you want them to be truly tender and sweet to balance the savory steak. Once they’re soft and golden, push them to the edges of the pan.
Now, add the shaved steak to the center of the skillet. It’s crucial to get the pan nice and hot here so the steak sears instead of steams. Break it up with your spatula as it cooks. After about 2 minutes, when it’s no longer pink, mix it in with the peppers and onions. Add the minced garlic, salt, pepper, and garlic powder. Cook for just one more minute until the garlic is fragrant. Be careful not to overcook the steak! It will continue to cook in the oven, and thin shaved steak can go from juicy to tough in an instant. I learned this the hard way and ended up with chewy filling. Transfer the entire mixture to a bowl and let it cool for at least 10 minutes. A hot filling will melt the crescent dough and make it impossible to seal.
While the filling cools, preheat your oven to 375°F (190°C) and line your baking sheet with parchment paper. Unroll the crescent dough and separate it into the 8 triangles. This is where the assembly fun begins. On the wide end of each triangle, place a small pile of the cooled steak mixture. The biggest tip I can give you here is: do not overfill. I know it’s tempting, but if you overstuff them, they will burst open in the oven and all the cheesy goodness will leak out. I’ve made that mistake, and it’s a delicious but messy tragedy. (See the next page below to continue…)
Now for the cheese! Place half a slice of provolone (or a generous pinch of shredded cheese) over the steak pile. Gently roll up each crescent, starting from the wide end and tucking the filling in as you go. Place each roll on your prepared baking sheet, point-side down, and give them a little space to expand. Bake for 11-13 minutes, or until they are puffed and a deep, glorious golden brown. The smell is incredible. Let them cool on the sheet for just 2-3 minutes before serving—the filling is like molten lava straight out of the oven. That brief rest lets the cheese settle just enough so you can pick one up without a catastrophe.
Pro Tips for Best Results
My absolute best tip is about the steak. I’ve tried this with thicker-cut steak strips I chopped myself, and it’s just not the same. You need the thin, shaved “sandwich steak” for authentic texture and quick cooking. If you can’t find it, pop a ribeye or sirloin in the freezer for 30 minutes until it’s very firm, then use a sharp knife to shave it as thinly as possible against the grain. This makes all the difference between a tender bite and a chewy one.
The second critical tip is letting your filling cool completely. I know, waiting is the hardest part when you’re hungry. But if you spoon that hot steak and pepper mixture onto the delicate crescent dough, it will start to melt the butter and fat in the dough immediately. This makes the dough greasy, impossible to seal properly, and it won’t puff up correctly in the oven. I spread my filling on a plate to cool it faster. A warm filling is okay, but a hot one is a recipe for flat, leaky rolls.
Finally, don’t skip the parchment paper on your baking sheet. Because of the cheese, some will inevitably bubble out and caramelize on the pan. Parchment paper makes cleanup an absolute breeze and prevents the bottoms from over-browning. I’ve tried it on a greased sheet, and the dripped cheese still stuck like cement. Parchment paper is my non-stick savior for any cheesy, bubbly recipe like this.
Common Mistakes to Avoid
The first mistake I made was using too much filling. In my enthusiasm, I piled the steak and peppers high, thinking more is better. What I got were rolls that wouldn’t seal, exploded in the oven, and created a burnt cheese mess on my baking sheet. You only need about 1 ½ to 2 tablespoons of filling per roll. It might not look like enough, but once the dough puffs, it’s the perfect ratio of flaky pastry to savory filling. (See the next page below to continue…)
Another common error is not seasoning the filling enough. The crescent dough is buttery and mild, so the filling needs to carry the flavor. Don’t be shy with the salt, pepper, and garlic powder. That little bit of garlic powder, in addition to the fresh garlic, adds a background warmth that makes it taste like a real cheesesteak shop sandwich. I tasted my filling for seasoning before letting it cool, and I recommend you do the same.
Using the wrong cheese is an easy pitfall. While any melty cheese will work, provolone is the classic Philly choice for a reason. It has a perfect melt and a sharp, tangy flavor that cuts through the richness. I tried it once with only mild mozzarella, and it tasted bland. A mix of provolone and a little white American cheese (for ultimate creaminess) is my gold-standard combo. Pre-shredded cheese often has anti-caking agents that can make the melt less smooth, so I always shred my own or use slices.
Finally, underbaking the rolls will leave you with a doughy, sad center. The tops might look browned, but the dough where it’s wrapped around the filling needs time to cook through. Bake until they are a uniform deep golden brown all over. If you’re worried about the tops getting too dark, you can tent them with foil for the last few minutes. A properly baked roll should be flaky and crisp all the way through, not gummy.
Serving Suggestions
I love serving these right on the baking sheet (placed on a trivet!) for a casual, help-yourself vibe. For dipping, I always offer a couple of options. A simple cheese sauce is a no-brainer for extra indulgence. My family also loves a “special sauce” made from equal parts mayo and ketchup with a dash of garlic powder and pickle relish. For a bit of tang, a side of marinara or even a garlic aioli works wonderfully.
These are the ultimate party food. For game day, I arrange them on a platter with a bowl of dipping sauce in the center and garnish with a little extra chopped parsley or sliced green onions for color. They pair perfectly with other easy finger foods like potato skins, chicken wings, or a simple veggie tray. They’re sturdy enough to be picked up and eaten with one hand, which is essential for any good sports-watching snack.
For a fun family dinner, I turn these into a meal by serving them with a big, crisp side salad or a bowl of tomato soup. It feels like a treat but comes together in minutes. I’ve even made a “Philly Cheesesteak Bar” where I set out the baked rolls and small bowls of extra toppings like sautéed mushrooms, hot cherry peppers, or different cheeses so everyone can customize their own plate.
Variations & Customizations
This recipe is a fantastic canvas. If you love mushrooms, add a handful of thinly sliced cremini mushrooms to the skillet with the peppers and onions. Let them cook down and release their moisture—they add an incredible earthy flavor. For a spicy kick, use a poblano pepper instead of green bell pepper, or add a few slices of jalapeño to the filling mix. A dash of Worcestershire sauce in the steak mixture adds a great depth of flavor.
You can absolutely change up the cheese. While provolone is classic, a sharp white cheddar gives a fantastic bite. For the ultimate melty experience, use Cheez Whiz inside the roll (just a small teaspoon) for a true, authentic Philly vibe. I’ve also made a “pizza steak” version by adding a spoonful of marinara sauce to the filling and using a mix of provolone and mozzarella.
For a different dough vehicle, you can use puff pastry sheets cut into squares instead of crescent rolls. They’ll be even flakier and more decadent. If you want to make them ahead for a party, you can assemble the rolls, place them on the parchment-lined sheet, and freeze them solid. Once frozen, transfer to a bag. Bake from frozen, adding 3-5 extra minutes to the baking time. It’s my secret for stress-free entertaining.
How to Store, Freeze & Reheat
These are best served fresh, but leftovers can be stored in an airtight container in the refrigerator for up to 2 days. They will lose some of their flakiness but will still taste delicious. To reheat, do not use the microwave, as it will make the pastry soggy. Instead, reheat them in a 350°F (175°C) oven or a toaster oven for 8-10 minutes until warm and crisp again. This brings back their texture beautifully.
You can freeze the unbaked, assembled rolls for a fantastic make-ahead option. After rolling them, place the sheet in the freezer until the rolls are solid (about 1-2 hours). Then, transfer them to a freezer-safe bag. They can be frozen for up to 2 months. When ready to bake, place the frozen rolls on a parchment-lined sheet and bake at 375°F, adding 3-5 minutes to the bake time. No need to thaw!
You can also freeze the baked rolls. Let them cool completely, then wrap individually in foil and place in a freezer bag. To reheat, place the frozen, foil-wrapped roll directly in a 350°F oven for 15-20 minutes, or until heated through. The texture won’t be quite as perfect as fresh, but it’s a great way to have a quick, satisfying snack on demand. I don’t recommend refreezing once thawed.
Conclusion
These Philly Cheesesteak Crescent Rolls are the ultimate proof that the most delicious ideas are often the simplest. They’re a joyful, shareable, and utterly craveable twist on a classic that never fails to bring a smile. I hope this recipe brings as much fun and flavor to your kitchen as it has to mine. They’re sure to become a requested favorite in your home, too. Now, go grab that roll of dough and get rolling—your new favorite snack awaits