
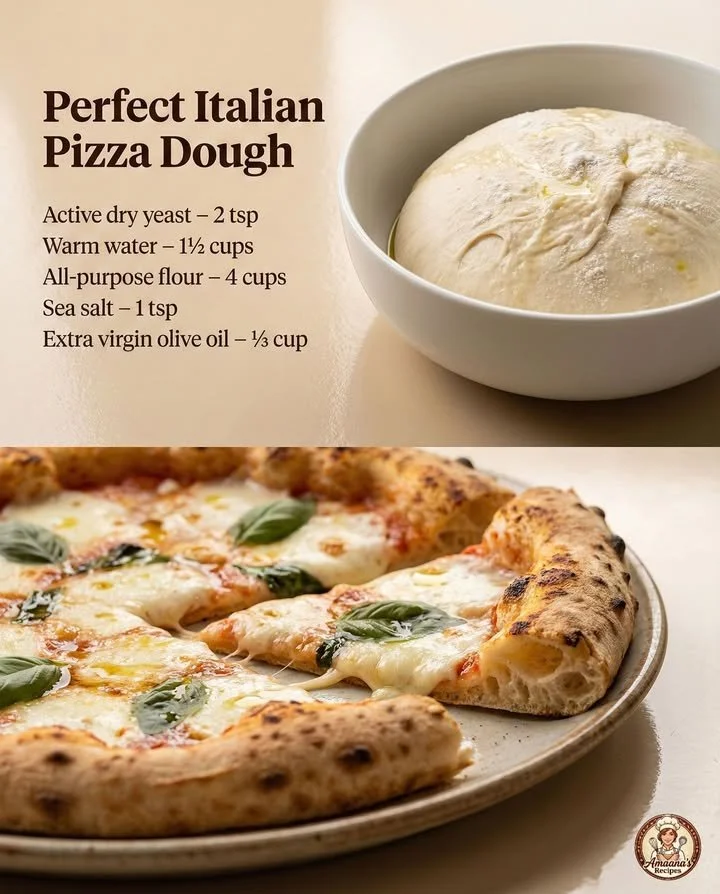
When it comes to creating the perfect Italian pizza, everything starts with the dough. There’s something almost magical about transforming simple ingredients into a fluffy, chewy crust that holds your favorite toppings. I’ve spent countless weekends experimenting in my kitchen, trying out various techniques to create my version of perfect Italian pizza dough—one that’s easily achievable and incredibly rewarding. Join me as I share the secrets to creating a delectable pizza dough that will make your homemade pizzas shine!
Why You’ll Love This Recipe
There are two main reasons why I adore this pizza dough recipe: it’s straightforward, and the results are phenomenal. The dough is soft and pliable, letting you create anything from a thick crust to a thin, crispy base. Plus, it requires minimal effort, making it a fantastic option for both beginners and seasoned home cooks alike. The aroma that fills your kitchen as it bakes is simply irresistible, inviting everyone to gather around the table. I promise, once you try it, you’ll never go back to store-bought! (See the ingredients in the next page below…)
Ingredients
– 2 ¼ teaspoons (1 packet) active dry yeast
– 1 ½ cups warm water (not too hot!)
– 4 cups all-purpose flour (plus extra for dusting)
– 2 teaspoons sea salt
– 1 tablespoon olive oil
– 1 teaspoon sugar (to feed the yeast)
Equipment Needed
– Mixing bowl
– Wooden spoon or dough whisk
– Plastic wrap or a kitchen towel
– Baking sheet or pizza stone
– Rolling pin
– Measuring cups and spoons
Step-by-Step Instructions
First, let’s activate that yeast. In my kitchen, I love using warm (not hot) water—about 110°F is perfect. Mix the yeast and sugar into the warm water in a bowl, letting it bloom for about 5-10 minutes, until it’s frothy. This step is crucial; you want to ensure your yeast springs to life! Once bubbly, stir in the olive oil. It’s such a comforting smell that fills the air. Now, it’s time to bring in the flour and salt. In another bowl, combine the flour and salt, and slowly add the yeast mixture, stirring to combine until it forms a shaggy dough. I often find myself using my hands at this point to make sure everything is nicely mixed together. (See the next page below to continue steps…)
Next, transfer the dough onto a floured surface and knead for about 8-10 minutes, or until the dough is smooth and elastic. I love getting my hands in the dough; it’s such a tactile experience! Once it reaches that perfect texture, place your dough in a large, greased bowl and cover it with plastic wrap or a kitchen towel. Let it rise in a warm, draft-free spot for about 1 to 2 hours, or until it doubles in size. The anticipation of watching it grow is half the fun!
After your dough has risen, punch it down gently, and turn it onto a floured surface. Divide it into 2 or 3 equal portions, depending on how large you’d like your pizzas. Shape each portion into a ball, and let them rest for another 30 minutes—this step is essential for achieving that lovely, chewy texture. Now it’s showtime! Roll out the dough to your desired thickness and transfer it to your baking sheet or pizza stone, ready to be topped with your favorite ingredients.
Finally, preheat your oven to the highest setting (usually around 475°F to 500°F) while you prepare your toppings. Once your oven is sizzling hot, it’s time to bake those pizzas for about 10-12 minutes. I can’t tell you how incredible the smell is as the cheese melts and the crust turns golden. Take a moment to savor it before serving!
Pro Tips for Best Results
Over the years, I’ve tried different brands of flour, and I’ve found that using high-protein bread flour can give you a chewier crust. It’s a small change, but it made a world of difference in my pizzas. I also recommend letting your dough rise in the refrigerator overnight for added flavor and chewiness—the longer fermentation process enhances the taste immensely.
Another tip I’ve learned is to ensure your baking surface is incredibly hot before placing your pizza on it. If you’re using a baking stone, preheat it at least 30 minutes prior to baking. This mimics the traditional wood-fired ovens, giving your crust that delightful, crispy finish without burning.
Lastly, don’t skip the olive oil! A little drizzle on the surface of the dough before it rises adds wonderful flavor and a delightful golden color. It’s these little details that make all the difference in creating a memorable pizza night.
Common Mistakes to Avoid
One of the most common mistakes I’ve encountered is using water that’s too hot when activating the yeast. This can kill the yeast and prevent your dough from rising. The sweet spot is warm, like a baby’s bath—comfortable to the touch but not scalding!
Another issue I’ve faced is over-kneading the dough. While it’s essential to develop the gluten, kneading it too long will make it tough instead of tender. I found that 8-10 minutes of gentle kneading is just about right, leaving the dough soft and pliable.
Also, be careful not to rush the rising time. In my early attempts, I sometimes skipped this step in a hurry, but allowing the dough to rise until it doubles in size is crucial for achieving that ethereal crust. Don’t cut corners here; patience pays off!
Finally, avoid overcrowding your pizza with too many toppings. I used to load on everything I could find in the fridge, which resulted in a soggy crust. Aim for a balance between flavor and texture for a truly satisfying pizza experience! (See the next page below to continue…)
Serving Suggestions
Once your pizzas are baked to golden perfection, there are countless ways to serve them! A simple sprinkle of fresh basil or arugula on top adds a lovely pop of freshness that elevates the flavors. I love drizzling a touch of balsamic glaze for that sweet tangy contrast—it’s a game-changer!
You can also create a DIY pizza buffet. Set out a variety of toppings—think pepperoni, mushrooms, olives, and colorful veggies—so everyone can customize their pizza just how they like it. It turns dinner into a fun and interactive experience; plus, it sparks creativity, and you might discover some amazing topping combinations!
For sides, a light arugula salad dressed with lemon vinaigrette pairs beautifully with pizza. The zesty freshness complements the richness of the cheese, making the perfect meal combination in my house.
Variations & Customizations
The beauty of this pizza dough is its versatility. If you’re looking for a bit of an upgrade, try adding some herbs (like oregano or garlic powder) directly into the dough for an extra flavor kick. I’ve also experimented with incorporating whole wheat flour for a nuttier taste—just adjust the hydration as necessary.
For those who love a good crunch, why not try a stuffed crust? Simply roll the dough out slightly larger, place cheese along the edges, and fold it over before sealing. Each bite of the crust is filled with melty goodness, and it’s always a hit at parties!
And let’s not forget about dessert pizza! After baking a traditional pizza, I’ve brushed the crust with melted butter and sprinkled it with cinnamon and sugar, then topped it with fresh fruit and a drizzle of glaze. It’s a delicious way to satisfy my sweet tooth!
How to Store, Freeze & Reheat
If you find yourself with leftover dough or pizza, storing it properly is essential. For the dough, wrap it tightly in plastic wrap and refrigerate it for up to three days. When I have extra dough, I often freeze it. Just place it in a freezer-safe bag, and it can last for about three months. When you’re ready to use it, thaw it overnight in the fridge, and let it return to room temperature before shaping.
For leftover pizza, simply place it in an airtight container in the fridge. To reheat, I recommend using an oven or a skillet rather than a microwave—the oven helps it maintain that delicious crunch! I usually heat the pizza at 375°F for about 10 minutes, or until it’s warm and crispy again.
If you’re in a hurry, a skillet works wonders too. Just cover it with a lid and heat on low for several minutes, checking often to ensure it doesn’t burn. You’ll be amazed at how fresh it tastes!
Conclusion
In conclusion, making your own Italian pizza dough at home is not just a cooking task; it’s an experience filled with delightful aromas, and moments of joy shared with loved ones around the table. I hope you’ve found this recipe as rewarding as I have. So roll up your sleeves, don your apron, and let’s make some pizza magic happen in your kitchen! Enjoy every bite—you’ve earned it!