
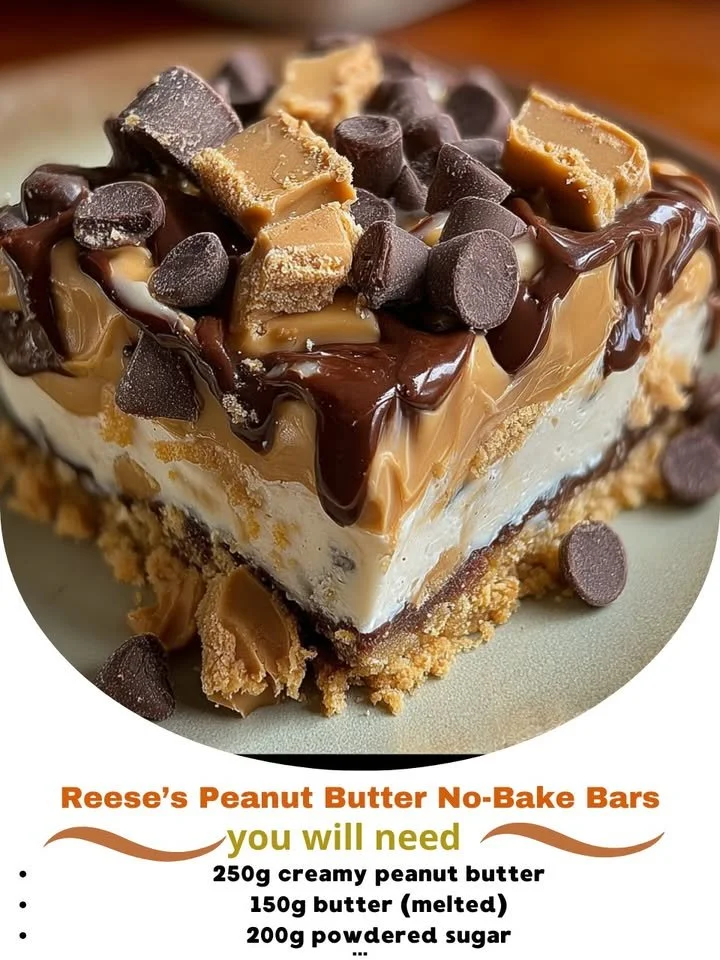
I’m excited to share my recipe for Reese’s Peanut Butter No-Bake Bars. The best part? You get all that delicious flavor without ever turning on the oven. As a peanut butter lover, I can assure you, these bars are going to become a favorite in your kitchen!
Why You’ll Love This Recipe
There’s something incredibly satisfying about a no-bake dessert, especially when it involves creamy peanut butter and rich chocolate. These Reese’s Peanut Butter No-Bake Bars are super quick to whip up and are always a big hit at gatherings or just for a family treat at home. Plus, the texture is so wonderfully chewy and delicious, you won’t be able to stop at just one! (See the ingredients in the next page below…)
Ingredients
– 1 cup peanut butter
– 1/2 cup unsalted butter, softened
– 1 cup powdered sugar
– 1 cup graham cracker crumbs
– 1 cup chocolate chips
– 1 tablespoon coconut oil (optional, for shiny chocolate)
Equipment Needed
– Mixing bowl
– 9×9 baking dish
– Rubber spatula
– Microwave-safe bowl (for melting chocolate)
– Parchment paper (optional, for easy removal)
Step-by-Step Instructions
To start, gather all your ingredients and equipment. In a mixing bowl, combine the softened butter and peanut butter until smooth and creamy. It’s so satisfying to mix these two together because the scent of the peanut butter wafts through the kitchen, making my mouth water! Once that’s well blended, add the powdered sugar and graham cracker crumbs and mix until everything is nicely incorporated. You’ll end up with a thick, sticky mixture that is simply divine. (See the next page below to continue steps…)
Next, you’ll want to prepare your baking dish. I like to line mine with parchment paper to make it easier to lift the bars out later. Spread the peanut butter mixture evenly into the dish using your rubber spatula, pressing it firmly to create an even layer. Once this is done, it’s time to melt the chocolate. In a microwave-safe bowl, combine the chocolate chips and coconut oil if you’re using it. Microwave in 30-second intervals, stirring in between, until fully melted and smooth.
Now pour the melted chocolate over your pressed peanut butter layer, spreading it evenly to cover the top. The sight of that glossy chocolate covering the creamy peanut butter is nothing short of heavenly! Once you’ve done that, pop the dish into the fridge and let the bars set for at least an hour (or until the chocolate is firm). This patience is tough but worth every second!
Once the bars are set, you can lift them out using the parchment paper. Cut them into squares or rectangles, depending on your personal preference. I love to serve them chilled, as they become a refreshing treat on a warm day. These bars are sure to bring smiles and happy bellies to all who indulge!
Pro Tips for Best Results
When I first made these bars, I tested the amount of powdered sugar and found that the sweetness can easily be adjusted to your taste. If you prefer a slightly less sweet bar, feel free to reduce the sugar a bit. Just remember that sweetness balances the richness of the peanut butter.
Another tip I’ve learned is to ensure your butter is at room temperature before mixing. This makes it super easy to blend with the peanut butter and helps create that creamy texture. Trust me, fighting with cold butter is not the way to go!
Lastly, if you really want that “Reese’s” crunch when you bite into your bar, consider adding some chopped peanuts on top of the chocolate layer before it sets. It adds a lovely textural contrast that makes every bite even more delightful.
Common Mistakes to Avoid
One common mistake I’ve made in the past is not mixing the peanut butter and butter thoroughly enough. This can lead to a clumpy texture which, while still tasty, isn’t as smooth as I’d like. Take your time to really incorporate them well. Trust me, it makes a difference! (See the next page below to continue…)
Another area to be careful about is the melting of the chocolate. It’s super easy to overheat chocolate in the microwave. Always start with shorter intervals and keep an eye on it as you stir. If you notice it starting to harden, it’s already too late!
Also, when cutting the bars, make sure to use a sharp knife that you can heat in warm water first. This ensures cleaner cuts and visually appealing bars. I regret the times I cut them cold, resulting in messy edges.
Remember, all these little tips can save you some headaches and lead to beautiful bars that your friends and family will adore!
Serving Suggestions
These Reese’s Peanut Butter No-Bake Bars are so versatile! I love serving them straight from the fridge for an afternoon treat, paired with a hot cup of coffee or tea. The combination of creamy peanut butter and rich chocolate pairs beautifully with warm drinks.
Another fun idea is to crush them up and use them as an ice cream topping. Just imagine your favorite vanilla or chocolate ice cream, topped with crushed no-bake bars. Pure bliss!
If you’re feeling adventurous, you could also layer these bars with yogurt and fresh fruit in a parfait. The crunchy bars add a delightful texture that complements the creaminess of the yogurt and the juiciness of the fruits.
Variations & Customizations
There are so many ways to customize these bars! If you want a nutty twist, try swapping out half the peanut butter for almond or cashew butter. Both of these nut butters add a lovely depth of flavor that pairs wonderfully with the chocolate.
For those of you who enjoy a little kick, adding a pinch of sea salt to the chocolate before it sets can enhance the flavor beautifully. It really brings out the sweetness and the richness, making each bite an explosion of flavor.
Finally, if you’re a fan of coconut, consider adding shredded coconut into the peanut butter mixture, or sprinkle some on top of the chocolate layer. The combination of peanut butter, chocolate, and coconut is heavenly—like a tropical treat!
How to Store, Freeze & Reheat
Storing these bars is super easy! Just keep them in an airtight container in the refrigerator, and they should stay good for up to a week. Just make sure they’re well-covered to keep that delicious chocolate layer from getting firm and crumbly.
If you want to make a larger batch or prep them ahead of time, they freeze beautifully! I’ve done this many times: cut them into squares and place them in a freezer-safe container. Just remember to use parchment paper between layers to prevent sticking. They can be kept in the freezer for up to three months.
When you’re ready to enjoy them again, just pull a few out and let them sit at room temperature for a bit. Or, if you’re in a hurry, you can microwave them for a few seconds. Just be careful not to heat them too long; we want to maintain that delicious creamy texture!
Conclusion
So there you have it—my simple and delightful recipe for Reese’s Peanut Butter No-Bake Bars! I hope you enjoy making these as much as I do, and that they bring a smile to your face and delight to your taste buds. Happy baking (without the baking), and enjoy every gooey, chocolatey bite!