
The very first time I made this Peanut Butter Fudge, my entire kitchen filled with that nostalgic warm, nutty aroma that instantly reminded me of childhood holiday gatherings. I remember standing over the stovetop watching the sugar and milk bubble gently, thickening into a syrup that felt almost magical. When I stirred in the peanut butter and felt the mixture turn smooth and glossy, it gave me that rush of excitement you only get when you know something incredibly delicious is just minutes away. This fudge has become one of my favorite “comfort sweets” because it’s unbelievably simple yet tastes like something lovingly passed down for generations.
Why You’ll Love This Recipe
You’ll love this Peanut Butter Fudge because it uses the simplest pantry ingredients yet results in one of the creamiest, smoothest fudges you’ll ever taste. There’s no candy thermometer, no complicated stages of boiling, and no intimidating techniques—just quick stovetop magic that turns into a beautiful pan of velvety fudge. It tastes rich and buttery without being overly sweet, and the peanut butter flavor is pure and satisfying. If you’re someone who appreciates easy recipes that still impress everyone, this one is going to feel like a dream.
Ingredients
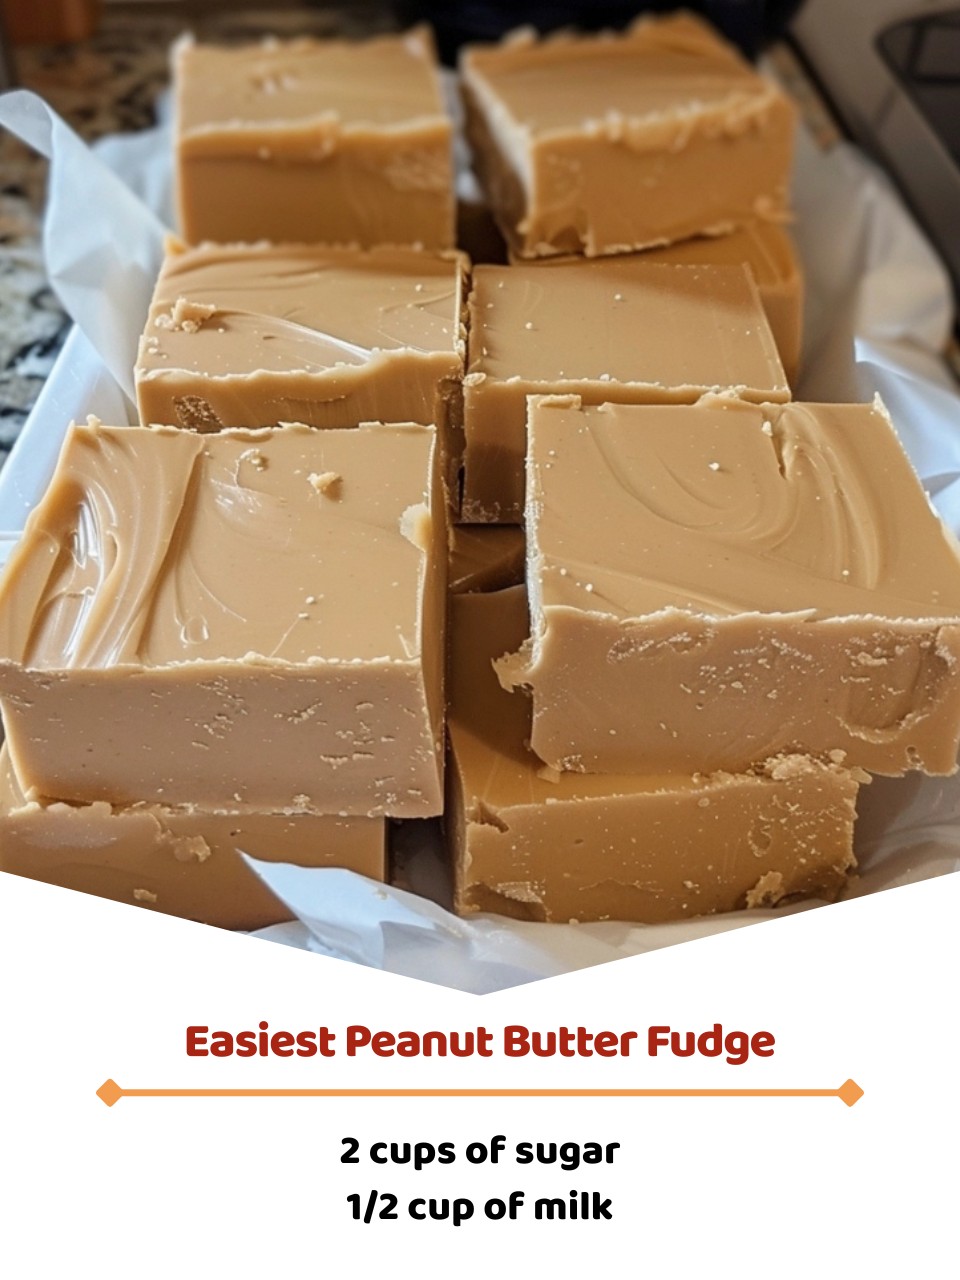
- 2 cups granulated sugar
- ½ cup milk
- 1 cup creamy peanut butter
- 1 teaspoon vanilla extract
- Pinch of salt (optional but recommended)
Most peanut butter fudge recipes have long ingredient lists or require marshmallow crème, but this version relies on simple, classic pantry staples. I’ve tried it with both natural and conventional peanut butter, and conventional peanut butter gives the smoothest texture. Natural peanut butter can work if you stir it extremely well and warm it slightly so the oils blend evenly, but the fudge will set a bit softer. The vanilla extract isn’t technically required, but it rounds out the flavor beautifully and makes the peanut butter shine even more. The pinch of salt intensifies sweetness and gives balance, so I never skip it.
Equipment Needed
- Medium saucepan
- Wooden spoon or heat-safe spatula
- Measuring cups
- 8×8-inch baking dish
- Parchment paper
- Butter or nonstick spray
A medium saucepan is essential because the mixture bubbles up as it heats. A wooden spoon holds up best to the heat and thick texture of the fudge, but any heat-safe spatula works. Lining your baking dish with parchment makes removal effortless—you can lift the whole slab out and slice clean squares. I’ve also greased the pan directly in the past, but parchment always gives the neatest results, especially if you plan on gifting or serving pieces.
Step-by-Step Instructions
I always begin by preparing my baking dish because fudge thickens quickly once removed from the heat. I line an 8×8 pan with parchment, leaving some hanging over the sides like little handles. Then I lightly butter the parchment to ensure an ultra-smooth finish. This step seems small, but it makes cutting perfect squares so much easier.
Next, I combine the sugar and milk in my saucepan over medium heat. I stir continuously as the sugar dissolves, watching the mixture turn glossy and smooth. After a minute or two, it begins to bubble gently. This is the stage where patience matters. I let it simmer steadily for about 2 ½ to 3 minutes without cranking up the heat too high. If you rush this step, the fudge won’t set properly later. I learned that the hard way on my second attempt, when I turned up the heat thinking it would be faster—it wasn’t.(See the next page below to continue…)