
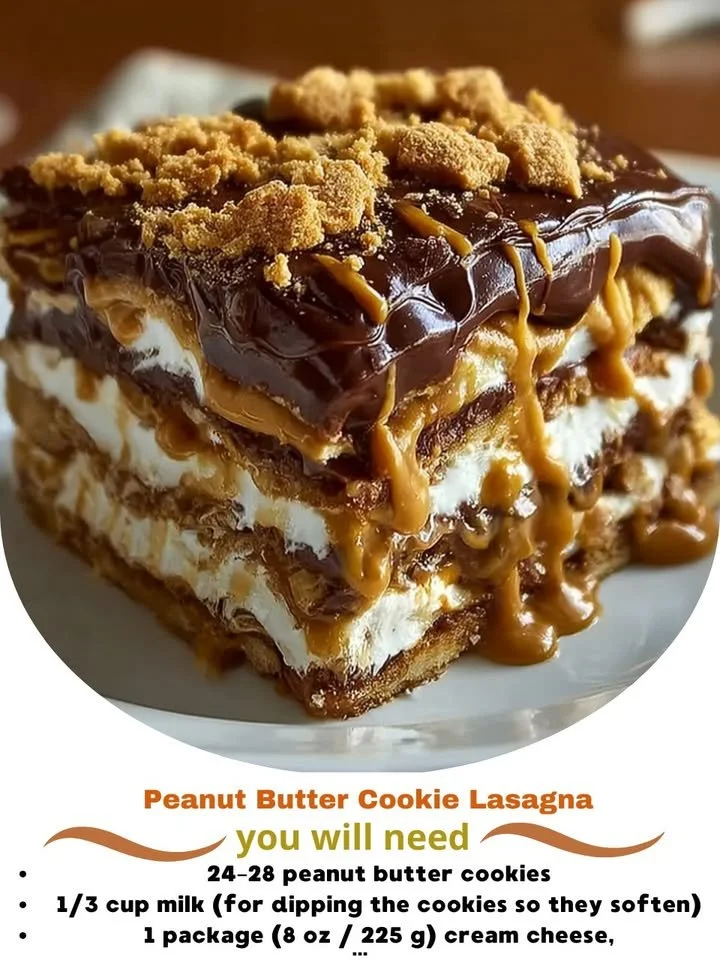
Welcome to my kitchen! Today, I’m so excited to share a recipe that combines two of my favorite things: peanut butter and dessert lasagna. This Peanut Butter Cookie Lasagna is a delightful treat that layers creamy peanut butter goodness with crunchy cookie layers, making it a show-stopping dessert that’s perfect for any occasion. Whether you’re having friends over or just want to indulge yourself, this dessert is sure to please.
Why You’ll Love This Recipe
There’s something magical about the combination of sweet, creamy, and crunchy textures in this dish that just brings a smile to my face. The layers of peanut butter, cookies, and whipped cream come together to create a texture sensation that is both satisfying and utterly indulgent. Plus, it’s no-bake, which makes it a breeze to whip up on lazy afternoons or when you’re short on time. It’s the perfect balance of flavors and will definitely leave your guests asking for the recipe! (See the ingredients in the next page below…)
Ingredients
– 1 package of peanut butter cookies (store-bought or homemade)
– 1 cup creamy peanut butter
– 1 cup powdered sugar
– 1 cup heavy whipping cream
– 1 teaspoon vanilla extract
– 1 cup chocolate chips (optional, for topping)
– Extra peanuts for garnish (optional)
Equipment Needed
– 8×8 inch baking dish
– Mixing bowls
– Electric mixer or whisk
– Spatula
– Measuring cups and spoons
Step-by-Step Instructions
First, I like to start by preparing my peanut butter layer. In a mixing bowl, I combine the creamy peanut butter and powdered sugar, blending them until it creates a smooth consistency that fills the kitchen with that warm, nutty aroma. Then, I whip the heavy cream in another bowl until soft peaks form, and gently fold this into the peanut butter mixture until well combined. This is such an amazing step, as the blend of textures already begins to shine through! (See the next page below to continue steps…)
Next, it’s time to layer it all up! I begin by spreading a layer of the peanut butter mixture evenly across the bottom of my baking dish. Following this, I carefully place a layer of peanut butter cookies right on top, making sure to cover the entire surface. Then, I repeat the process by adding another layer of the peanut butter mixture on top of the cookies, followed by another cookie layer. I make sure to end with the peanut butter mixture, creating a lovely and inviting top layer.
Once that’s done, I like to let my dessert chill in the fridge for at least two hours to let all the flavors meld together beautifully. Patience is key here! While it’s chilling, I start thinking about how to give it that extra something—sometimes I sprinkle chocolate chips on top before serving, or I’ll even drizzle some melted chocolate. The crispness of the cookies against the creamy peanut butter layer is a sight to behold!
When I finally take it out of the fridge, I slice through it and the smell is just heavenly. Each slice reveals those beautiful layers—it’s nothing short of a masterpiece! And trust me, the first bite is like a hug from the inside out. You’ll be hooked, I promise!
Pro Tips for Best Results
One thing I’ve learned from making this dessert many times is to really take your time with the whipping cream. I’ve tested it with store-bought whipped cream and homemade, and I must say, nothing beats freshly whipped. The taste and texture are so much better, and it really makes a difference in the overall quality of the dish.
Another tip is to let the layered dessert chill long enough. I recommend at least four hours, but if you can set it overnight, that’s even better. It gives the cookie layers a chance to soften and absorb all those creamy flavors, resulting in the ultimate indulgence. Trust me, letting it chill is worth the wait!
Lastly, if you want to add a touch of flair, consider garnishing with crushed peanuts or a sprinkle of flaky sea salt just before serving. I tried it once, and the contrast of flavors brought out the peanut butter even more, elevating the entire experience!
Common Mistakes to Avoid
One common mistake I’ve made in the past is skimping on the chilling time. I know it can be tempting to cut corners, but rushing this step means you lose out on that delicious melding of flavors. I’ve even tried to serve it right after assembling and the texture was all off! Trust me, patience pays off here. (See the next page below to continue…)
Also, I’ve found that using overly crumbly cookies can lead to a less-than-ideal texture. If your cookies don’t hold their shape, you might end up with a mushy layer instead of a delightful crunch. So, choose cookies that are sturdy enough to hold their own against that creamy peanut butter layer.
Another hiccup I faced was not measuring the peanut butter correctly. If too much goes into the mix, it can overwhelm the dessert and drown out the other flavors. I’ve learned to stick to the measurements outlined in this recipe for the perfect balance of flavors.
Lastly, I used to think I could get away with not using a spatula when spreading the layers. But trust me, spreading it evenly is key to maintaining those lovely layers. A good spatula helps give you that professional bakery look—after all, we eat with our eyes first!
Serving Suggestions
When it comes to serving, I love to let my guests see the layers. I cut clean slices and serve them on a nice dessert plate, perhaps with a dollop of extra whipped cream on the side. It looks so inviting! Plus, pairing this dessert with a cup of coffee or a glass of cold milk is always a winning combination.
If I have extra time, I’ll take it up a notch and serve it alongside some fresh berries. The tartness of the berries contrasts beautifully with the sweetness of the Peanut Butter Cookie Lasagna, making it a delightful balance of flavors.
For special occasions, I sometimes decorate the top with a drizzle of chocolate or a sprinkle of crushed peanuts for an added touch of elegance. It not only looks stunning but adds an extra layer of flavor that makes it feel even more indulgent.
Variations & Customizations
There are so many fun ways to customize this dessert! For example, if you’re not a huge fan of peanut butter, you can easily swap it out for almond butter or sunflower seed butter. Just keep in mind that the taste will shift a bit, but it’ll still be delicious!
Another fun variation I’ve experimented with is adding layers of chocolate pudding in between the peanut butter layers. The chocolaty addition creates an even richer dessert that is irresistible for chocolate lovers. You can layer it in just like the peanut butter mixture, and it turns out so decadently good!
Lastly, for a more festive touch, I’ve added crushed graham crackers as a layer. This gives a delightful crunch while making it feel reminiscent of a s’more. It’s a surprising twist that everyone loves, and it’s perfect for summer gatherings!
How to Store, Freeze & Reheat
Storing this dessert is super easy! Just cover the baking dish with plastic wrap or aluminum foil and keep it in the refrigerator. It will last for about 3 to 5 days—if it even lasts that long in my house!
If you want to prepare this in advance, you can freeze it as well! Just be sure to tightly wrap it in plastic wrap and then in aluminum foil. It can stay frozen for up to 2 months. Whenever I freeze it, I make a note on my calendar so I can remember to take it out the night before we plan to enjoy it!
As for reheating, this dessert is best served cold or at room temperature, so there’s no need to reheat it. Just slice it straight from the fridge—who doesn’t love a chilled slice of creamy peanut butter bliss?
Conclusion
I hope you’re as excited to try this Peanut Butter Cookie Lasagna as I am to share it with you! It’s a delightful and easy dessert that’s sure to become a new favorite in your kitchen. Whether you’re whipping it up for a special occasion or just to enjoy on a cozy night at home, I’m sure it’ll bring joy and smiles all around. Happy baking!