
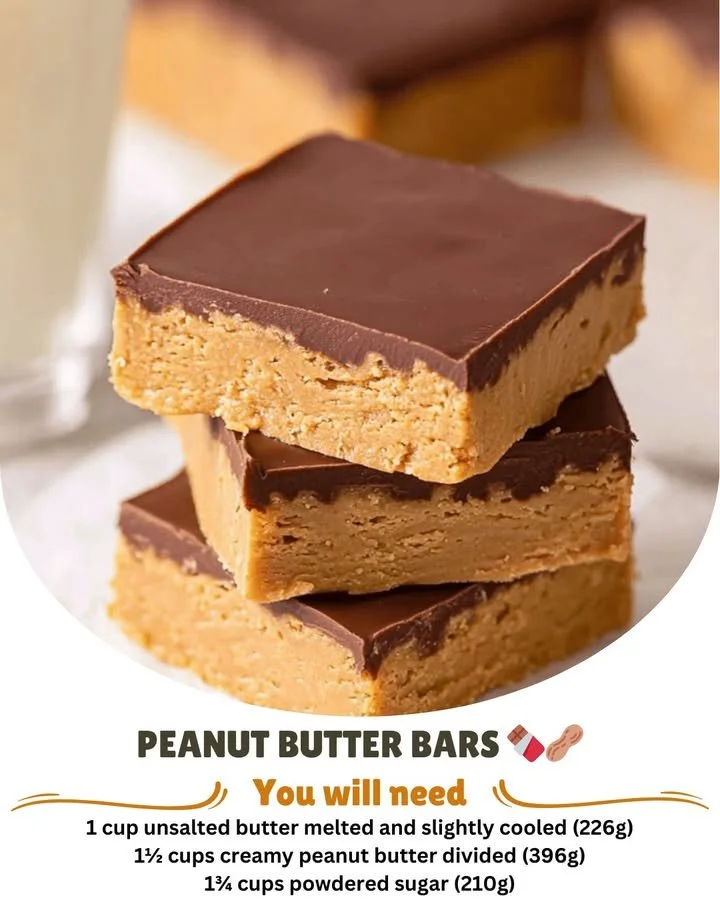
Hello, friends! Today in my kitchen, I’m excited to share one of my all-time favorite recipes: Peanut Butter Bars. These delightful treats have been a staple in my home for years, and there’s something wonderfully nostalgic about biting into a chewy, peanut buttery square that takes me right back to my childhood. Whether it’s for an afternoon snack, a potluck, or just to satisfy a sweet tooth, these Peanut Butter Bars never disappoint!
Why You’ll Love This Recipe
I can promise you that once you experience the perfect balance of creamy peanut butter and sweet, rich goodness, you’ll find yourself making these bars on repeat. They’re simple to whip up and require minimal ingredients, making them a favorite when I need something quick and delicious. Plus, they’re always a hit with family and friends! Trust me, they disappear faster than I can cut them. (See the ingredients in the next page below…)
Ingredients
- 1 cup creamy peanut butter
- 1/2 cup unsalted butter, softened
- 1 cup brown sugar, packed
- 1/2 cup granulated sugar
- 2 large eggs
- 1 teaspoon vanilla extract
- 1 1/2 cups all-purpose flour
- 1 teaspoon baking powder
- 1/2 teaspoon salt
- 1/2 cup chocolate chips (optional)
Equipment Needed
- Mixing bowl
- Electric mixer or whisk
- Spatula
- 9×13-inch baking pan
- Parchment paper (optional)
- Measuring cups and spoons
Step-by-Step Instructions
Let’s get started on these mouthwatering bars! First, I preheat my oven to 350°F (175°C) because a warm oven is key for baking perfection. While that’s heating up, I grab a large mixing bowl and beat together the creamy peanut butter and softened butter until smooth and creamy. The moment I start mixing, the rich peanut aroma fills my kitchen, and I can’t help but smile! Once that’s done, I add in the brown sugar and granulated sugar, mixing until everything is combined. It’s important to really cream these ingredients together for that dreamy texture. (See the next page below to continue steps…)
Next, I add the eggs, one at a time, ensuring that each is well incorporated before moving on to the next. I toss in the vanilla extract, which adds an amazing depth of flavor. After that, I sift together the flour, baking powder, and salt in a separate bowl, then gradually mix it into the wet ingredients. This step is crucial because it ensures that every bar is perfectly fluffy and avoids any lumps. If you want to add some chocolate chips for an extra treat, now’s the time to fold them in gently!
Once everything is mixed, I line my 9×13-inch baking pan with parchment paper for easy removal, but you can also grease it if you prefer. I pour the batter into the pan, smoothing it out evenly. The batter is thick and luscious, and I can’t resist sneaking a taste (I recommend you do the same!). Finally, I pop the pan into the oven and bake for about 25 to 30 minutes, or until the edges are golden brown, and a toothpick inserted in the center comes out clean. The smell of these bars baking is heavenly, and I usually find it hard to wait to dig in!
Pro Tips for Best Results
I’ve made these Peanut Butter Bars a few times with different brands of peanut butter, and I can say, using a good-quality creamy peanut butter makes a noticeable difference. I once tried using a natural peanut butter that had separation, and the texture was a bit crumbly in comparison. Stick with a well-mixed, classic brand, and you can’t go wrong!
Another tip I’d share from my many rounds of testing is to keep an eye on the baking time. Every oven is a bit different, and I learned that underbaking leads to gooey bars that are hard to slice, while overbaking makes them dry. I often check them a few minutes before the timer goes off, just to ensure they’re perfectly baked.
Lastly, let these bars cool in the pan for at least 10 minutes before trying to cut them. It may seem tempting to dive right in, but giving them time to set helps them hold together better and makes for cleaner slices. Trust me, you’ll thank yourself later!
Common Mistakes to Avoid
One mistake I made early on was not measuring my peanut butter correctly. I scooped out what I thought was a cup, but it turned out to be far too generous! The result? A gooey mess that didn’t set properly. Make sure to level off that measuring cup for accuracy! (See the next page below to continue…)
Another pitfall to avoid is skimping on the mixing. Those homogenous ingredients are what create the magical texture we’re after! If you don’t mix well enough, you might end up with clumps of flour or sugar that haven’t blended in properly. It’s worth taking those extra few minutes.
When it comes to baking, the use of fresh ingredients matters. Old baking powder can lead to flat bars, and stale ingredients can affect the flavor. I recommend checking the expiration dates and storing your pantry ingredients properly to avoid this common error.
Lastly, don’t forget to allow the bars to cool completely before cutting. If you cut into them while they’re still warm, they’re likely to fall apart. Patience is key for those beautiful squares that are Instagram-ready!
Serving Suggestions
Once these Peanut Butter Bars are sliced and ready to go, I love to present them on a colorful platter. They make an excellent addition to any gathering or picnic, and I often sprinkle a few extra chocolate chips on top for visual appeal.
They pair beautifully with a glass of cold milk! There’s just something so satisfying about dunking a square in milk and savoring that delicious combo of flavors. If you’re feeling extra fancy, top them off with a scoop of vanilla ice cream—heaven on a plate!
And let’s not forget about breakfast options! Slather a little more peanut butter on top or enjoy a piece alongside some fresh fruit for a protein-packed start to your day.
Variations & Customizations
One of the great things about Peanut Butter Bars is how customizable they are! If you’re in the mood for something fruity, consider adding in some chopped nuts or dried cranberries for a burst of flavor and texture. I’ve experimented with this a few times, and it adds a delightful crunch that I can’t get enough of.
If you have a sweet tooth like me, try drizzling some melted chocolate on top after they’ve cooled. It adds an elegant touch and can really elevate the dessert! You can even sprinkle some sea salt on top for an enticing sweet-salty combination.
For those who want a healthier twist, you can substitute half the all-purpose flour with whole wheat flour or even oatmeal for a heartier version. Just keep in mind that this may change the texture slightly, but it’s a great way to add some fiber to your snack!
How to Store, Freeze & Reheat
Storing these bars is a breeze. I usually place any leftovers in an airtight container at room temperature, although they can also be stored in the fridge for an extended shelf life. They last about a week on the counter, but trust me, they won’t stick around that long!
If you want to make a batch ahead of time, these bars freeze wonderfully. I cut them into squares, and then I place parchment paper between layers in a freezer-safe container. When I’m in the mood for a treat, I simply pull one (or two) out, and they’re ready to enjoy after just a few minutes of sitting at room temperature.
Reheating them is easy, too! If I’m feeling indulgent, I pop one onto a microwave-safe plate and heat it for about 10-15 seconds. It softens perfectly, making it almost taste like it’s fresh out of the oven again. Yum!
Conclusion
I hope you’re as excited to try these Peanut Butter Bars as I am to bake them! They really embody the cozy, heartwarming feeling of home and are sure to delight anyone who takes a bite. Get ready for compliments and rave reviews! Happy baking, friends!