
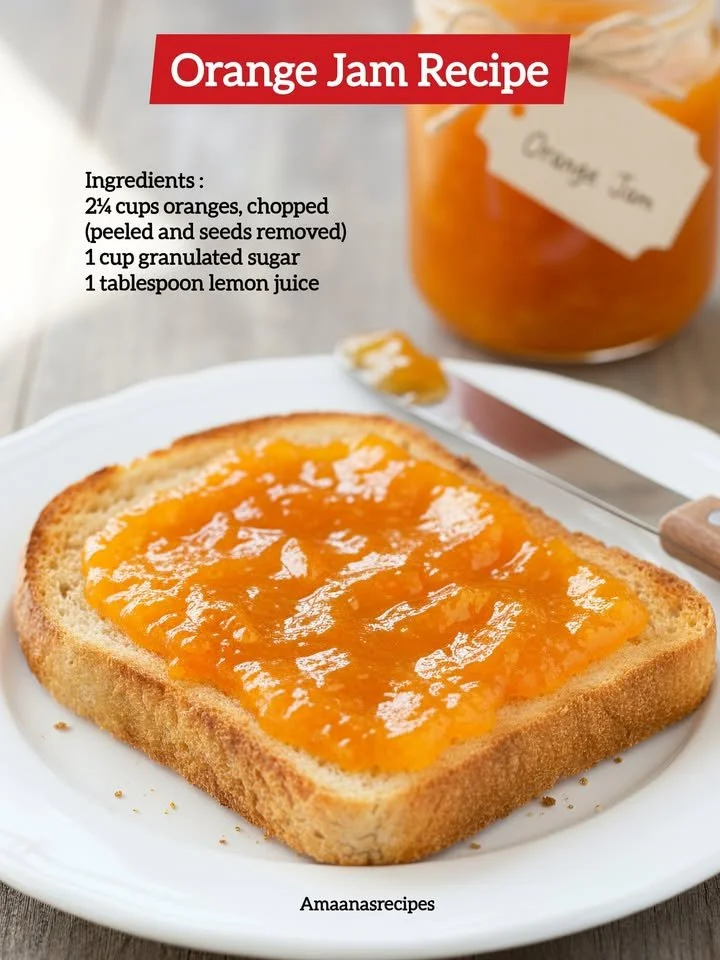
There’s something truly magical about the vibrant color and zesty aroma of homemade orange jam. Sitting in my kitchen, I often find myself reminiscing about the sun-soaked citrus orchards where the sweetest oranges grow. This recipe for orange jam brings that bright, sunny flavor right into my home, filling my space with a cheerful scent that awakens my senses. With just a few simple ingredients and some love, I can transform fresh oranges into a delightful spread that’s perfect for slathering on toast or dolloping on yogurt.
Why You’ll Love This Recipe
If you’ve never made jam before, this orange jam recipe is a fantastic starting point. The balance of sweet and tart flavors combined with the fresh zest of oranges makes your taste buds dance. Plus, it’s incredibly versatile! I love how it brightens up breakfast or serves as a unique ingredient in various desserts. Once you’ve tried it, you’ll find that store-bought jams seem lackluster in comparison. It’s a true labor of love, and the satisfaction of creating something so delicious in my kitchen is hard to beat. (See the ingredients in the next page below…)
Ingredients
- 4 cups of freshly squeezed orange juice (about 10-12 oranges)
- Zest from 2 oranges
- 2 tablespoons of lemon juice
- 4 cups of granulated sugar
- 1 packet (1.75 oz) of fruit pectin
- 1/4 teaspoon of salt
Equipment Needed
- Large pot
- Sterilized glass jars with lids
- Wooden spoon
- Ladle
- Candy thermometer (optional)
- Cheesecloth or fine strainer
Step-by-Step Instructions
To start, I wash the oranges thoroughly since I’ll be using both the zest and juice. After that, I zest two of the oranges before slicing them in half and squeezing out the juice. What I love about this part is the bright, citrusy scent that fills my kitchen; it’s just so uplifting! Once I have my juice ready, I pour it into a large pot, adding the orange zest, lemon juice, and salt, then mixing everything together. Next, I bring it to a gentle boil over medium heat. If you want to use a candy thermometer, aim for a temperature of about 220°F. (See the next page below to continue steps…)
After reaching that perfect boiling point, I carefully stir in the fruit pectin. It’s fascinating to watch as the mixture thickens slightly. I then add the granulated sugar in increments, mixing well until completely dissolved. My kitchen smells absolutely heavenly at this stage, and the vibrant color is simply mesmerizing! Once everything is well mixed, I return it to a boil and keep cooking for another 10-15 minutes. This is where the magic really happens: the jam starts to gel and transform into that lovely, spreadable consistency we all adore.
Once finished, I remove the pot from the heat and let it cool slightly. Meanwhile, I prepare my sterilized jars by placing them upside down on a lint-free cloth. When the jam is still warm but not hot, I ladle it into the jars, filling each jar to about ¼ inch from the top. After tightly sealing them with lids, I can’t help but do a little dance around my kitchen, knowing I’ve created something special. Lastly, I allow the jars to cool completely on the counter, where they’ll eventually pop as they seal—a sure sign that I’ve done it right!
Pro Tips for Best Results
One thing I’ve learned through trial and error is to always use fresh oranges whenever possible. Trust me, the difference in flavor is significant! I tested this recipe with both fresh and frozen oranges and found that the fresh juice yields a brighter and more aromatic jam that brings that citrus magic to life. Plus, I like to zest the oranges right before juicing them; the oils in the skin are at their peak freshness, adding an extra burst of flavor!
I also recommend using a quality fruit pectin. There are so many options available out there, but I’ve found that the powdered variety gives me the best results. It produces a firmer set, and I’m always pleased with the final texture. If you prefer a softer jam, you can adjust the amount of sugar slightly and experiment a bit until you find the perfect balance that suits your taste buds.
Lastly, patience is key! Allow the jam to cool completely before moving it to the fridge, and try to resist the temptation to dig in right away. Letting it rest for at least 24 hours allows the flavors to meld together beautifully. I promise, it will be worth the wait!
Common Mistakes to Avoid
One mistake I’ve made in the past is not properly preparing my jars before filling them with jam. It’s critical to use sterilized jars to keep the jam preserved safely. A quick trip through the dishwasher or a soak in hot, soapy water followed by rinsing and drying works wonders. Skipping this step can lead to spoilage, and no one wants to waste all that hard work!
Another thing to keep in mind is the cooking time. It’s easy to get busy chatting or distracted while stirring. If I don’t boil the jam long enough, it may not set correctly, resulting in a syrupy consistency. On the flip side, boiling it for too long can make it gummier than desired. I recommend using a candy thermometer to save yourself from any guesswork! (See the next page below to continue…)
Also, be cautious about overfilling your jars. Leaving that ¼ inch space at the top is essential for safe sealing and expansion, especially since the jam can bubble during the cooling process. If I fill them too high, the lids can pop off, and it’s just a mess. I’ve been there, trust me!
Lastly, pay attention to the sweetness level. Depending on the juiciness and ripeness of the oranges, you may not need the full amount of sugar. If you prefer a less sweet jam, taste as you go and adjust accordingly. There’s no right or wrong here; it’s all about what pleases your palate!
Serving Suggestions
Once my orange jam is ready, I can’t wait to dig in! One of my favorite ways to enjoy it is simply slathered on a toasted slice of homemade bread or English muffin. The warm bread and sweet, tangy jam create a delightful contrast that I find utterly irresistible! I often pair it with a cup of herbal tea for a cozy morning ritual.
Another way I love to use this jam is as a topping for yogurt or oatmeal. A dollop of orange jam over creamy yogurt adds that perfect citrus zing, and it transforms a simple breakfast into something extra special. I often add a sprinkle of granola for crunch and texture, not to mention those lovely layers of flavor!
Lastly, this vibrant jam makes a fantastic ingredient in desserts. I sometimes use it as a filling for cakes or pastries, and it brightens up everything from tarts to cupcakes. It’s amazing how one jar of homemade orange jam can elevate multiple dishes and bring a little sunshine to my day!
Variations & Customizations
If you’re feeling adventurous, there are plenty of ways to customize this orange jam recipe. One of my all-time favorites is adding a splash of vanilla extract during the cooking process. It complements the citrus beautifully and creates a delicious depth of flavor that’s simply enchanting!
For those who enjoy a kick of spice, why not try incorporating a pinch of cinnamon or ginger? I once added a teaspoon of fresh minced ginger, and the result was a warm, spiced jam that I couldn’t get enough of. It added an aromatic note that was perfect for cozy winter breakfasts!
Finally, consider infusing your jam with herbs. Adding a few sprigs of fresh rosemary during cooking gives an unexpected twist that makes for a lovely pairing with savory dishes, like cheese boards. Don’t be afraid to experiment with flavors until you discover your perfect combination!
How to Store, Freeze & Reheat
Once my jars of orange jam are completely cool, I store them in the fridge if I plan to use them within a few weeks. The jam will keep well in the refrigerator for about 1 month. However, if I’ve made a larger batch and want to save some for later, I often freeze the jam. I simply pour some into freezer-safe containers, leaving a little room at the top for expansion, and store them in the freezer. It can last for up to a year!
When I’m ready to use my frozen jam, I let it thaw in the refrigerator overnight. It’s just as delicious as the day I made it! I usually take out only what I need, so I can keep the other portions frozen until I’m ready for another burst of citrus goodness.
I should mention that, after thawing, the jam might be a bit softer than when freshly made, but it still retains that delightful flavor. If I want to elevate it again, I often stir in a splash of fresh orange juice or zest before serving, which brings back that fresh citrus aroma.
Conclusion
Making orange jam has truly become one of my cherished kitchen traditions. The joy of transforming simple ingredients into something so delightful and flavorful brings warmth to my heart each time I prepare it. I hope you find as much happiness in this recipe as I have. So grab those bright oranges, and let your kitchen be filled with love, sunshine, and the sweet scent of homemade jam!