
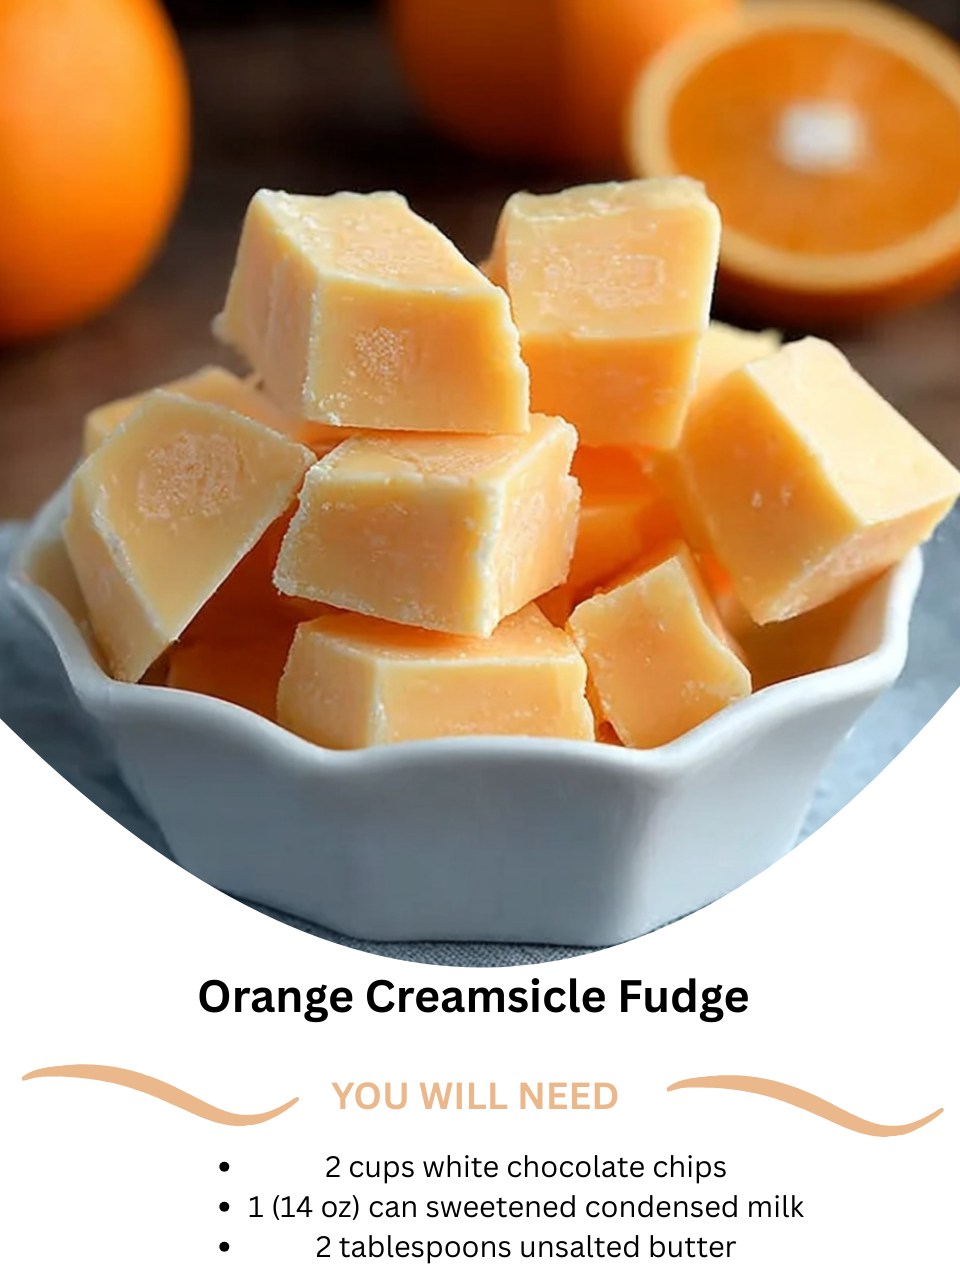
The first time I made Orange Creamsicle Fudge, it was a complete experiment born from a deep craving for a taste of summer nostalgia. I wanted to capture that magical, creamy-orange flavor of the ice cream truck treat I loved as a kid, but in a rich, melt-in-your-mouth form. As the white chocolate and sweetened condensed milk melted together on my stovetop, the kitchen filled with a sweet, vanilla-tinged aroma. Then, I stirred in that vibrant orange flavor, and the whole space suddenly smelled like a sunny, joyful dream. Watching it set into perfectly creamy, swirled squares was pure satisfaction. This fudge is my little edible happiness project, and it never fails to bring a smile.
Why You’ll Love This Recipe
You are going to adore this recipe because it is astonishingly simple—just three core ingredients!—yet the result tastes like you spent all day in a fancy candy kitchen. It delivers that iconic, creamy orange-vanilla flavor in a decadent, smooth fudge that feels both fancy and fun. It’s the perfect make-ahead treat for parties, teacher gifts, or just a sweet pick-me-up. From my experience, it’s a guaranteed crowd-pleaser that has friends and family always asking, “How did you make this?!” Trust me, the pride you’ll feel is almost as sweet as the fudge itself.
Ingredients
- 2 cups high-quality white chocolate chips
- 1 (14 oz) can full-fat sweetened condensed milk
- 2 tablespoons unsalted butter
- 1 ½ teaspoons pure vanilla extract
- 1 ½ – 2 teaspoons orange extract (to taste)
- Orange gel food coloring (a few drops)
- A pinch of fine sea salt (optional, for balancing sweetness)
(See the next page below to continue…)
Equipment Needed
- An 8×8 inch baking pan
- Parchment paper
- Medium-sized, heavy-bottomed saucepan
- Rubber spatula
- Two small bowls for dividing the mixture
- A knife for swirling
Step-by-Step Instructions
First, get your pan ready—this is a step you don’t want to be rushing through later. I line my 8×8 inch pan with parchment paper, leaving some overhang on two sides. This little “sling” is a lifesaver for lifting out the set fudge in one perfect block. Trust me, trying to pry it out of an unlined pan is a recipe for crumbly disaster. Now, in your heavy-bottomed saucepan, combine the white chocolate chips, the entire can of sweetened condensed milk, and the butter. Turn the heat to the absolute lowest setting possible.
This is the most critical phase: melting everything together slowly and gently. I stir almost constantly with my rubber spatula, making sure to scrape the bottom and corners of the pan to prevent any scorching. White chocolate is notoriously finicky and can seize up if it gets too hot. You’re looking for a completely smooth, glossy, lava-like mixture with no lumps. Once it’s perfectly melted and combined, I immediately remove it from the heat. The aroma at this point is wonderfully sweet and buttery.
Now, for the fun part: creating the creamsicle swirl. I divide the warm fudge mixture roughly in half between two bowls. To one bowl, I stir in the pure vanilla extract. To the other, I add the orange extract and just a few drops of orange gel food coloring until I get that perfect, creamy orange hue. Gel coloring is key here—I tried liquid once and it made the mixture slightly grainy. I then alternately scoop large spoonfuls of the vanilla and orange fudge back into the prepared pan, creating a checkerboard pattern.(See the next page below to continue…)
Finally, it’s time to create that beautiful marbled effect. I take a knife or a toothpick and gently drag it through the pan in wide, sweeping S-shapes and figure-eights. Don’t overdo it! My first batch, I got carried away and swirled it into a homogenous peach color. You want distinct ribbons of orange and vanilla. Once swirled to your liking, let the pan sit at room temperature until completely cool, then cover and refrigerate for at least 4 hours, or ideally overnight. The wait is the hardest part, but it’s essential for the perfect, sliceable texture.
Pro Tips for Best Results
I tested the chocolate quality three different ways, and here’s what I learned: the brand of white chocolate chips matters immensely. A higher-quality brand with real cocoa butter will give you a far smoother, creamier melt and a less waxy finish than bargain chips. If you can find them, using a chopped-up bar of good white chocolate (like Ghirardelli or Baker’s) makes this fudge truly sublime. It’s the difference between a good treat and an incredible one.
Here’s what I learned the hard way about flavoring: pure extracts are non-negotiable. That little bottle of imitation vanilla or orange flavoring won’t give you the same depth and won’t hold up as well against the sweetness. The pure orange extract is what delivers that true, bright creamsicle essence without tasting artificial. And don’t be shy with it—start with 1.5 teaspoons and taste a tiny bit (it will be sweet!), adding up to 2 teaspoons if you want a stronger punch.
For the cleanest slices, you need patience and a hot knife. After the fudge has fully set in the fridge, I lift the whole block out using the parchment paper and place it on a cutting board. I run a large, sharp knife under very hot water, wipe it completely dry, and then make my cuts. I re-heat and wipe the knife between every few cuts. This gives you those stunning, professional-looking squares with clean layers and swirls, instead of squished or ragged edges.
Common Mistakes to Avoid
My first batch, I was impatient and turned the heat up to medium to melt things faster. Big mistake. The white chocolate seized almost immediately, turning into a grainy, clumpy mess that was beyond saving. Don’t do what I did! Low and slow is the only way to go with this fudge. If you see even a hint of graininess, you’ve likely gotten it too hot. Constant, gentle stirring over the lowest flame is your best friend.(See the next page below to continue…)
Another classic error is skipping the parchment paper. I thought, “It’s a non-stick pan, it’ll be fine.” Oh, was I wrong. Even with buttering the pan, the fudge stuck terribly and I had to essentially chip it out in broken pieces. The parchment paper sling isn’t just a suggestion; it’s your guarantee of perfect, intact bars. It’s the one piece of equipment I will never, ever make this fudge without again.
When it comes to the orange coloring, less is more. I once added too much liquid food coloring in an attempt to get a vibrant shade, and it altered the texture of that portion of the fudge, making it slightly softer and stickier. Gel or paste food coloring is highly concentrated, so you only need a few drops to achieve a beautiful color without adding excess moisture that can throw off the fudge’s setting ability.
Finally, don’t rush the setting time. I’ve poked it at the two-hour mark, and while the top is firm, the center is still much too soft to slice cleanly. A full four hours is the bare minimum, but overnight in the fridge is truly ideal. This allows the fats to fully crystallize, giving you that firm yet creamy bite. If you try to cut it too early, you’ll just get a gooey, delicious mess—which you can still eat with a spoon, but it won’t give you those beautiful squares.
Serving Suggestions
I love serving this fudge at room temperature. I take it out of the fridge about 15-20 minutes before serving, which allows the flavors to bloom and the texture to soften just slightly into that perfect, creamy bite. Arranged on a simple white platter, the vibrant orange and white swirls look absolutely stunning and always get compliments before anyone even takes a bite.
For a casual gathering, I like to pair it with a pot of lightly citrusy herbal tea, like orange blossom or chamomile, or a cup of strong coffee. The bitterness of the coffee cuts through the sweetness of the fudge beautifully. It’s also fantastic as part of a dessert board alongside some fresh berries, dark chocolate truffles, and shortbread cookies for a variety of textures and flavors.
During the holidays or for a special gift, I’ll stack the squares in a clear cellophane bag tied with a bright orange ribbon, or arrange them in a festive tin lined with parchment. I always include a little note that says “Orange Creamsicle Fudge” because people are so delighted and surprised by the flavor. It’s a treat that feels both nostalgic and special.
Variations & Customizations
If you’re a chocolate-orange fan, this recipe is a perfect canvas. I’ve tried adding a thin layer of semi-sweet chocolate on top. After swirling the fudge in the pan, I’ll melt about ½ cup of dark chocolate chips with a teaspoon of shortening, pour it over the top, and let it set. The combination of dark chocolate with the orange-vanilla beneath is absolutely divine, like a sophisticated Terry’s Chocolate Orange in fudge form.
For a fun, crunchy twist, try folding in some add-ins. In the vanilla portion, I’ve stirred in a handful of finely chopped vanilla wafer cookies or even crushed shortbread for a subtle texture. You could also add a small handful of toasted coconut to the orange portion for a tropical creamsicle vibe. Just be sure any add-ins are at room temperature so they don’t shock the warm fudge.
You can play with the extracts, too, to create different “creamsicle” flavors. I’ve had great success using 1.5 teaspoons of pure lemon extract and yellow food coloring for a sunny lemon-vanilla version. A friend tried it with raspberry extract and pink coloring, and it was a huge hit. The basic sweet, creamy fudge base is wonderfully adaptable to whatever fruity flavor you’re craving.
How to Store, Freeze & Reheat
For storing, I keep the fudge in an airtight container in the refrigerator. It stays perfectly fresh and maintains its ideal texture for up to two weeks this way. I always place sheets of parchment between layers to prevent them from sticking together. You can keep it at room temperature for a day or two if your kitchen is cool, but I find the fridge keeps it firmer and preserves that clean, creamy mouthfeel better.
This fudge freezes beautifully! I learned this when I made a double batch for the holidays. Wrap the whole block or individual squares tightly in plastic wrap, then place them in a heavy-duty freezer bag or airtight container. It will keep for up to 3 months. The key is preventing freezer air from reaching it, which can cause ice crystals and affect the texture. I’ve found no loss in flavor at all.
To thaw, I simply transfer the wrapped fudge from the freezer to the refrigerator and let it thaw slowly overnight. Trying to thaw it on the counter can cause condensation, which can make the surface sticky. Never try to microwave it to speed up the process—it will melt into a puddle. The slow fridge thaw brings it right back to its original, perfect state, ready to be enjoyed.
Conclusion
Making this Orange Creamsicle Fudge has become one of my favorite kitchen rituals, a surefire way to conjure a little sunshine and sweetness no matter the season. It’s proof that a few simple ingredients, handled with a bit of care and a lot of love, can create something truly magical and memorable. I hope you’ll give it a try and experience that same burst of creamy, citrusy joy. Happy cooking, and don’t forget to lick the spatula—it’s the cook’s reward