
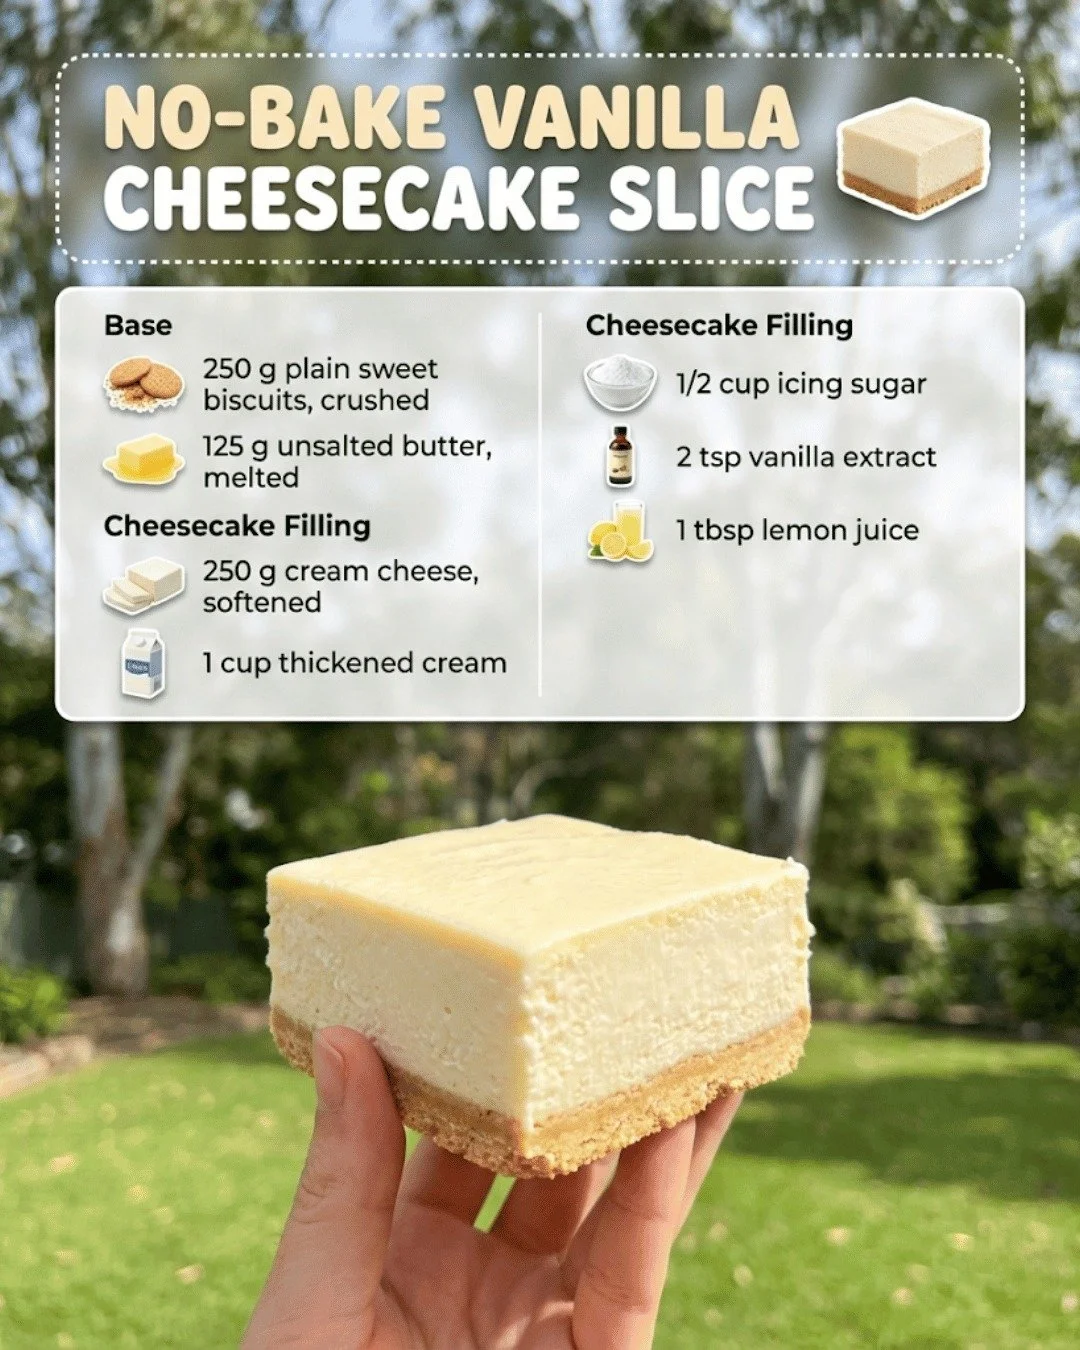
When the craving for something sweet hits, but the thought of turning on the oven feels like too much, I have the perfect solution for you: No-Bake Vanilla Cheesecake Slice! This delightful dessert is not only simple to make but also incredibly refreshing and creamy, perfect for any occasion. Trust me, once you try this recipe, it will quickly become a staple in your kitchen for all your sweet tooth emergencies!
Why You’ll Love This Recipe
This No-Bake Vanilla Cheesecake Slice is so versatile and satisfying. It has that perfect creamy texture that melts in your mouth, and the vanilla flavor is simply heavenly without being overwhelming. Plus, the best part is you don’t have to sweat it out in front of the oven! It’s great for entertaining or simply indulging after a long day. I promise you, one slice simply won’t be enough. (See the ingredients in the next page below…)
Ingredients
– 250g digestive biscuits (or similar cookies)
– 125g unsalted butter, melted
– 400g cream cheese, softened
– 100g icing sugar
– 200ml heavy cream
– 1 teaspoon vanilla extract
– Zest of 1 lemon (optional)
Equipment Needed
– 9-inch square or rectangular baking dish
– Mixing bowl
– Electric mixer or whisk
– Rubber spatula
– Measuring cups and spoons
– Parchment paper (for easier removal)
Step-by-Step Instructions
To begin, crush the digestive biscuits into fine crumbs. I usually do this by placing them in a zip-lock bag and giving them a good roll with my trusty rolling pin. Once you have a fine crumb consistency, mix the crumbs with the melted butter until fully combined. Transfer this mixture into your prepared baking dish, pressing it down firmly to create a nice, even base. This step is crucial as it gives your cheesecake slice its deliciously crunchy texture. (See the next page below to continue steps…)
Next, in a mixing bowl, combine the softened cream cheese and icing sugar. Using an electric mixer or a hand whisk, beat them together until smooth and creamy. I love taking a moment at this step to admire how beautifully rich and thick the mixture looks. Then, pour in the heavy cream and vanilla extract, mixing on low speed until it combines. Increase the speed to medium and beat until soft peaks form. This ensures your cheesecake gets that fluffy texture we all adore.
Now, carefully fold in the lemon zest if you’re using it—this adds a lovely brightness to your cheesecake. Spread the cream cheese mixture over the prepared base and smooth the top with a spatula. I always like to give it a gentle shake to level it out. Cover your dish with plastic wrap and let it set in the fridge for at least four hours, but overnight is even better if you can wait that long!
Once it’s set, it’s time for the fun part—cutting into your No-Bake Vanilla Cheesecake Slice! Remove it from the baking dish using the parchment paper for easy lifting. Cut into desired slices, serve, and watch as everyone enjoys every bite. This dessert really is a crowd pleaser!
Pro Tips for Best Results
I tested this recipe three ways, trying different biscuit bases, and I found that digestives provide the best flavor and texture. Another great tip is to ensure your cream cheese is at room temperature; it blends so much more easily, resulting in a super creamy filling. When whipping the cream, don’t over-whip it, or you may end up with a buttery texture rather than the light and fluffy consistency you’re after.
Lastly, I’ve also tried adding a hint of almond extract along with the vanilla, and it added a delightful twist to the flavor without being overpowering. So, if you’re feeling adventurous, don’t hesitate to experiment a little!
Common Mistakes to Avoid
One mistake I often made in my early baking adventures was not ensuring my bowl and utensils were cold enough before whipping the cream. This can cause the cream not to whip properly, leading to a flat cheesecake. A simple fix is to chill your mixing bowl and whisk for about 15 minutes in the fridge before you start.
Another thing I learned is to be patient with the setting time. I once pulled mine out of the fridge too early, hoping for creamy bliss, but instead ended up with a slightly wobbly mess that didn’t hold its shape. Give it that time; it’s worth the wait! (See the next page below to continue…)
Additionally, make sure to press the biscuit base firmly enough. If it’s too loose, it will crumble apart when you cut it, which can be frustrating. I learned that the hard way and ended up with more crumbs than slices!
Finally, always taste as you go! I find it so helpful to adjust sweetness and flavors to suit my preferences, especially the vanilla. Each brand has its unique flavor, and you may want to add just a touch more to get it just right.
Serving Suggestions
When it comes to serving my cheesecake slice, I like to keep it simple yet elegant. A sprinkle of powdered sugar on top just before serving gives it a beautiful finishing touch and makes it look extra fancy. I’ve also found that topping with fresh berries—like raspberries or strawberries—adds a delicious tartness that pairs perfectly with the creamy cheesecake.
If I’m feeling indulgent, drizzling a bit of chocolate sauce on each slice brings in a delightful richness that everyone loves. I’ve even served it with a dollop of whipped cream for that extra special touch, and trust me, it’s always a hit!
Lastly, for gatherings, I love to present it on a beautiful platter and let guests serve themselves. Something about a dessert buffet brings everyone together and creates a lovely, communal vibe.
Variations & Customizations
One of the best aspects of this no-bake cheesecake is how easily it can be customized. For a chocolate version, simply swap out some of the cream cheese with melted chocolate or use chocolate cookies for the base. You could even swirl in some caramel or fruit preserves for a fun flavor twist.
Another fun idea is to experiment with different extracts, like coconut or hazelnut, to create unique flavor profiles. These subtle changes can elevate the cheesecake and make every experience feel new.
And if you’re dairy-free, don’t fret! You can substitute the cream cheese with a non-dairy variety and use coconut cream in place of heavy cream. I’ve tested this with great success, and it’s just as delightful!
How to Store, Freeze & Reheat
To store any leftover cheesecake (if there’s anything left!), simply cover it with plastic wrap or place it in an airtight container. It stays fresh in the refrigerator for up to five days, but I bet it won’t last that long!
For those of you wanting to make this ahead of time, it freezes wonderfully. Just cut the cheesecake into slices and wrap each one tightly in plastic wrap before placing them in a freezer-safe container. It can be frozen for up to three months, ready for a sweet treat whenever you need one!
When it’s time to enjoy those frozen slices, simply remove them from the freezer and let them thaw in the fridge for a few hours. I like to grab a slice in the morning and let it sit until dessert time; it’s the perfect afternoon treat to look forward to!
Conclusion
I hope you find as much joy in making this No-Bake Vanilla Cheesecake Slice as I have in my kitchen. It’s a delightful, easy, and versatile dessert that never fails to impress family and friends alike. Enjoy every creamy, dreamy bite, and happy baking!