
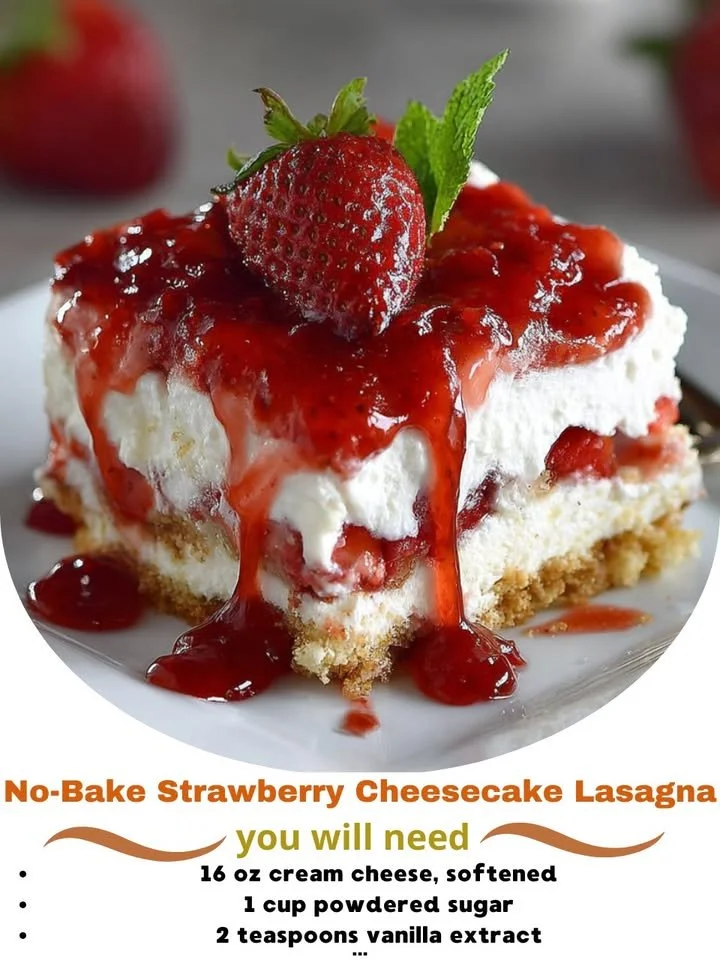
Welcome to my cozy kitchen! Today, I’m thrilled to share one of my all-time favorite desserts: No-Bake Strawberry Cheesecake Lasagna. If you love strawberries and creamy cheesecake, this delightful dish is an absolute must-try. It’s light, refreshing, and perfect for a warm day or any gathering where you want to impress friends and family without spending hours in the kitchen. Plus, the best part? No baking required!
Why You’ll Love This Recipe
This dessert is a showstopper without all the fuss. The layers of creamy cheesecake, sweet strawberries, and crunchy graham crackers come together harmoniously to create an indulgent experience that will have everyone coming back for seconds (or thirds!). As someone who appreciates a good dessert that doesn’t involve a million steps, this recipe fits the bill perfectly. It’s quick, easy, and so delicious! (See the ingredients in the next page below…)
Ingredients
– 2 packages (8 oz each) cream cheese, softened
– 1 cup powdered sugar
– 1 teaspoon vanilla extract
– 1 cup heavy whipping cream
– 2 cups fresh strawberries, sliced
– 1 package (14.4 oz) graham cracker crumbs
– 1/2 cup unsalted butter, melted
– 1 tablespoon sugar
– Additional strawberries for topping (optional)
Equipment Needed
– Mixing bowls
– Electric mixer
– 9×13 inch baking dish
– Spatula
– Measuring cups and spoons
– Plastic wrap or foil
Step-by-Step Instructions
Let’s jump right into making this luscious dessert! First, I like to prepare the graham cracker crust. In a mixing bowl, combine the graham cracker crumbs, melted butter, and a tablespoon of sugar. Once it’s all mixed together, press this mixture firmly into the bottom of your 9×13 inch baking dish to form a solid crust. I use the back of a measuring cup to get it nice and even. This crust is the perfect base that gives you that satisfying crunch with every bite. (See the next page below to continue steps…)
Next, in another bowl, beat the softened cream cheese with the powdered sugar and vanilla extract until it’s smooth and creamy. This part smells divine, and I can hardly wait to dive in! In a separate bowl, whip the heavy cream until stiff peaks form. Gently fold the whipped cream into the cream cheese mixture until combined. The texture is light and airy, just how I love it.
Now it’s time to layer this beautiful dessert! Start with half of the cream cheese mixture, spreading it evenly over the graham cracker crust. Then, add a layer of fresh sliced strawberries on top. I love the burst of color and sweetness they bring to the dish! Repeat these layers with the remaining cream cheese mixture and strawberries. Finish by covering it with plastic wrap or foil and let it chill in the fridge for at least four hours to set. The waiting may be the hardest part, but it’s absolutely worth it!
When the time’s up, and you finally pull this beauty out of the fridge, it’s time for the moment of truth. Cut yourself a generous piece, drizzle with extra strawberries if you like, and get ready for a heavenly dessert experience!
Pro Tips for Best Results
I’ve made this No-Bake Strawberry Cheesecake Lasagna a few times, and I’ve learned some tricks along the way that I think you’ll find helpful! First, make sure your cream cheese is at room temperature before you start mixing. This ensures a smooth and creamy texture that blends beautifully with the other ingredients. Trust me; it makes a world of difference.
Another tip is to use fresh strawberries when they are in season for the best flavor. I remember the first time I made this dessert with store-bought strawberries that were a bit bland, and it didn’t have that same delightful impact. Fresh, ripe strawberries are juicy and sweet, adding a vibrant taste that pairs perfectly with the creamy filling.
Lastly, if you have time, letting the dessert sit in the fridge overnight enhances the flavor even more! I’ve tested it this way, and the cheesecake develops a richer taste, making it even more indulgent. Plus, it gives the layers a chance to meld together beautifully.
Common Mistakes to Avoid
One of the most common mistakes I’ve made with this recipe is not chilling it long enough. If you serve the cheesecake lasagna too soon, it may fall apart when you cut into it. I know it’s tempting to dive right in, but patience truly pays off here. Allowing it to chill for at least four hours—or even better, overnight—makes all the difference in the texture and presentation. (See the next page below to continue…)
Another thing I’ve learned is to be cautious with the whipped cream. You want those stiff peaks but be careful not to over-whip it! If you whip it too much, it can become grainy, and that’s not the silky texture we’re aiming for in this cheesecake lasagna. Just whip until those peaks hold their shape.
Don’t skip on the melting of the butter for the crust, either. I once tried to save a few minutes by using softened butter and ended up with a crumbly crust that didn’t hold together well. Melting the butter ensures that the crumbs stick together beautifully, giving you that perfect crunch that complements the smooth cheesecake filling.
Serving Suggestions
When serving this No-Bake Strawberry Cheesecake Lasagna, I love to pair it with a dollop of whipped cream on top—it adds an extra layer of creamy goodness. Sometimes, I sprinkle a few more fresh strawberries around the plate for a colorful presentation. It’s the little details that can really elevate the dessert.
For occasions like summer barbecues or family gatherings, I like to serve it alongside some light refreshments, like iced tea or lemonade. The bright flavors of the dessert pair wonderfully with these drinks, enhancing the overall experience. It’s perfect for warm days when you want something refreshing!
I also recommend considering small individual servings if you’re entertaining. Using ramekins or dessert cups to create mini versions of this cheesecake lasagna can make for an adorable presentation, and people love having their own little dessert to enjoy!
Variations & Customizations
While I love this classic strawberry version, there are endless possibilities for customizations! For instance, if you’re a fan of chocolate, adding a layer of chocolate pudding or even using chocolate graham crackers for the crust could be a delicious twist. The rich chocolate flavor complements the creaminess of the cheesecake perfectly.
Another fun idea is to switch up the fruit. I’ve experimented with blueberries and raspberries, and both were equally delightful. Each fruit imparts a unique tartness that can make the dessert exciting and different every time. Just keep the fresh fruit in mind as you layer it, and get creative!
If you’re looking for a dairy-free version, you can substitute the cream cheese with a dairy-free cream cheese alternative and use coconut cream instead of heavy cream. I’ve tried this with great success, and it still created a creamy, dreamy dessert that everyone could enjoy.
How to Store, Freeze & Reheat
If you happen to have leftovers (which is rare in my house!), you can store your No-Bake Strawberry Cheesecake Lasagna covered in the refrigerator for about 3 to 4 days. Just make sure it’s well wrapped, so it stays fresh! It’s even more delicious the next day when the flavors have melded together.
I also sometimes freeze individual servings. To do this, slice the dessert, wrap each piece tightly in plastic wrap, and then place them in an airtight container. It can last in the freezer for up to 3 months. When you’re ready for a treat, just thaw it in the fridge for a few hours or overnight. It’s like having a little surprise waiting for you!
One thing to note is that I wouldn’t recommend reheating it in the microwave. The textures may change, and the creamy goodness will lose its integrity. Instead, just let it thaw in the fridge, and it’s ready to enjoy again!
Conclusion
I hope you give this No-Bake Strawberry Cheesecake Lasagna a try—it’s truly a crowd-pleaser and so easy to whip up. I love how it’s a versatile dessert that you can customize and make your own. Whether you stick with the classic strawberry or venture into new flavor territory, I know you and your loved ones will savor every last bite. Happy cooking—and indulging!