
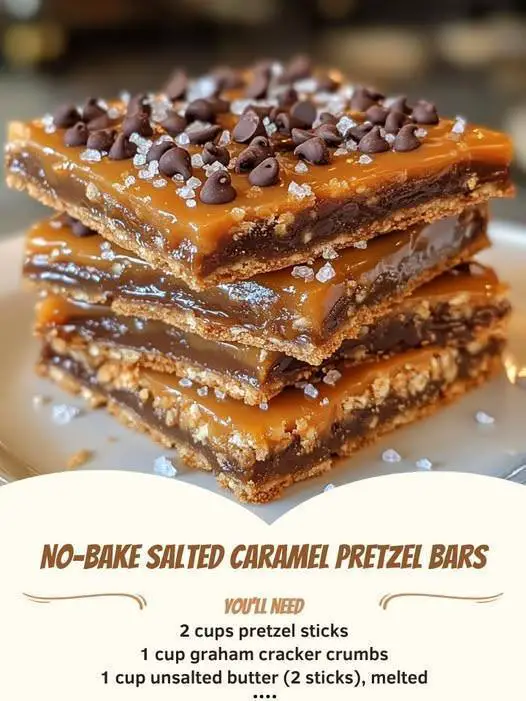
Common Mistakes to Avoid
My first time, I used salted butter and regular table salt in the caramel, thinking it would be fine. It was a salt bomb—overwhelming and unpleasant. Don’t do what I did. Stick with unsalted butter and use a flaky sea salt like Maldon for topping. The milder, crunchier flakes integrate perfectly without dominating.
Don’t rush the chilling process. I get it, you want to taste your creation. But if you try to cut these before they are fully set, you’ll have a delicious but unservable caramel soup. The four-hour minimum is real, and the overnight chill is the true game-changer for perfect texture. Plan ahead.
Avoid substituting the heavy cream. I tried it once with half-and-half in a pinch, and the caramel sauce never fully set. It stayed frustratingly soft and oozed everywhere. The high fat content in heavy cream is essential for the caramel to firm up correctly in a no-bake recipe. It makes a huge difference.
Finally, don’t skip the parchment paper liner. I thought I could just grease the pan well for my first attempt. The bars stubbornly stuck in the corners, and I had to serve them as a “deconstructed” crumble. The parchment paper sling is your best friend for presenting beautiful, intact bars.
Serving Suggestions
I love serving these bars straight from the fridge, cut into small squares because they are incredibly rich. They’re fantastic with a cup of strong black coffee, which cuts through the sweetness beautifully, or a cold glass of milk.
For a dressed-up dessert plate, I’ll add a dollop of freshly whipped cream with a tiny sprinkle of pretzel crumbs on top. The airy cream alongside the dense, chewy bar is a textural dream. It turns a simple bar into a plated dessert worthy of company.
In the fall, I sometimes serve them alongside a mug of warm apple cider. The spices in the cider complement the buttery toffee notes of the caramel so well. It just feels cozy and complete.
Variations & Customizations
If you’re a chocolate lover, you have options. I’ve drizzled the top of the set bars with melted dark chocolate, and it’s heavenly. You could also sprinkle a handful of semi-sweet chocolate chips over the hot caramel right after you pour it, let them melt for a minute, and then swirl them in with a knife for a marbled effect.
For a nutty twist, try stirring 1/2 cup of chopped toasted pecans or peanuts into the pretzel base mixture. The added crunch and flavor take it in a totally different, wonderful direction. I brought a pecan version to a potluck, and it disappeared first.
If you want to play with the salty element, try using salted pretzel sticks but reducing the added salt in the caramel by half. I’ve also seen friends crumble cooked bacon on top for an ultimate sweet-salty-smoky treat. I haven’t braved that one yet, but the reports are rave!
How to Store, Freeze & Reheat
These bars store beautifully. I keep them tightly covered in the same pan or in an airtight container in the refrigerator. They stay perfect for up to a week. The cold fridge is key—if you leave them on the counter, the caramel will soften too much and they’ll lose their shape.
Yes, you can freeze them! I wrap individual bars tightly in plastic wrap and then place them all in a heavy-duty freezer bag. They’ll keep for up to 3 months. This is my secret for always having a dessert on hand. Just transfer a bar to the fridge to thaw for a few hours before serving.
There’s no need to reheat these at all—they are meant to be enjoyed cold. The texture is ideal straight from the fridge. If they’ve been frozen, just let them thaw in the refrigerator. Trying to microwave them will melt the caramel into a puddle, so resist the urge!
Conclusion
These No-Bake Salted Caramel Pretzel Bars are more than just a recipe; they’re my little triumph of simplicity over complexity. They prove that you don’t need fancy techniques or hours of baking to create something truly special and satisfying. I hope you give them a try and experience that same moment of joy when you take that first perfect, salty-sweet bite. Happy no-baking