
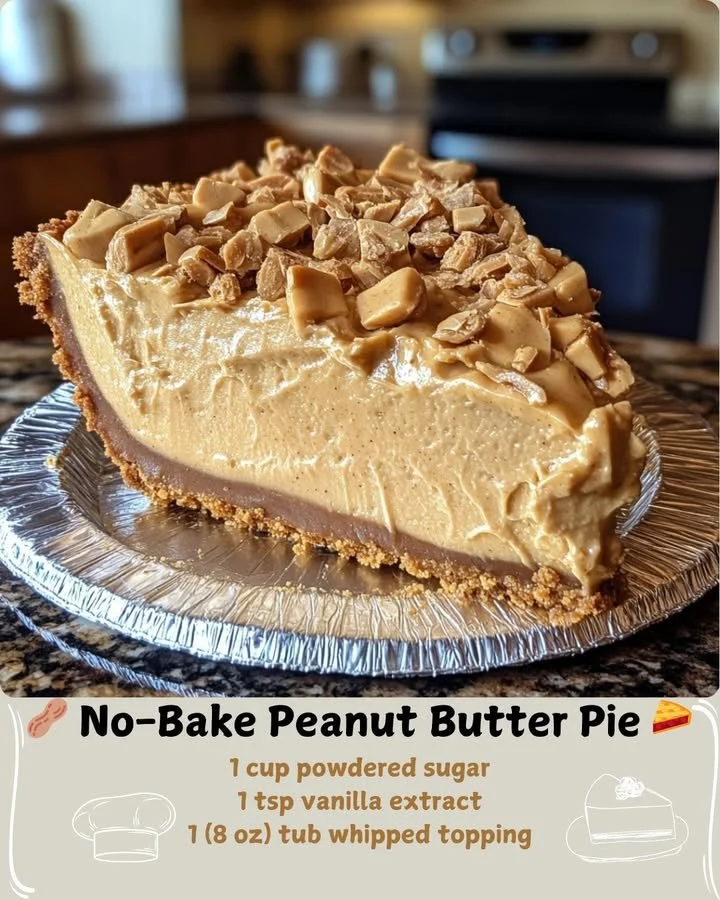
No-Bake Peanut Butter Pie. This delightful dessert is incredibly easy to whip up, and the buttery crust combined with the velvety filling creates an indulgence that’s simply irresistible. Whether it’s for a gathering or a quiet evening at home, this pie is guaranteed to bring smiles and satisfaction.
Why You’ll Love This Recipe
There’s something magical about desserts that require no baking, and this No-Bake Peanut Butter Pie is a perfect example. The creamy peanut butter filling is rich and dreamy, while the buttery graham cracker crust adds just enough crunch. Plus, it comes together in no time, which means less time in the kitchen and more time enjoyed around the table with loved ones. I think you’ll find it’s the ultimate treat for any peanut butter lover! (See the ingredients in the next page below…)
Ingredients
– 1 ½ cups graham cracker crumbs
– ½ cup unsalted butter, melted
– 1 cup creamy peanut butter
– 1 cup powdered sugar
– 1 cup heavy cream
– 1 teaspoon vanilla extract
– 1 cup whipped topping (optional, for garnish)
– Chocolate shavings or chocolate sauce (optional, for garnish)
Equipment Needed
– Mixing bowls
– Electric mixer or whisk
– 9-inch pie dish
– Rubber spatula
– Measuring cups and spoons
Step-by-Step Instructions
First, I like to start with the crust because it’s the foundation of our delightful pie. In a medium mixing bowl, combine the graham cracker crumbs and melted butter, stirring until the mixture resembles wet sand. Press the crumb mixture firmly into the bottom and up the sides of a 9-inch pie dish. Make sure to create an even layer so every slice is perfect! Next, pop it in the fridge while we whip up the filling, which is the fun part. (See the next page below to continue steps…)
Now, in a large bowl, mix together the peanut butter and powdered sugar until smooth and creamy. The aroma of peanut butter fills your kitchen, and honestly, it’s one of my favorite smells! Next, in another bowl, whip the heavy cream and vanilla extract until soft peaks form. This step is crucial for giving the pie a light and airy texture. Gently fold the whipped cream into the peanut butter mixture with a rubber spatula, being careful to keep it fluffy and light.
Once the filling is well combined, pour it into your prepared crust, smoothing it out with the spatula. This is where I like to get creative: You can create beautiful swirls or peaks on top if you’re feeling artistic! Refrigerate the pie for at least 4-6 hours or overnight. The longer it chills, the more the flavors deepen and the filling sets-up perfectly. Your patience will pay off!
When it’s finally time to serve, top it with whipped topping and drizzle with chocolate sauce or sprinkle some chocolate shavings for an extra touch. Slice it up, and watch as everyone’s faces light up with joy!
Pro Tips for Best Results
One tip I always recommend is to use a good-quality creamy peanut butter. I’ve tested this recipe with both mainstream brands and natural versions. The difference in flavor is noticeable! A richer peanut butter truly enhances the overall taste of the pie, so if you can, splurge a little on the good stuff.
Another pro tip is to make sure your heavy cream is cold before whipping. This small step can make a big difference in how well it whips up. I’ve had instances when I was a bit impatient, and the cream didn’t whip to its full potential, so take your time. I promise it’s worth it!
Lastly, if you want to add a unique touch, try mixing in some crushed caramel candies or peanut butter chips into the filling. I’ve tried this a few times, and it elevates the pie to a whole new level of deliciousness!
Common Mistakes to Avoid
A mistake I’ve made often is not letting the pie chill long enough. Trust me, rushing this step is a definite no-go if you want that perfect texture. The filling needs to set, and the flavors need time to meld. I can still remember the first time I served it too early—it was delicious but not quite slice-able, and it turned into more of a spoon dessert than a pie! (See the next page below to continue…)
Another thing to watch out for is overmixing the whipped cream. It can quickly turn from soft peaks into butter if you’re not careful. I’ve learned the hard way that gentle folding is the key to getting that light and airy filling we all adore. Just be patient and fold until combined!
Also, don’t skip the crust-chilling step! If you pour the filling into a crust that hasn’t had time to set, it might crumble when you slice it. Trust me, I learned that one the hard way during my first attempt at making this pie—I ended up with a tasty but messy dessert!
Serving Suggestions
When it comes time to serve this No-Bake Peanut Butter Pie, I love pairing it with a light, refreshing beverage. A tall glass of iced tea or lemonade complements the richness of the pie perfectly. If you want to go all out, a dollop of unsweetened whipped cream on top adds an elegant touch while balancing the dessert’s sweetness.
For added fun, I’ve even served this pie with a side of fresh fruit, like strawberries or banana slices. The juicy freshness not only adds color to the plate but also a delightful contrast to the creamy, dense filling. Plus, it makes for a beautiful presentation when hosting guests!
Lastly, don’t forget about the garnishes! A sprinkle of crushed peanuts or a drizzle of chocolate sauce makes each slice look extra special. I often let my family and friends customize their slices with their favorite toppings, which always leads to smiles all around.
Variations & Customizations
If you’re looking to shake things up a bit, try swapping out the peanut butter for another nut butter, like almond or cashew. Each nut brings its own unique flavor, and I’ve found that almond butter adds a nice, subtly sweet twist that’s equally satisfying. In fact, my cousin loves a cashew butter version so much, it’s become one of our family favorites!
For a bit of an upscale feel, how about incorporating some melted chocolate into the filling? Just melt some dark or semi-sweet chocolate and fold it into the peanut butter mixture for a rich chocolatey experience. It feels like you’ve taken your pie to a whole new decadent level, and it’s an absolute treat for chocolate lovers!
Finally, if you’re in the mood for a crunchy texture, mix in a handful of crushed pretzels or toffee bits into the filling before pouring it into the crust. The contrast between the smooth filling and that little bit of crunch is delightful, and it creates a surprising pop with every bite!
How to Store, Freeze & Reheat
This No-Bake Peanut Butter Pie is wonderful for storing. Just cover it tightly with plastic wrap or aluminum foil and keep it in the refrigerator. It can be stored for about 4–5 days, although I guarantee it won’t last that long if you’re sharing it with friends and family!
If you’re looking to make it ahead of time, this pie also freezes beautifully! Wrap it well and store it in an airtight container for up to 2 months. Just be sure to let it thaw in the refrigerator the night before you plan to serve it—this way, it retains that creamy texture we all love.
As for reheating, there’s really no need to do that with this pie, since it’s served chilled. However, if you have leftovers (which is a rare occurrence!), simply slice off a piece directly from the fridge and enjoy it cold. You might find that the flavors develop even more as it sits, making each bite even more delicious!
Conclusion
So there you have it—my cherished No-Bake Peanut Butter Pie recipe! I hope it brings as much joy and sweetness to your kitchen as it has to mine. Whether you’re celebrating a special occasion or just craving something delightful, this pie is sure to become a favorite in your home. Happy baking (or no-baking, in this case)! Enjoy every creamy, peanut buttery bite!