
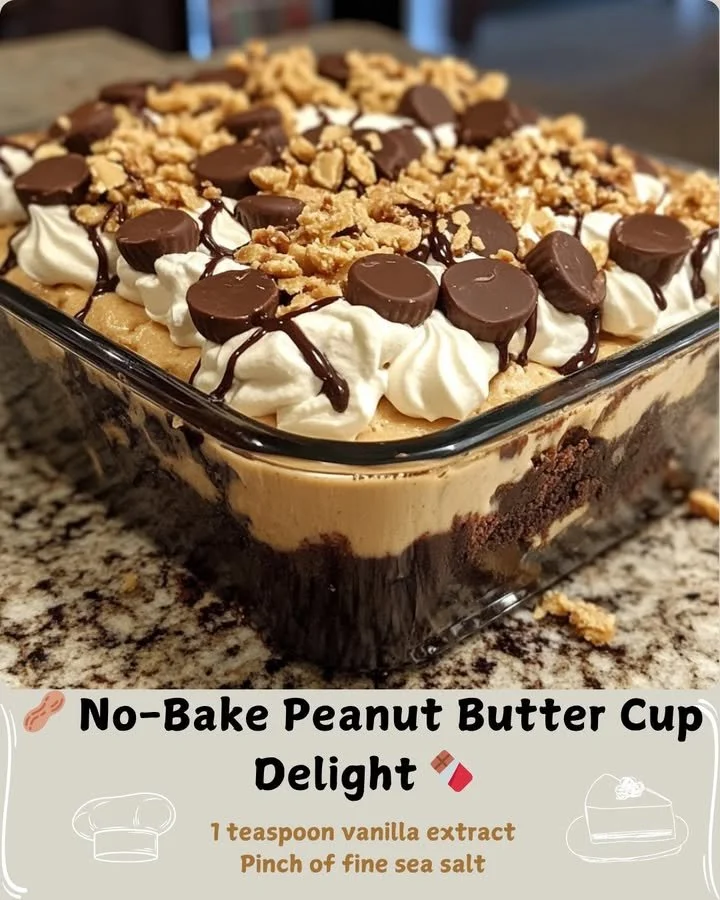
Welcome to my kitchen! Today, I’m thrilled to share one of my all-time favorite desserts: No-Bake Peanut Butter Cup Delight. This indulgent treat has a creamy peanut butter filling, a rich chocolate layer, and a delightful crunch from the graham cracker crust. If you’re looking for a quick and easy dessert that’s packed with flavor, you’ve just struck gold! Trust me, this recipe is a crowd-pleaser and will make you feel like a kitchen superstar with minimal effort.
Why You’ll Love This Recipe
The best part about this No-Bake Peanut Butter Cup Delight is just how simple it is to whip up—no oven required! The combination of smooth peanut butter, fluffy cream cheese, and decadent chocolate not only satisfies my sweet tooth, but it also creates an irresistible harmony of flavors. Plus, it’s perfect for warm days when you don’t want to heat up the kitchen. You can prepare this delightful dessert in under an hour! Oh, and did I mention that it’s a no-fuss, minimal cleanup kind of recipe? (See the ingredients in the next page below…)
Ingredients
– 1 ½ cups graham cracker crumbs
– ½ cup unsalted butter, melted
– 1 cup creamy peanut butter
– 8 oz cream cheese, softened
– 1 cup powdered sugar
– 1 tsp vanilla extract
– 2 cups whipped topping (like Cool Whip)
– 1 ½ cups chocolate chips, melted
– 2 tbsp vegetable oil (for thinning the chocolate)
Equipment Needed
– Mixing bowls
– Electric mixer
– 9×13 inch baking dish
– Rubber spatula
– Measuring cups and spoons
– Microwave-safe bowl for melting chocolate
Step-by-Step Instructions
Let’s dive into making this delightful treat! First, I always start by preparing the crust. In a mixing bowl, combine the graham cracker crumbs and melted butter until well mixed. You want the texture to be like wet sand. Press this mixture firmly into the bottom of a 9×13 inch baking dish. It’s essential to pack it tightly to create a sturdy base for your dessert. After that, pop it into the fridge for about 10 minutes to firm up. While that cools, I move on to the peanut butter filling.
In a large mixing bowl, combine the softened cream cheese and peanut butter and mix until creamy and smooth. Then gradually add in the powdered sugar and vanilla extract, mixing until it’s all well incorporated. The filling should be light and fluffy! (See the next page below to continue steps…)
Next, gently fold in the whipped topping with a rubber spatula. This step really adds to the creaminess. Spread the peanut butter mixture evenly over the chilled graham cracker crust. At this point, I can’t help but take a little taste—it’s so irresistible! Now, let’s focus on the chocolate topping. In a microwave-safe bowl, melt the chocolate chips along with the vegetable oil, stirring after every 30 seconds until smooth.
This smart little addition of oil helps the chocolate maintain that glossy sheen. Once melted, let it cool for just a few minutes before pouring it over the peanut butter layer. Use the spatula to spread it smoothly across the top. Finally, cover the dish tightly with plastic wrap and refrigerate for at least 4 hours; overnight works even better. Patience truly pays off with this one!
Pro Tips for Best Results
One thing I’ve learned from making this dessert multiple times is to use a good quality chocolate. It makes a noticeable difference in flavor! I tested this three ways—using regular chocolate chips, dark chocolate, and a mix—and the dark chocolate turned out to be the star! It added a beautiful richness that balanced the sweetness of the peanut butter perfectly.
Another tip is to ensure your cream cheese is softened before mixing. I usually take mine out of the fridge an hour before I start, so it’s at room temperature. This helps prevent lumps in your filling and creates that smooth, dreamy texture we all love. No one wants a lumpy dessert!
Lastly, don’t skip the chilling time. Trust me, I tried serving it right after assembling once, and it turned out to be a gooey disaster! Giving it time in the fridge allows the layers to set beautifully, making the slice presentation much more appealing.
Common Mistakes to Avoid
One common mistake I see is not pressing the graham cracker crust firmly enough. If it’s too loose, it can crumble when you try to cut into the dessert. I’ve had my fair share of crumbling disasters! Make sure you pack it down tightly with the back of a measuring cup or your hands; it’s worth the effort. (See the next page below to continue…)
Another thing I’ve learned is to be cautious with the whipped topping. If you overmix it when folding into the peanut butter mixture, it can lose that light, airy texture. Remember, we want fluffy, not deflated! So, be gentle and just mix until combined.
Also, watch the temperature of the melted chocolate. If you let it sit too long after melting, it can start to set and become difficult to spread. Always pour it onto the peanut butter layer while it’s still warm for the best results.
Finally, don’t skip the chilling time! I can’t stress this enough. This dessert needs to be properly chilled for the flavors to meld together. It’s so tempting to dig right in, but the end result is so much better if you resist the urge!
Serving Suggestions
When it’s finally time to serve, I love garnishing the top with extra chocolate shavings or a dusting of cocoa powder for a touch of elegance. A dollop of whipped cream on each slice adds a lovely creaminess and makes it feel extra special.
Another great idea is to pair it with fresh fruit, like strawberries or raspberries. The tartness of the fruit offsets the sweetness of the dessert perfectly. Plus, it adds a beautiful pop of color on the plate!
Lastly, this dessert is perfect for gatherings or potlucks. I often make it a day ahead and store it in the fridge, so it’s ready to go when my friends come over. Trust me, everyone will be reaching for seconds!
Variations & Customizations
If you’re feeling adventurous, you might want to try adding crushed pretzels to the crust for a sweet-salty twist. This adds an extra crunch and depth of flavor that pairs beautifully with the peanut butter.
You can also experiment with flavored chocolate. For example, using a peanut butter-flavored chocolate can intensify the flavor and create a unique dessert that’s sure to impress!
Finally, if you’re in the mood for caramel, you could drizzle some on top alongside the chocolate layer. It would create a decadent caramel-chocolate-peanut butter layer that takes this dessert to the next level.
How to Store, Freeze & Reheat
Storing this No-Bake Peanut Butter Cup Delight is super easy. Just cover the dish tightly with plastic wrap or aluminum foil and keep it in the refrigerator. It’ll stay fresh for about a week, but I doubt it’ll last that long because it’s so delicious!
If you want to freeze it, that works, too! Just cut it into squares and wrap each piece in plastic wrap, then place them in a zip-lock freezer bag. It should keep well for up to 3 months. When you’re ready to enjoy, let them thaw in the fridge for a few hours, and you’ll be good to go!
Reheating isn’t necessary for this dessert, but if you do want that warm, melty chocolate experience, simply pop individual servings in the microwave for about 10 seconds. Just enough to take the chill off without melting everything into a puddle!
Conclusion
I hope you give this No-Bake Peanut Butter Cup Delight a try! It’s a quick, simple dessert that never fails to impress. Every bite is smooth, creamy, and completely melt-in-your-mouth delicious. Plus, it’s a great way to bring a homemade treat to your next gathering without any fuss. Happy baking (or rather, no-baking!), and enjoy every satisfying bite!