
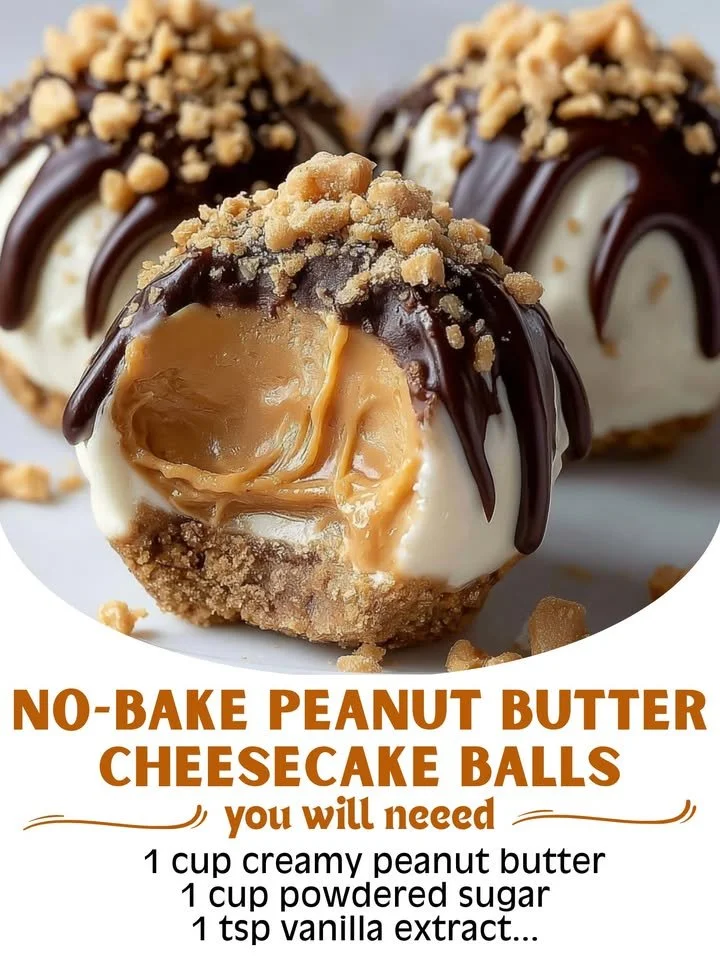
I absolutely adore the simplicity and deliciousness of no-bake desserts, and lately, I’ve been obsessed with these No-Bake Peanut Butter Cheesecake Balls! They’re the perfect little bites of creamy, nutty goodness that come together in no time. I find that there’s something irresistibly comforting about peanut butter and cream cheese mixed together, especially when they’re rolled into bite-sized morsels. They make for a great snack, dessert, or even a special touch for gatherings.
Why You’ll Love This Recipe
This recipe is not only easy but also requires minimal ingredients, making it perfect for those days when I want something sweet but don’t feel like going through the theatrics of baking. Each bite is a delightful combination of creamy, sweet, and nutty flavors that never fails to please. Plus, there’s no baking involved, which means less time spent in the kitchen and more time enjoying these treats with friends and family. If you want a no-fuss, out-of-this-world dessert, this recipe is absolutely for you. (See the ingredients in the next page below…)
Ingredients
- 1 cup cream cheese, softened
- 1 cup creamy peanut butter
- 1 cup powdered sugar
- 1 teaspoon vanilla extract
- 1 ½ cups graham cracker crumbs
- 1 cup mini chocolate chips (optional)
- A pinch of salt
Equipment Needed
- Mixing bowl
- Electric mixer or whisk
- Rubber spatula
- Cookie scoop or tablespoon
- Baking tray
- Parchment paper
- Refrigerator
Step-by-Step Instructions
To start making these delicious No-Bake Peanut Butter Cheesecake Balls, first, I grab a mixing bowl and combine the softened cream cheese, peanut butter, powdered sugar, and vanilla extract. I like to beat the mixture with my electric mixer until it’s smooth and creamy, which usually takes just a minute or two—you’ll want to make sure there are no lumps. The unique aroma of peanut butter filling my kitchen is absolutely heavenly! Once it’s all blended to perfection, I fold in the graham cracker crumbs and a pinch of salt with a rubber spatula to keep that lovely texture. (See the next page below to continue steps…)
Next, I like to chill the mixture in the refrigerator for about 15-20 minutes. This step is essential for helping the mixture firm up a bit, making it easier to handle. While that’s happening, I line a baking tray with parchment paper—this is where the balls will chill later. Once the mixture is chilled, I use a cookie scoop to portion out the dough, rolling each one into a ball with my hands. I can’t help but sneak a few bites during this process—pure bliss!
After I’ve rolled out all the balls, I pop them in the fridge again to set for about 30 minutes. While they’re chilling, I like to melt some chocolate to drizzle over the top for a delightful finish, but that’s totally optional if you want to keep things simple. Once they’re firm, I dip the tops of each ball into the melted chocolate or simply drizzle it on. You can also sprinkle some mini chocolate chips on top, which adds a nice crunch and extra sweetness!
Pro Tips for Best Results
I’ve experimented with different brands of peanut butter while making these cheesecake balls, and I’ve learned that not all peanut butters are created equal. For the creamiest texture that blends seamlessly with the cream cheese, I recommend sticking to a good-quality, creamy peanut butter. Natural peanut butter can work, but sometimes it becomes a bit too oily.
Another tip I discovered is to make sure your cream cheese is truly softened. If it’s still a bit cold or too firm, it doesn’t blend as well, leaving lumps in your mixture. To soften it quickly, I’ve found that cutting it into smaller cubes and letting it sit at room temperature for 20 minutes works wonders. Trust me, it’s worth the wait for that ultra-smooth filling!
Lastly, when it comes to flavoring, I love adding a tiny bit of cinnamon or even a splash of maple syrup to the mixture for an autumn-inspired twist. Incorporating different flavors can really personalize this recipe to match any occasion or holiday theme. These little adjustments keep me excited about making them time and time again!
Common Mistakes to Avoid
One of the most common mistakes I’ve encountered when making these is under-mixing the ingredients. I initially thought a simple stir was enough, but I learned the hard way that blending them well is crucial for the right texture. The filling should be smooth and creamy, not gritty, so don’t rush this step! (See the next page below to continue…)
Another pitfall is not properly chilling the mixture before rolling them into balls. A lot of my early attempts ended up as a sticky mess because the mixture was too soft to work with. I now always ensure that I chill it for at least 15 minutes, which makes all the difference in ease and handling.
Some people might skip the salt, thinking it will make it too salty. But trust me, just a pinch enhances all the flavors beautifully. It balances out the sweetness and really brings out the peanut butter flavor. Always remember, a little salt goes a long way!
Serving Suggestions
These No-Bake Peanut Butter Cheesecake Balls are perfect for so many occasions! I love serving them at parties, where they’re a big hit and often disappear before the night ends. Just arrange them on a pretty platter, and watch how quickly they get devoured! They also make for a delightful addition to any dessert table.
For a relaxed movie night in, I often prepare a batch and keep them stored in the fridge. They’re the ultimate grab-and-go treat to satisfy my sweet cravings while I indulge in my favorite flicks. I can always count on them to lift my spirits after a long day!
Lastly, these little bites are also fantastic for sharing with friends. Whether it’s a small get-together or a simple coffee catch-up, presenting them with a cute container or treat bag adds a personal touch that feels incredible to give!
Variations & Customizations
If you want to change things up a bit, I’ve found that adding crushed nuts or coconut to the mixture gives it a delightful texture. Chopped peanuts add a nice crunch, and if I’m feeling extra adventurous, I sometimes throw in some shredded coconut for a tropical twist. It makes the treats feel unique every time!
I also enjoy swapping out the mini chocolate chips with other mix-ins. Dried fruits, like cranberries or raisins, can add a lovely tartness that pairs beautifully with the sweetness of the balls. This variation is especially nice during the holidays when I crave a bit of seasonal flair in my treats.
If you’re aiming for a low-sugar version, I’ve successfully replaced regular powdered sugar with a sugar substitute, and it works quite well! The flavor and texture remain consistent, and it’s a fantastic way to enjoy this recipe while staying mindful of sugar intake.
How to Store, Freeze & Reheat
Storing these delightful cheesecake balls couldn’t be easier! I usually keep them in an airtight container in the fridge, where they last for about a week—if they last that long, that is! They’re perfect for a quick snack or sweet craving at any time.
If you want to make a batch ahead of time, I highly recommend freezing them. I line a baking tray with parchment paper and flash freeze the individual balls until firm. Then, I transfer them to a zip-top freezer bag. They stay fresh for about three months, and you can grab a couple whenever the sweet tooth hits you!
When it comes to reheating, there’s no need! These cheesecake balls are enjoyed cold, and taking them straight from the freezer or fridge to your plate is just as satisfying. In fact, I find they have a wonderfully firm texture when chilled, making each bite indulgently satisfying!
Conclusion
I hope you’re as excited as I am to whip up these No-Bake Peanut Butter Cheesecake Balls in your kitchen! They’re a treat that brings smiles and joy, whether it’s for yourself or shared with loved ones. With minimal effort and maximum satisfaction, you’ll wonder why you didn’t try them sooner. Happy snacking!