
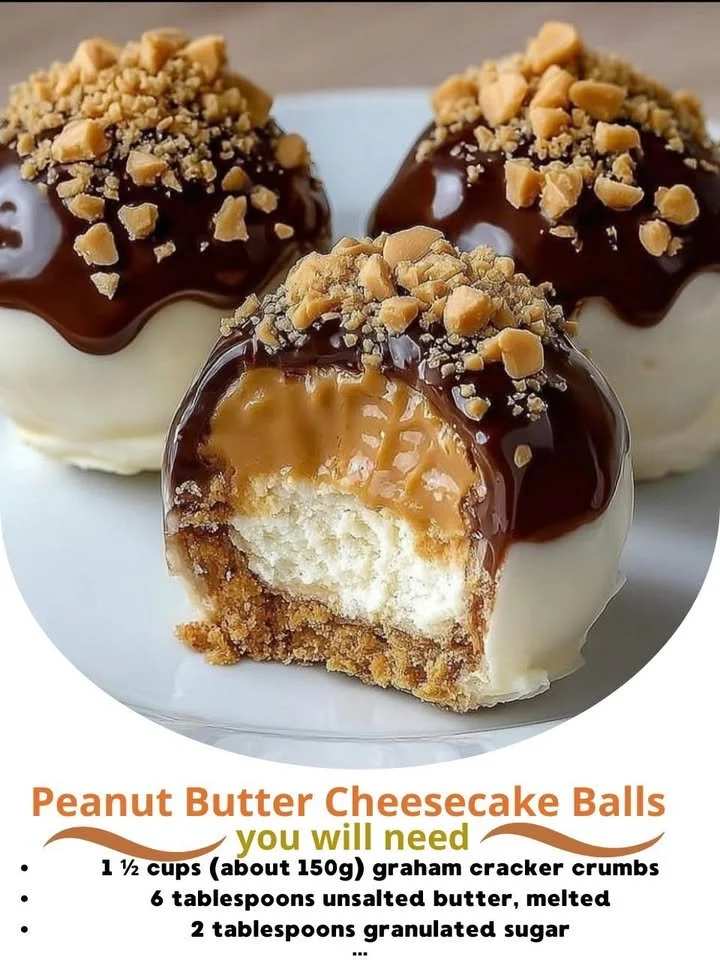
If you’re anything like me, you might find yourself craving something sweet but don’t always want to go through the hassle of baking. That’s where No-Bake Peanut Butter Cheesecake Balls come in! These delightful little bites are not only easy to make but also packed with a deliciously creamy peanut butter filling that just melts in your mouth. Let me take you into my kitchen as I guide you through this simple yet indulgent recipe.
Why You’ll Love This Recipe
These No-Bake Peanut Butter Cheesecake Balls are the perfect treat for any occasion. Whether I’m hosting friends, bringing a dish to a gathering, or simply indulging myself after a long day, these little bites are always a hit. The combination of rich peanut butter and creamy cheesecake is like a party in my mouth! Plus, they come together in no time, which is always a win in my books. (See the ingredients in the next page below…)
Ingredients
– 1 cup cream cheese, softened
– 1 cup peanut butter (smooth)
– 1/2 cup powdered sugar
– 1 teaspoon vanilla extract
– 1 cup graham cracker crumbs
– 1/2 cup chocolate chips (for coating)
– A pinch of salt
Equipment Needed
– Mixing bowl
– Electric mixer or whisk
– Cookie sheet
– Parchment paper
– Microwave-safe bowl (for melting chocolate)
– Freeze-friendly container
Step-by-Step Instructions
To start off, I like to get my mixing bowl and beat the softened cream cheese until it’s nice and smooth. This makes for the perfect base for our cheesecake balls. Then, I carefully fold in the peanut butter, powdered sugar, and vanilla extract. You want to mix until everything is well combined and creamy, which takes just a couple of minutes. This is when my kitchen starts to smell heavenly with that rich peanut butter aroma wafting through the air. (See the next page below to continue steps…)
Next, it’s time for the graham cracker crumbs. I like to add them in gradually, stirring until everything is evenly mixed. You’ll notice that the mixture will become a bit thicker, and that’s exactly what we want! Once it’s all combined, I grab a small scoop and begin rolling the mixture into bite-sized balls. Each ball should be about an inch wide. I place them on a cookie sheet lined with parchment paper as I go.
Once I’ve rolled out all the mixture, I pop the cookie sheet into the freezer for about 30 minutes. This helps the balls firm up, making them easier to coat with the melted chocolate. In the meantime, I can’t resist having a taste of the cheesecake mixture—it’s just that good! After the chill time, I melt the chocolate chips in a microwave-safe bowl, making sure to stir every 30 seconds to avoid scorching.
Finally, I take each chilled cheesecake ball and dip it into the melted chocolate, letting the excess drip back into the bowl. Then, I place them back on the parchment-lined sheet. You can sprinkle a few graham cracker crumbs on top before the chocolate sets for an extra touch. I always do a little dance around the kitchen when I see how cute they look!
Pro Tips for Best Results
I’ve tested this recipe a few times, and one thing I learned is that using creamy peanut butter really makes a difference. I tried crunchy peanut butter once, and while it was still tasty, it didn’t have that smooth cheesecake texture that I love. Make sure to choose a good-quality peanut butter for the best flavor!
Another tip is to let your cream cheese warm up a bit before mixing. If it’s too cold, it can end up clumping together instead of blending smoothly. Trust me, a smoother texture is what we’re after here! Also, feel free to adjust the amount of sugar to your liking; sometimes I cut back just a bit to let the peanut butter shine through more.
Lastly, don’t skip chilling the balls after rolling! It seems like a small step, but that little bit of time in the freezer really helps them hold their shape when being coated in chocolate. I’ve made the mistake of skipping it before, and let me tell you, it gets a bit messy!
Common Mistakes to Avoid
One mistake I’ve made in the past was skipping the parchment paper on my cookie sheet. I thought I could just lay the cheesecake balls directly on the sheet, but they ended up sticking too much. It became a whole ordeal trying to get them off without damaging them! Trust me—always use parchment paper for easy removal.
Another common pitfall is not allowing the chocolate to cool down slightly before dipping. I once melted the chocolate until it was scalding hot, and when I dipped the balls, the chocolate melted them instead! It was a disaster. So, let it cool just enough so that it’s still pourable but not so hot that it disrupts your beautiful cheesecake balls.
Finally, when rolling the cheesecake mixture into balls, make sure your hands are slightly wet (not dripping, just a light mist) to avoid the mixture sticking to your fingers. It makes the process so much more enjoyable! (See the next page below to continue…)
Serving Suggestions
These No-Bake Peanut Butter Cheesecake Balls make an excellent snack or dessert for any occasion. I love serving them at parties because they are easy to pop in your mouth—no utensils needed! I also like to present them in cute little cupcake liners; it adds a lovely touch and makes them feel extra special.
If you have kids around, they absolutely love helping to roll the mixture into balls and dipping them in chocolate. It’s such a fun activity, and I’ve found that even the pickiest eaters can’t resist the combination of peanut butter and chocolate!
Another great idea is to serve them alongside fresh fruit. The refreshing burst of flavor from strawberries or bananas complements the richness of the cheesecake balls beautifully. I’ve done this when hosting brunch, and everyone loves the pairing!
Variations & Customizations
One of the things I love most about this recipe is how versatile it is. For a twist, try adding some crushed Oreos or colorful sprinkles to the mixture for a fun look. I’ve experimented with both, and they can add a fantastic texture and pop of flavor that still keeps all the deliciousness of classic peanut butter.
If you’re looking to lighten things up, you could try using Greek yogurt instead of cream cheese for a tangier flavor. I’ve done this on occasion when I want to feel a bit healthier, and while the texture is slightly different, it’s still equally delicious and satisfying.
Lastly, for all my chocolate lovers, you can experiment with different types of chocolate for coating—dark chocolate, white chocolate, or even flavored chocolates like mint! Each variation brings a new flavor dimension to the table, and I love having fun with different combinations.
How to Store, Freeze & Reheat
Once these little bites are made, you’ll want to store them in an airtight container in the fridge. They usually last about a week, but trust me—they won’t be around that long! The flavors continue to meld and get even better with a day or two in the fridge.
If you’re looking to make these ahead of time, they freeze beautifully. Just layer them in a freezer-friendly container with parchment paper in between the layers. They can last up to three months in the freezer, making them perfect for meal prep or unexpected guests.
To enjoy them again after freezing, just let them thaw in the fridge for a few hours. I’ve found they maintain their texture quite well, and they taste just as delicious as the day I made them! There’s no need to reheat them—just enjoy them cold straight out of the fridge.
Conclusion
I hope you’re as excited to make these No-Bake Peanut Butter Cheesecake Balls as I am! They are an absolute delight to munch on and perfect for any occasion. Whether you want a sweet treat for yourself or a crowd-pleaser for guests, these little bites will not disappoint. Happy baking (or rather, no-baking!) from my kitchen to yours!