
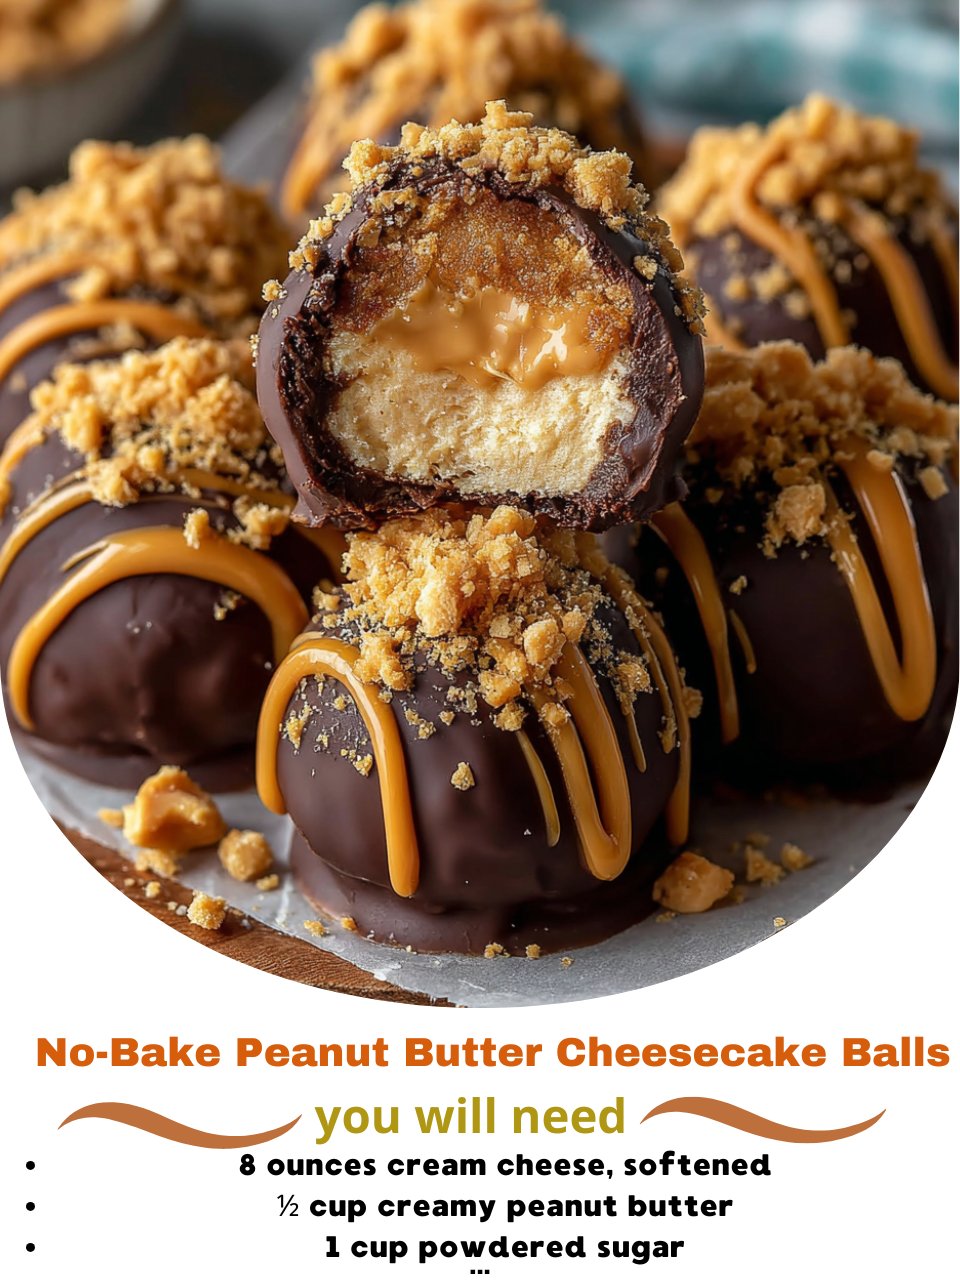
For the smoothest, most professional-looking coating, use a fork and a spoon in tandem. I place the frozen ball on a fork, dunk it in chocolate, then lift it and tap the fork gently on the edge of the bowl to remove excess. I then use a small spoon to help slide the coated ball off the fork and back onto the parchment. This minimizes finger marks and creates a beautifully even chocolate shell.
Common Mistakes to Avoid
My first-time mistake was using natural peanut butter. I thought it would be a healthier twist, but the oil separation created a filling that was far too soft and greasy to ever hold a ball shape, no matter how long I chilled it. Don’t do what I did! Stick with a conventional, homogenized peanut butter. It’s essential for structure and texture.
Don’t skip the softening step for the cream cheese. I’ve tried to microwave a cold block to soften it quickly, and it either became too hot and melted parts of it, or it warmed unevenly. This leads to a lumpy, difficult-to-mix base. True, slow, room-temperature softening is the only reliable path to a silky-smooth filling.
Avoid rolling the balls with dry hands. The mixture is sticky! I keep a small bowl of water nearby to dampen my palms slightly between every few balls. This prevents the mixture from sticking to your hands and makes rolling smooth, round spheres an effortless joy. Just don’t get them wet, just lightly damp.
Finally, don’t rush the final setting after coating. If you try to eat one before the chocolate has fully re-hardened, the shell will be soft and can crack. Letting them set completely in the fridge gives you that satisfying snap when you bite into the chocolate, followed by the creamy, cold filling—the ideal textural experience.
Serving Suggestions
I love serving these arranged on a elegant white platter, dusted with a little extra powdered sugar or a drizzle of contrasting chocolate. They are rich, so I keep the portions small—a platter of these little bites is perfect for a party or potluck. I often set them out with a pot of strong coffee; the bitter coffee is the perfect companion to the sweet, rich peanut butter and chocolate.
For a fun dessert board, I’ll add these balls to a spread with other bite-sized treats like fresh berries, shortbread cookies, and some salty roasted nuts. The variety lets people mix flavors and textures, and these cheesecake balls are always the star of the show. It turns a simple dessert into a beautiful, interactive experience.
These are also my secret weapon for a make-ahead, impressive homemade gift. I’ll package a dozen in a cute cellophane bag or a small cardboard box lined with parchment. They travel well (kept cool!) and feel so much more special than store-bought chocolates. A little ribbon and a tag make them a gift anyone would be thrilled to receive.
Variations & Customizations
One of my favorite twists is the “Cookies and Cream” version. I replace ½ cup of the powdered sugar with crushed Oreo cookie crumbs (filling and all) when mixing the base. Then, I coat the balls in melted white chocolate and roll them in more Oreo crumbs. It’s like a frozen Oreo cheesecake bite, and it’s absolutely addictive.
For a “Salted Caramel Pretzel” bite, I mix ½ cup of crushed pretzel pieces into the peanut butter filling for a salty crunch. I then dip them in milk chocolate and, before the chocolate sets, sprinkle the tops with a few more pretzel bits and a tiny flake of sea salt. The sweet-salty-crunchy-creamy combination is out of this world.
If you’re a fan of different nut butters, this recipe is wonderfully adaptable. I’ve made a fabulous version using Biscoff cookie butter in place of the peanut butter. The filling has a warm, spiced flavor, and I coat them in dark chocolate. Almond butter with a white chocolate coating and a sprinkle of toasted almonds is another elegant, delicious variation.
How to Store, Freeze & Reheat
These balls are a freezer’s best friend. Once the chocolate coating is fully set, I transfer them to a single layer in an airtight, freezer-safe container, separating layers with parchment paper. They will keep perfectly in the freezer for up to 2 months. This is my favorite way to store them, as they are meant to be eaten cold and hold their texture beautifully.
For shorter-term storage, they keep wonderfully in the refrigerator in an airtight container for up to 5 days. The flavor remains fantastic, though the chocolate coating may lose a tiny bit of its initial snap after a day or two (it’s still delicious!).
There is no need to reheat these treats. They are designed to be enjoyed cold, straight from the fridge or freezer. Taking one out and letting it sit for just 2-3 minutes on the counter softens the filling to the perfect creamy, mousse-like consistency. They are a perfect grab-and-go frozen dessert.
Conclusion
These No-Bake Peanut Butter Cheesecake Balls are my little kitchen triumph—proof that maximum flavor and joy can come from minimal effort and zero oven time. They’ve saved countless cravings, impressed countless guests, and become my most-requested treat. I hope this recipe brings the same effortless delight to your kitchen, giving you a cool, creamy, and deeply satisfying bite of happiness whenever you need it. Now, go soften that cream cheese—your new favorite freezer treasure is just a mix and a roll away.