
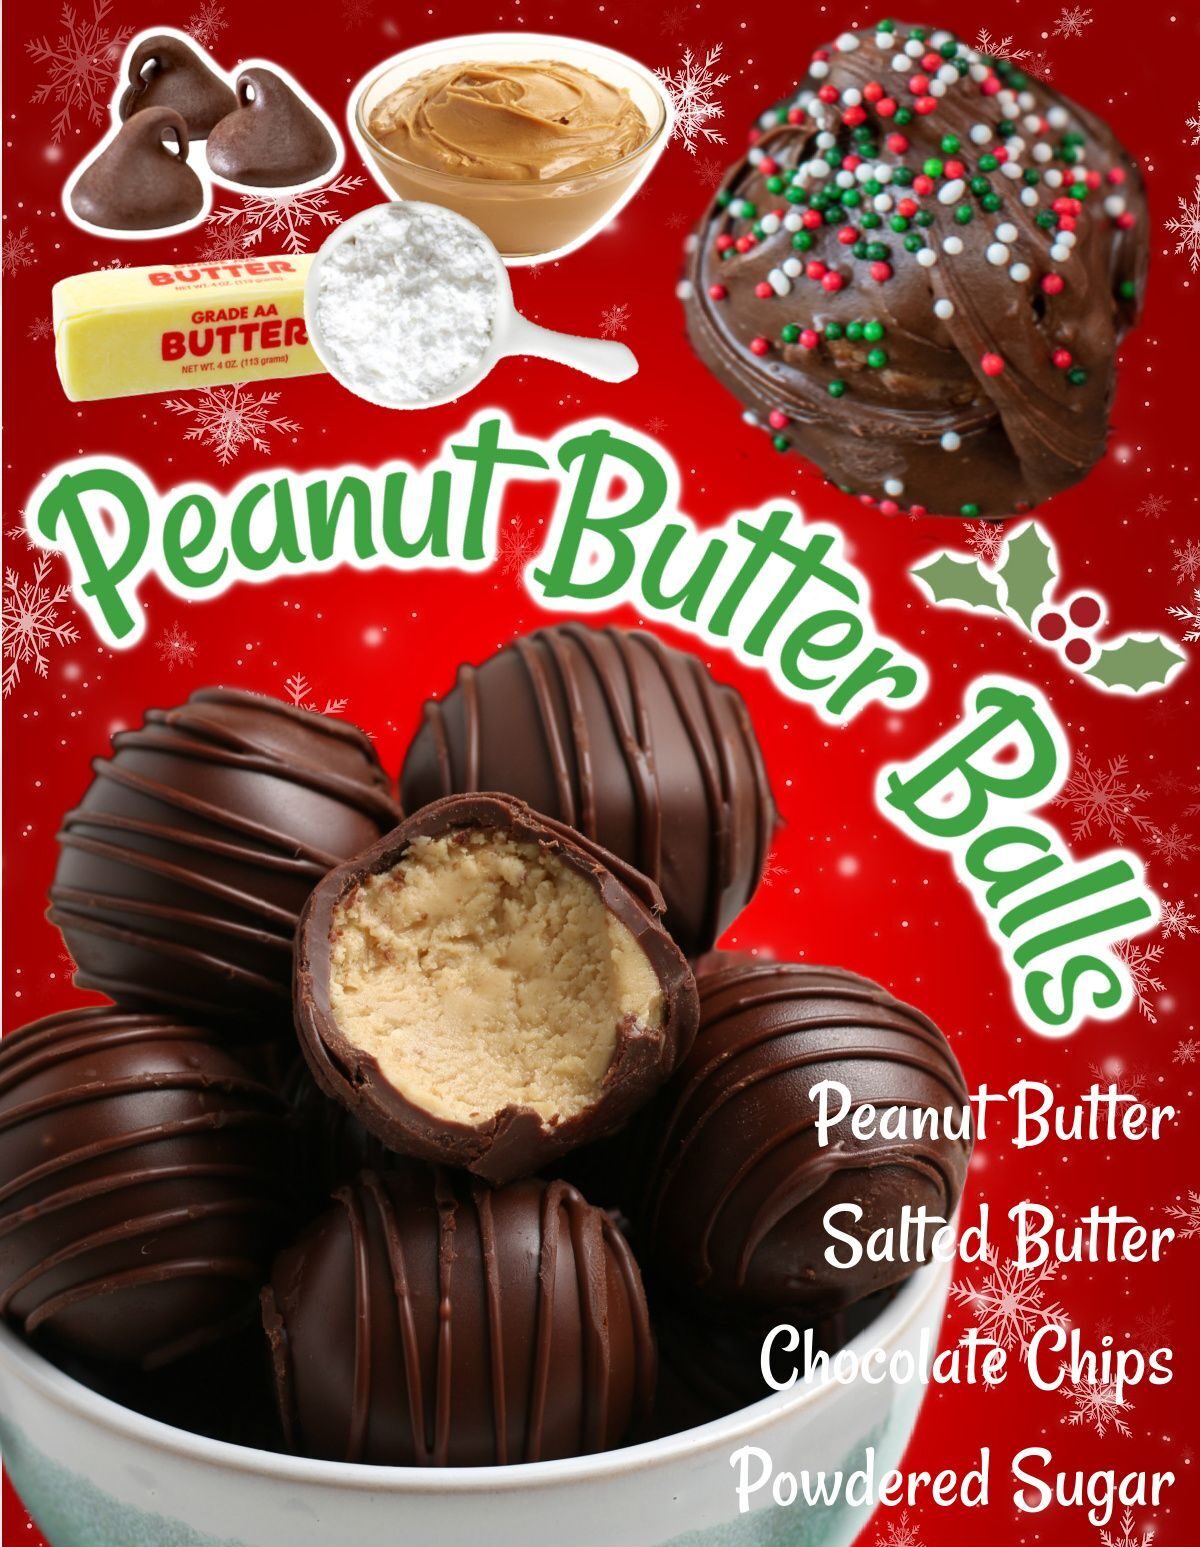
Another common issue is using natural peanut butter. While I love natural peanut butter on toast, it’s too oily for this recipe and doesn’t firm up the same way. The filling can separate or become greasy. Stick with standard creamy peanut butter for the best results.
Skipping the powdered sugar adjustment can also ruin the texture. The dough should be firm, not soft or sticky. If it’s too soft, the balls will flatten or fall apart during dipping. Add powdered sugar gradually and test the texture by rolling a small amount in your hands.
And finally, don’t store these at room temperature for long periods. Because of the butter and peanut butter filling, they soften quickly and can lose their shape. Always chill them for long-term storage.
Serving Suggestions
I love serving these peanut butter balls straight from the fridge—the cold chocolate coating gives the perfect snap, and the soft peanut butter interior melts instantly in your mouth. They’re always the first treat to disappear from any dessert tray.
For holiday gatherings, I place them in festive mini cupcake wrappers and arrange them on a tiered dessert stand. It makes them look extra special without any extra effort. You can also drizzle colored chocolate on top to match whatever holiday or event you’re celebrating.
When I’m gifting these, I layer them gently in small decorative tins with sheets of parchment paper in between. They hold their shape well and look so professional that people always assume they came from a candy shop. You can also mix them with other homemade candies for a beautiful assortment.
On movie nights or cozy evenings at home, I love pairing them with a warm drink—hot chocolate, coffee, or even a chai latte. The combination of warm and cold treats creates such a satisfying contrast.
Variations & Customizations
One of my favorite variations is rolling the peanut butter balls in crushed graham crackers before dipping them in chocolate. It gives them a slight cookie-like crunch that tastes like a peanut butter pie in candy form.
If you love salty-sweet combinations, sprinkle a pinch of flaky sea salt on top of each ball right after dipping. It elevates the flavor in a way that makes them taste gourmet and adds a lovely contrast to the sweetness.
For a fun twist, you can mix mini chocolate chips into the peanut butter dough before rolling. The little bursts of chocolate inside the center give even more richness and texture.
And if you prefer a softer, truffle-like interior, reduce the powdered sugar slightly and chill the mixture longer before rolling. It creates a creamier, meltier experience that almost feels like chocolate-peanut butter fudge.
How to Store, Freeze & Reheat
These peanut butter balls store beautifully in an airtight container in the refrigerator for up to two weeks. I layer them with parchment so they don’t stick together, especially if the chocolate shell softens slightly.
Freezing is my favorite long-term storage option. Once the chocolate coating is fully set, place the peanut butter balls on a baking sheet and freeze for about 30 minutes. Then transfer them to a freezer-safe bag or container. They keep well for up to three months and taste incredible frozen.
You don’t need to reheat these, of course, but if you prefer them softer, just leave a few at room temperature for 10–15 minutes. The center becomes extra creamy and delicious.
If you’re preparing them for a party, I recommend keeping them chilled until you’re ready to serve. They maintain their shape better and look glossy and perfect throughout the event.
Nutrition Information
These No-Bake Peanut Butter Balls are definitely indulgent, but they’re also satisfying in a way that keeps you from overindulging. Peanut butter provides protein and healthy fats, making each ball feel more filling than typical candy.
Because the recipe uses simple ingredients, you won’t find any preservatives or artificial flavors—just pure peanut butter goodness wrapped in chocolate. You can control the sweetness by adjusting the powdered sugar, and choosing semi-sweet chocolate reduces the overall sugar content.
Each ball delivers that classic chocolate-peanut butter flavor combination that many of us crave. It’s a dessert that feels balanced, rich, and completely worth the indulgence.
Sometimes I even enjoy one as a quick boost of energy in the afternoon; the peanut butter gives just enough staying power to tide me over.
FAQ Section
Can I use natural peanut butter in this recipe?
I’ve tried it, and the texture just doesn’t turn out right. Natural peanut butter is too oily and doesn’t firm up enough, so the balls often fall apart or become greasy.
How do I prevent the chocolate from cracking?
Make sure the peanut butter centers are cold but not rock hard when dipping. If they’re too frozen, the temperature shock can cause cracks in the chocolate.
Can I make these dairy-free?
Yes! Use dairy-free chocolate chips and swap the butter for a plant-based alternative. The texture is slightly softer, but it works well.
My mixture is too crumbly—what should I do?
Add a tablespoon of peanut butter at a time until it comes together smoothly again. Crumbly dough usually just needs a little more moisture.
Can I add flavors like maple or cinnamon?
Absolutely! A splash of maple extract or a pinch of cinnamon can give these a warm, cozy flavor without overpowering the peanut butter.
Conclusion
Making these No-Bake Peanut Butter Balls has become one of my favorite traditions, whether it’s holiday season or just an ordinary afternoon when I need a little pick-me-up. They’re simple, nostalgic, and incredibly satisfying—every bite delivers that perfect mix of creamy peanut butter and smooth chocolate. I hope you enjoy creating these irresistible treats as much as I do, and that they bring as much warmth and joy to your kitchen as they always do to mine.