
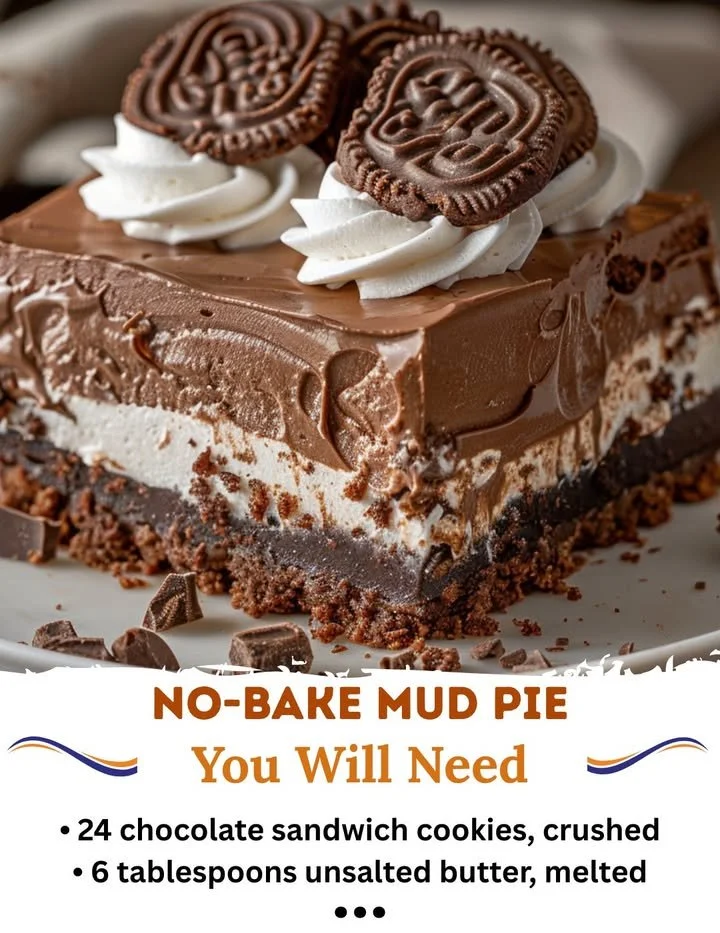
There’s something incredibly nostalgic about a rich and creamy no-bake mud pie. The kind of dessert that brings back memories of summer barbecues and family gatherings. In my kitchen, it’s a go-to recipe that never disappoints, with its luscious layers of chocolate goodness and crumbly crust. Plus, there’s no need to crank up the oven!
Why You’ll Love This Recipe
You’ll adore how easy and fun it is to whip up this no-bake mud pie. It’s perfect for those hot summer days when turning on the oven is the last thing on your mind. With layers of chocolate pudding and whipped cream, it’s a dessert that’s sure to impress your friends and family. The best part? It can be made ahead of time, allowing you to sit back and enjoy the moment. It’s super indulgent yet simple to make, which makes it a win-win in my kitchen! (See the ingredients in the next page below…)
Ingredients
– 1 ½ cups chocolate sandwich cookies (like Oreos), crushed
– ½ cup unsalted butter, melted
– 2 cups heavy cream, divided
– 1 cup powdered sugar
– 1 teaspoon vanilla extract
– 1 package (3.9 oz) instant chocolate pudding mix
– 2 cups milk
– Optional: chocolate shavings or whipped cream for garnish
Equipment Needed
– Mixing bowls
– 9-inch pie pan
– Electric mixer or whisk
– Measuring cups and spoons
– Rubber spatula
Step-by-Step Instructions
Let’s dive right into the delightful process of making this no-bake mud pie! Start by preparing the crust. In a mixing bowl, combine the crushed chocolate cookies with the melted butter. Mix well until the crumbs are fully coated in butter. Then, press this mixture firmly into the bottom and up the sides of a 9-inch pie pan to form a crust. It’s super satisfying to pack it all down, and you can already smell that chocolaty goodness! (See the next page below to continue steps…)
Next, in another bowl, whip together 1 cup of heavy cream, powdered sugar, and vanilla extract until stiff peaks form. This whipped cream layer is going to add that incredible lightness to the pie. Set that aside. In yet another bowl, mix the instant chocolate pudding with 2 cups of milk. Whisk for about 2 minutes until it thickens. What I love about this step is how quickly it transforms into a smooth, velvety pudding!
Layer the chocolate pudding over the crust, smoothing it out with a spatula. Now, gently fold half of the whipped cream mixture into the pudding until well combined, creating a rich and fluffy filling. Spread this mixture over the pudding layer. You can already start to see the layers forming, and it looks heavenly! Finally, top with the remaining whipped cream. You can also add some chocolate shavings if you’re feeling fancy.
Refrigerate the pie for at least 4 hours, or better yet, overnight. This allows all the flavors to meld together beautifully. The anticipation is one of my favorite parts—I always peek at it in the fridge, dreaming of that first spoonful!
Pro Tips for Best Results
When I first made this mud pie, I realized that crushing the cookies is key! I’ve tested this recipe with both a food processor and just a good ol’ Ziploc bag with a rolling pin, and I found that the rolling pin method gives a coarser texture, which I love. It creates a lovely crunch against the creamy filling.
Another tip is to ensure your cream is super cold before whipping. I put my mixing bowl and beaters in the fridge for about 10 minutes beforehand. This trick helps the cream whip faster and achieve those lovely stiff peaks without deflating.
Finally, when layering the pudding and whipped cream, make sure to spread gently. I learned the hard way that aggressive mixing can ruin the fluffy texture. Folding methodically keeps the layers distinct and visually appealing!
Common Mistakes to Avoid
One common mistake I made during my initial attempts was not letting the pie chill long enough. Without that proper chilling time, the layers might not set correctly, resulting in a sloppy serving. It’s hard to resist digging in early, but trust me on this one—patience is a virtue in this case! (See the next page below to continue…)
Another blooper is not crushing the cookies finely enough. If you leave large chunks, the crust can fall apart when you slice into it, and nobody wants that! A fine crumb is essential to give you that sturdy base.
Also, be cautious about over-mixing the whipped cream. It’s tempting to keep whisking until you reach a perfect fluffiness, but if you go too far, it can turn grainy, which isn’t what you want. Just stop as soon as you see those stiff peaks forming!
Lastly, ensure you use instant pudding mix. If you accidentally grab the cook-and-serve version, the texture will be off—it won’t set in the same delightful way. I learned this the hard way after an embarrassing pudding disaster!
Serving Suggestions
When it comes to serving, I like to garnish my mud pie with a dollop of whipped cream and a sprinkle of chocolate shavings on top. It elevates the dessert visually and adds a touch of elegance. If you’re feeling adventurous, a drizzle of melted chocolate or caramel sauce takes this dessert to the next level!
This pie pairs perfectly with a scoop of vanilla ice cream on the side. The cool ice cream balances wonderfully with the rich chocolate flavors, creating a delightful experience for the palate. I often serve this pie at family gatherings—everyone loves it and it never lasts long!
For a fun twist, consider serving individual portions in small bowls or glasses. Layer the crust, pudding, and whipped cream in clear cups for a beautiful presentation that allows guests to see the delicious layers. Plus, this makes it easier to portion out for large gatherings!
Variations & Customizations
One of the best things about this no-bake mud pie is how easily it can be customized. If you’re not a huge fan of chocolate, you can swap the chocolate pudding for vanilla and add a layer of fresh berries. It transforms the pie into a summery treat that’s just as dreamy!
I tested adding a layer of peanut butter to the filling once, and oh boy, it was divine! By mixing in a cup of peanut butter with half of the whipped cream before layering, you achieve a rich and nutty flavor that pairs beautifully with the chocolate. If you’re a peanut butter lover, this variation is a must-try.
Another fun option is to infuse the whipped cream with flavors like coffee or almond extract. Just a teaspoon of either can add an unexpected twist that complements the chocolate beautifully. I love switching it up, so I always keep my variations on hand to surprise my family and friends!
How to Store, Freeze & Reheat
Once made, this no-bake mud pie can be stored in the refrigerator, covered with plastic wrap, for up to 5 days. Just make sure to keep it well-covered to prevent it from absorbing any odors from the fridge. The flavors actually get better as it sits, so it’s fantastic for leftovers!
You might be wondering about freezing. Yes, you can freeze this pie! Just make sure to wrap it tightly in plastic wrap and then aluminum foil to avoid freezer burn. It can last for about 2 months frozen. To serve, thaw it in the fridge for several hours or overnight before slicing.
However, I wouldn’t recommend reheating it since this pie is designed to be served cold. Enjoy it straight from the fridge for that perfect creamy texture. Trust me, it’s the ideal way to savor a slice of this delicious dessert.
Conclusion
In my kitchen, this no-bake mud pie has become a favorite for good reason. It’s easy to make, absolutely delicious, and brings a smile to everyone’s face. Whether it’s a family gathering or just a casual weeknight treat, this dessert always hits the spot. I hope you enjoy making it as much as I do, and may it bring as much joy to your kitchen as it has to mine!