
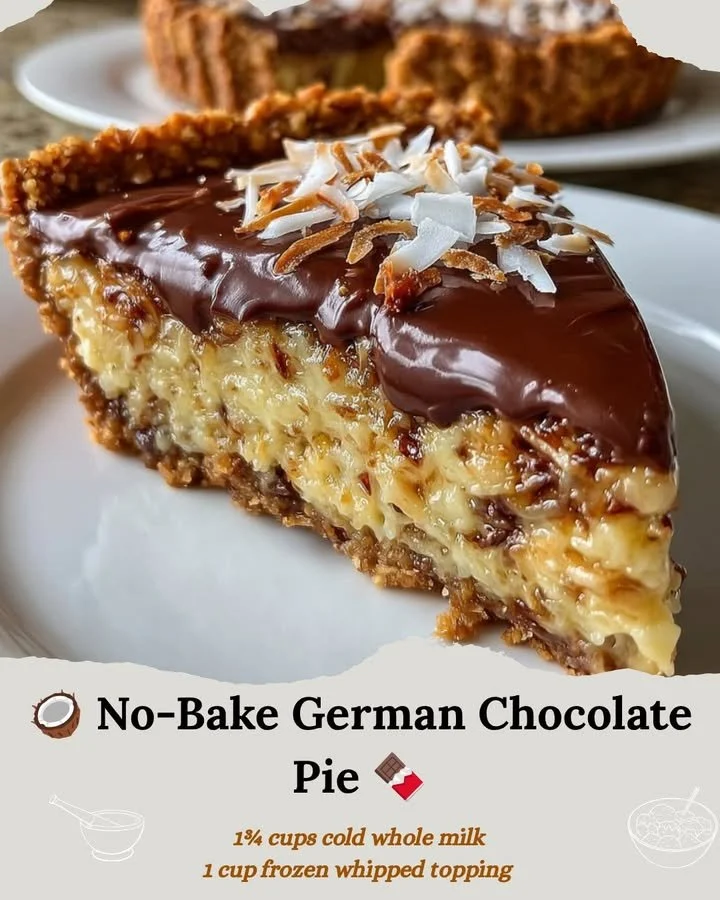
This delightful dessert has become a staple in my kitchen, especially on warm days when I want something sweet without heating up the oven. The beauty of this recipe lies not just in its freshness but also in its simplicity—perfect for both seasoned bakers and kitchen novices alike.
Why You’ll Love This Recipe
I absolutely adore how easy it is to whip up this pie with minimal fuss, requiring no baking whatsoever! The flavors meld beautifully, creating a luscious filling that hugs a buttery crust. Plus, it’s a showstopper at gatherings and quite the conversation starter! I often find myself indulging in a slice as a late-night treat or sharing it with friends for dessert over coffee. It’s hard not to fall in love with this pie once you’ve tried it! (See the ingredients in the next page below…)
Ingredients
– 1 ½ cups crushed graham crackers
– ½ cup unsweetened cocoa powder
– ½ cup granulated sugar
– ½ cup melted butter
– 2 cups heavy whipping cream
– 8 oz cream cheese, softened
– 1 cup powdered sugar
– 1 teaspoon vanilla extract
– 1 cup sweetened coconut flakes
– 1 cup chopped pecans
– 4 oz semi-sweet chocolate, melted (for drizzling)
Equipment Needed
– Mixing bowls
– Electric mixer
– 9-inch pie dish
– Rubber spatula
– Measuring cups and spoons
– Whisk
– Small saucepan (for melting chocolate)
Step-by-Step Instructions
First things first, let’s get that crust ready! I start by combining the crushed graham crackers, cocoa powder, granulated sugar, and melted butter in a mixing bowl. Using a fork, I mix everything until it resembles wet sand. Once that’s done, I gently press it into my pie dish, making sure it’s evenly distributed and tightly packed down. Chilling in the refrigerator for at least 15 minutes really helps it hold its shape well. (See the next page below to continue steps…)
Now for the filling! In a separate bowl, I whip the heavy whipping cream until it forms stiff peaks and set it aside. In another mixing bowl, using an electric mixer, I beat the softened cream cheese until smooth. Gradually, I add the powdered sugar and vanilla extract, mixing until everything is well combined and creamy. I then fold in half of the whipped cream gently to lighten the mixture before carefully incorporating the remaining cream.
It’s time to add the star ingredients! I fold in the sweetened coconut flakes and chopped pecans, and oh, the aroma is heavenly! Once it’s all mixed, I spoon this delightful filling into my chilled graham cracker crust, smoothing it out to create a nice layer. The pie goes back into the fridge to set for a minimum of two hours, but if I can resist, I often leave it overnight.
Before serving, I melt some semi-sweet chocolate in a small saucepan over low heat. I like to drizzle this melted chocolate over the top of the pie for that elegant touch. Once that’s done, it’s time to slice and enjoy. Serve it chilled, and get ready for the compliments!
Pro Tips for Best Results
When I first made this pie, I realized that letting the crust chill is crucial. I tested it three ways—cooling it for 15 minutes, an hour, and overnight. Trust me, the longer it chills, the better it holds together! I also recommend using full-fat cream cheese and heavy whipping cream—skimping on quality here compromises the luscious texture we all love.
Be gentle when folding the whipped cream into the filling; working too aggressively can deflate those lovely air bubbles that give your pie that irresistible fluffiness. I’ve found that using a silicone spatula works wonders for this step!
Lastly, while the chocolate drizzle is optional, it adds a slide of decadence to your pie. I’ve experimented with caramel drizzle too, which pairs beautifully with the flavors in the pie. You can’t go wrong with a little extra sweetness!
Common Mistakes to Avoid
One mistake I made early on was not packing the crust tightly enough. The last thing you want is for it to crumble when you’re trying to slice it! I found that pressing down firmly with the back of a measuring cup helps create a sturdy base. So, take your time and make sure that crust is nice and snug. (See the next page below to continue…)
Another hiccup can happen with the whipped cream. If you whip it too long, you’ll end up with butter! I always watch the mixer closely and stop as soon as I see those stiff peaks forming. This ensures the light and airy texture of the pie’s filling.
I also once made the mistake of rushing the chilling time. I thought I could get away with less than two hours, and it just wasn’t the same! Patience is key here; allowing the pie to set fully helps all those flavors meld deliciously together.
Finally, make sure to keep an eye on the chocolate while melting. It can turn from smooth to burnt in a matter of seconds! I prefer to use a double boiler when melting chocolate for precise control, but a carefully monitored saucepan works too!
Serving Suggestions
This pie is a crowd-pleaser served straight out of the refrigerator, but I’ve also discovered some fun ways to elevate serving it. A dollop of freshly whipped cream on top adds a touch of elegance and extra creaminess. You can even sprinkle additional coconut flakes or pecans for a crunchy topping!
For a unique twist, I love serving each slice with a scoop of vanilla or coconut ice cream on the side. The cold ice cream pairs beautifully with the rich chocolate filling, creating a delightful contrast in temperatures and textures.
If you’re feeling fancy, a drizzle of warm caramel sauce over the top can turn your pie into a decadent dessert that’s perfect for special occasions or a cozy night in. The sweet, rich caramel complements the chocolate and nutty flavors beautifully!
Variations & Customizations
I enjoy experimenting with flavors in my pie! For a tropical twist, try adding some crushed pineapple to the filling for a fruity surprise that complements the coconut nicely. You can also substitute the pecans for walnuts if you prefer a different nutty flavor.
Should you want a different chocolate experience, consider using dark chocolate instead of semi-sweet for a richer taste. Just make sure to adjust the sweetness of the filling accordingly if you go this route!
Lastly, if you want to make this dessert a bit lighter, I’ve experimented with using Greek yogurt in place of cream cheese. While the texture changes a little, it still provides a creamy backdrop and adds a tangy flavor that I actually enjoyed!
How to Store, Freeze & Reheat
Storing this pie is super simple. I usually cover it with plastic wrap or tuck it into an airtight container and keep it in the fridge, where it stays fresh for about 4-5 days. It makes the perfect dessert to prepare in advance for gatherings!
If you’re looking to keep it longer, you can also freeze the pie for up to 2 months. Just be sure to wrap it tightly in plastic wrap and then foil to prevent freezer burn. I recommend letting it thaw in the refrigerator overnight before serving for the best texture.
Reheating isn’t necessary for this dessert since it’s best served chilled. However, if you have leftovers, I like to allow them to sit out at room temperature for about 10-15 minutes before enjoying to taste the flavors at their best.
Conclusion
I truly hope you enjoy making this No-Bake German Chocolate Pie as much as I have! It’s a delightful balance of flavors and textures, and there’s something so rewarding about creating desserts that bring smiles to those I share them with. So gather your ingredients, and let’s make some sweet memories together in the kitchen!