
Some people mistakenly think any chocolate will work for the topping, but lower-quality chocolate chips sometimes melt into a dull, chalky mixture. Better chocolate melts more smoothly and sets with a glossy finish. It doesn’t have to be expensive—just a reliable brand you trust.
Lastly, avoid storing the bars uncovered in the refrigerator. The peanut butter layer can absorb fridge odors and dry out slightly. Always keep them in an airtight container or wrap them well to maintain their soft, dreamy texture.
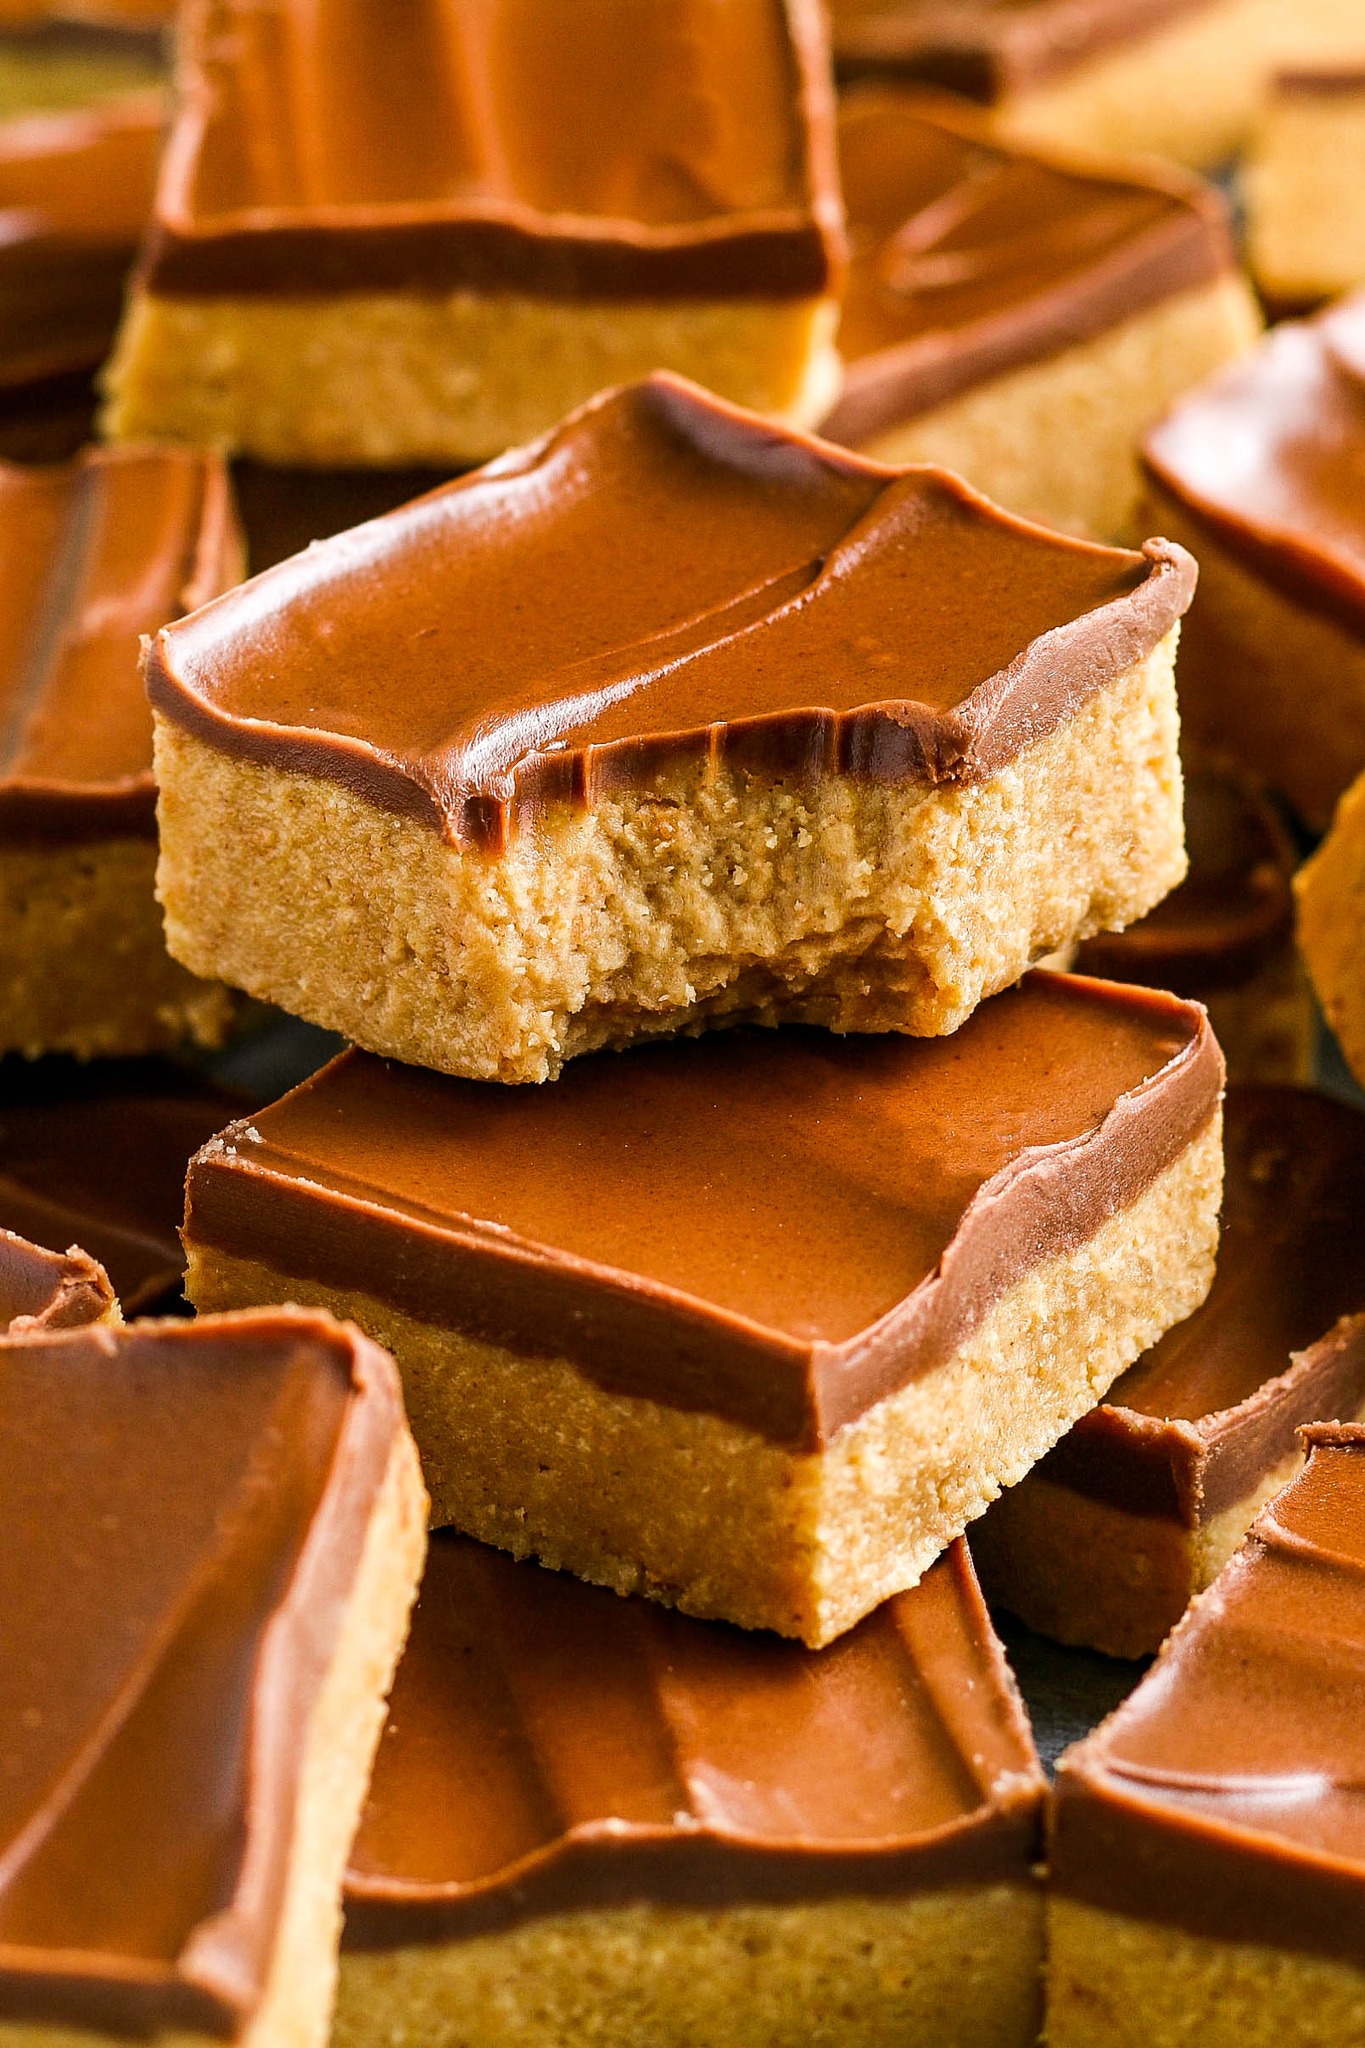
Serving Suggestions
Whenever I serve these No Bake Chocolate Peanut Butter Bars, I love arranging them in neat squares on a pretty tray lined with parchment paper. The layers look so clean and inviting that guests immediately gravitate toward them. They hold their shape beautifully at room temperature, making them perfect for parties, potlucks, and holiday cookie tables.
At home, I often cut the bars into small bite-sized squares instead of large ones. This creates little peanut-butter-chocolate jewels that are perfect when you just want a quick sweet nibble. They pair wonderfully with a cold glass of milk, and I’ve caught my family sneaking them from the fridge more than once.
These bars also make incredible dessert gifts. I layer them in a bakery-style box with wax paper sheets between each layer, and they look like something from a gourmet shop. People love receiving food gifts that don’t require reheating or special storage, and these bars fit that category perfectly.
Sometimes I crumble a bar over vanilla ice cream, letting the cold cream soften the chocolate and warm peanut butter mixture underneath. It creates an impromptu sundae that tastes far more decadent than it should, considering how simple the bars are to make.
Variations & Customizations
One variation I adore is adding crushed pretzels to the peanut butter base. The salty crunch works so well with the sweetness and gives the bars that irresistible sweet-salty contrast. A handful mixed into the base transforms the texture without any extra effort.
Another fun twist is using white chocolate or dark chocolate instead of milk chocolate for the topping. Dark chocolate gives the bars a more intense, grown-up flavor, while white chocolate creates a sweeter, creamier finish. You can even swirl two types of chocolate together for a marbled effect that looks stunning once sliced.
If you love crunch, try stirring in mini chocolate chips, chopped peanuts, or even toffee bits into the base layer. I’ve tried each of these versions, and they all elevate the bars into something uniquely delightful. The toffee variation, in particular, adds a buttery crunch that tastes like a candy bar.
You can also add a teaspoon of vanilla extract or a pinch of sea salt to the peanut butter mixture for deeper flavor. Salted peanut butter bars with dark chocolate topping taste almost dangerously good. Customizing them is easy because the base recipe is so dependable.
How to Store, Freeze & Reheat
Storing these bars is incredibly simple, which is another reason I love making them. I keep them in an airtight container in the refrigerator, where they stay fresh for up to a week. The chocolate stays firm but not too hard, and the peanut butter base keeps its soft, creamy texture.
Freezing these bars works beautifully too. I stack the sliced bars between layers of parchment or wax paper and seal them in a freezer-safe container. They freeze for up to three months without any texture loss. When I want one, I just let it sit at room temperature for 10–15 minutes, and it’s ready to enjoy.
If you prefer the bars a little softer, you can remove them from the refrigerator and let them rest on the counter for a few minutes before serving. The peanut butter base softens slightly at room temperature, making each bite even creamier.
Reheating isn’t something you typically do with no-bake bars, but if the chocolate becomes too firm from long refrigeration, a brief softening at room temperature is all they need. Never microwave them—they melt too quickly and lose their structure.
Nutrition Information
These bars are definitely a treat, but they’re the kind of dessert that satisfies so fully that a small square often feels like enough. The peanut butter provides protein and healthy fats, which gives the bars a rich, satisfying texture. The graham cracker crumbs add a bit of whole grain, and the chocolate offers antioxidants—so while they’re indulgent, I like thinking of them as balanced in their own sweet way.
The calorie count comes mostly from the butter, peanut butter, and chocolate, which is no surprise. These ingredients are what create that irresistible smoothness and richness. Because the bars are cut into squares, portion control is incredibly easy, making them a great choice for sharing or snacking in moderation.
One reason I love keeping these bars in the fridge is that the cold temperature makes each square feel more decadent, allowing me to savor smaller pieces instead of feeling like I need a large serving. They hit that sweet tooth craving quickly and deliciously.
Overall, while these bars aren’t meant to be health food, they are a wonderfully satisfying dessert that brings joy, comfort, and nostalgia with every small bite.
FAQ Section
Can I use natural peanut butter in this recipe?
Yes, but with caution. Natural peanut butter is looser and may make the base softer. If using it, I sometimes add an extra tablespoon of graham crumbs or powdered sugar to help the bars firm up properly.
Can I make these bars gluten-free?
Absolutely. Simply use gluten-free graham cracker crumbs. The bars taste just as delicious, and no one will notice the difference.
Why is my chocolate topping separating from the base?
This often happens if the base wasn’t pressed firmly enough or chilled slightly before adding the chocolate. I’ve also had separation occur when slicing the bars while they’re too warm. Chilling helps keep the layers together.
Can I halve the recipe?
Yes, the recipe halves beautifully. Use an 8×8 pan for a smaller batch. This is great for when you want a treat but don’t need a full 9×13 pan.
How do I get cleaner slices?
Use a warm knife, slice straight down, and wipe the blade between cuts. Cutting while the bars are cold gives the neatest, most professional-looking squares.
Conclusion
Making these No Bake Chocolate Peanut Butter Bars always reminds me why simple recipes can be the most magical. There’s something wonderfully comforting about stirring together just a few ingredients and ending up with an irresistibly rich dessert that everyone loves. Each time I press the peanut butter mixture into the pan or smooth the glossy chocolate across the top, I feel like I’m creating a little moment of joy. I hope these bars bring the same sweetness and simplicity into your kitchen, whether you share them with loved ones or savor them all to yourself. Enjoy every creamy, chocolatey bite!