
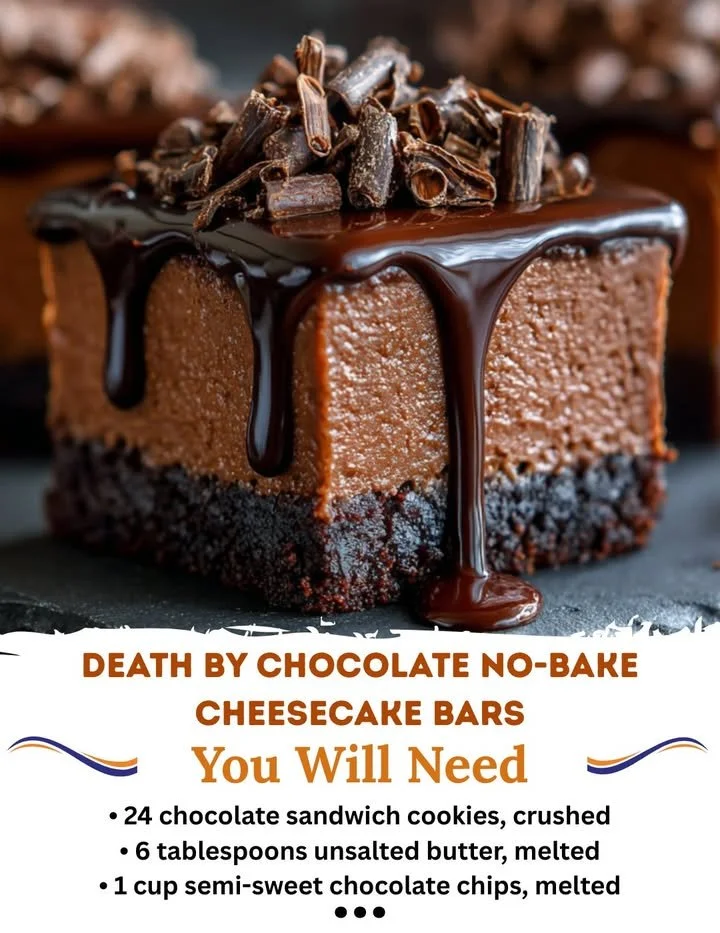
Death by Chocolate No-Bake Cheesecake Bars. These bars are rich, creamy, and perfectly chocolatey, while being super easy to whip up without turning on the oven. Trust me, once you take a bite, you’ll understand the name!
Why You’ll Love This Recipe
If you’re anything like me and can’t resist anything chocolatey, then you’re in for a treat! The combination of the silky cheesecake layer and the luscious chocolate topping creates a dessert that is simply irresistible. Plus, the no-bake aspect means you can enjoy these treats without the hassle of heating up the kitchen. They’re perfect for warm days or when you want something quick and decadent! (See the ingredients in the next page below…)
Ingredients
– 2 cups chocolate cookie crumbs
– 1/2 cup unsalted butter, melted
– 16 ounces cream cheese, softened
– 1 cup powdered sugar
– 1 teaspoon vanilla extract
– 2 cups heavy whipping cream
– 1 cup semi-sweet chocolate chips
– 1/2 cup chocolate ganache (store-bought or homemade)
– Optional: chocolate shavings for garnish
Equipment Needed
– 9×13 inch baking dish
– Mixing bowls
– Electric mixer or whisk
– Rubber spatula
– Measuring cups and spoons
– Parchment paper (for easy removal)
Step-by-Step Instructions
Let’s dive right into making these heavenly cheesecake bars! First, I start by preparing the crust. In a mixing bowl, I combine the chocolate cookie crumbs with the melted butter until everything is well blended. The mixture should resemble wet sand. Then, I press it firmly into the bottom of my baking dish to create a solid base. This decadent crust is essential, so I make sure to pack it down tightly. (See the next page below to continue steps…)
Next, I whip up the cheesecake filling. In another large bowl, I beat the softened cream cheese with the powdered sugar and vanilla extract until it’s smooth and creamy. I can’t resist tasting it at this point! The tanginess of the cream cheese paired with the sweetness of the sugar is divine. Then, I slowly fold in the whipped cream until it’s light and airy, ensuring that every bite will be fluffy and delicious. I pour this beautiful mixture over the crust, smoothing it out with my spatula.
Now, for the star of the show—the chocolate layer! I melt the semi-sweet chocolate chips in a microwave-safe bowl, making sure to stir every 30 seconds until it’s velvety smooth. Once it has cooled slightly, I spread it over the cheesecake layer, creating a glossy finish that looks absolutely appetizing. After that, I pop the entire dish into the refrigerator to chill. Patience is key here; I usually wait for at least four hours, but overnight is best for perfect set bars.
Finally, once chilled, I pull the dessert out, and with the help of parchment paper, I lift it out of the baking dish. I slice it into bars, garnishing with a drizzle of chocolate ganache and chocolate shavings if I’m feeling fancy. My heart flutters every time I serve these bars, and I can’t wait to share them with my family!
Pro Tips for Best Results
I’ve tested this recipe a couple of times, and I’ve learned that using room temperature cream cheese is vital. It blends more easily, creating a smoother filling that’s free of lumps. On the days I forgot to take it out early, I ended up with a less than desirable texture, and who wants that in a cheesecake?
Also, make sure your whipped cream is whipped to stiff peaks. This little tip dramatically affects the lightness of your filling. I recall one time I was in a rush, and my cream didn’t whip sufficiently. The result? A denser texture that, while still tasty, didn’t have that airy quality I adore. A little extra time in the mixing can make a world of difference!
Lastly, be cautious with your chocolate. After melting it, let it cool slightly before adding it to the cheesecake, otherwise, you risk melting the filling, and nobody wants a soupy cheesecake. Trust me, I learned this the hard way!
Common Mistakes to Avoid
One common mistake I encountered was not allowing the bars to chill long enough. The first batch I made could barely hold their shape when I served them, and watching it collapse felt like the end of the world. Patience is essential, so make sure to let these bars chill properly! (See the next page below to continue…)
Another thing to watch out for is over-mixing the cheesecake filling. It’s tempting to keep blending until everything is perfectly smooth, but over-beating can result in a runny filling once whipped cream is added. My advice? Mix just until combined—your cheesecake will still be delightful!
Also, be cautious not to skip the lining of the baking dish with parchment paper. In my early attempts, I went without it, and let me tell you, trying to get those bars out was a real challenge. With parchment, everything comes out smoothly, and cleanup is a breeze!
Serving Suggestions
These Death by Chocolate No-Bake Cheesecake Bars are lovely on their own, but I love to dress them up a bit when serving. A dollop of freshly whipped cream on top adds an airy touch, while sprigs of mint can lend a refreshing contrast to the luscious chocolate. If I’m hosting a gathering, I often serve them alongside fresh berries for a pop of color and acidity.
For gatherings or celebrations, I suggest presenting the bars on a fancy cake stand; it elevates the dessert’s appeal and makes it feel extra special. You can also sprinkle some extra chocolate shavings around the plate for that added gourmet flair.
And let’s not forget about coffee! I’ve found that these bars go perfectly with a strong brew or even a scoop of vanilla ice cream on the side. The contrast between warm and cold makes for a heavenly experience with each bite.
Variations & Customizations
One of the fantastic things about this recipe is how versatile it is! For a different twist, consider using flavored chocolate cookies for the crust, like Oreos or even salted caramel cookies! The unique flavor will add an unexpected layer of taste that’s simply delightful.
If you’re feeling adventurous, try mixing in some chocolate chunks into the cheesecake filling for added texture. The little bites of chocolate enhance the overall experience and make it even more decadent.
Lastly, if you want to lighten it up a bit, substitute the cream cheese with a lower-fat option or even a dairy-free cream cheese alternative. I’ve tried this, and while it’s not quite as rich as the original, it still delivers a satisfying treat without feeling too heavy!
How to Store, Freeze & Reheat
These cheesecake bars can be stored in the refrigerator for up to a week, but I doubt they’ll last that long! Just make sure to cover them well with plastic wrap or store them in an airtight container to keep them fresh.
If you want to make a batch ahead of time, these bars freeze beautifully. I wrap individual bars in plastic wrap and then place them in a zip-lock bag. This way, I can pull out a single serving whenever a chocolate craving strikes! They stay fresh for about three months, making them an excellent make-ahead dessert for any occasion.
When you’re ready to enjoy a frozen bar, simply transfer it to the refrigerator a few hours before you plan on serving it. There’s no need to worry about reheating; these bars are meant to be enjoyed cold and are still incredibly rich and creamy even after being frozen!
Conclusion
I hope you’re as excited as I am to try making these Death by Chocolate No-Bake Cheesecake Bars! There’s something so joyful about creating desserts that don’t just taste amazing but look beautiful too. I promise you won’t regret making these—each bite is like a little piece of chocolate heaven. Happy baking, and enjoy every moment in your kitchen!