
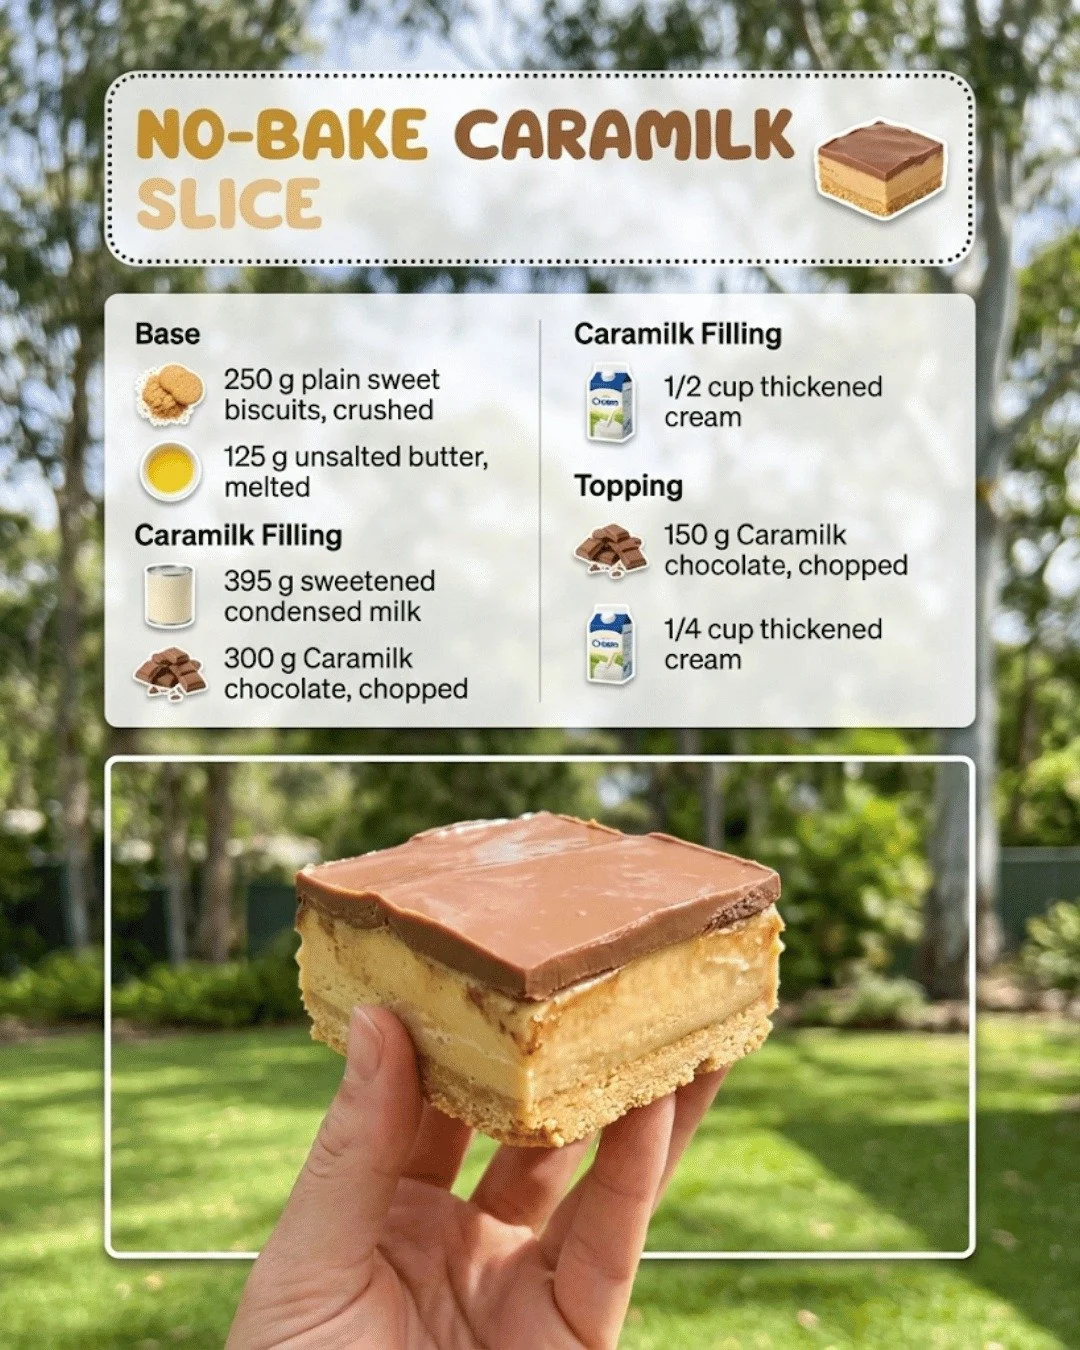
In a mixing bowl, combine the crushed biscuits, melted butter, sweetened condensed milk, desiccated coconut, and vanilla extract. Stir until all the ingredients are well combined and you have a thick mixture. I love how the coconut adds a lovely texture and a hint of tropical flavor that pairs wonderfully with the Caramilk. Now, pour the mixture into the prepared baking dish and press it down firmly to create an even layer. Smooth out the top with a spatula for a beautiful finish.
Once it’s nicely packed, pop it in the fridge for about 4 hours or until it’s set. The hardest part is waiting, but I promise it’ll be worth it! After it’s had sufficient chill time, take it out of the fridge and melt some extra Caramilk chocolate if you want to drizzle on top—it adds that special touch that makes it look professional and decadently inviting!
Pro Tips for Best Results
When I first made this slice, I tried using different types of biscuits, and I found that plain biscuits work best because they let the chocolate flavor shine through. I experimented with chocolate biscuits, but they overpowered the caramel essence. After some trials, I settled on using a classic plain biscuit that’s not too sweet. Trust me—it’s all about balance!
Another tip I learned is to ensure your melted chocolate isn’t too hot when combining it with other ingredients. If the chocolate is too hot, it can cause the butter or condensed milk to separate, which will affect the final texture. I always let it cool just a bit before mixing.
Lastly, don’t skip the pressing step! I’ve made the mistake of not pressing down the mixture firmly enough, and the slice ended up crumbly instead of holding its shape. A firm press creates that perfect slice you can impress your family and friends with!
Common Mistakes to Avoid
One of the most common mistakes I see—and I made this too— is not using enough butter. Butter not only helps the biscuits stick together but also adds richness to the slice. Make sure to measure it carefully! If you’re using less than the recommended amount, you might end up with a dry slice.
Another boo-boo is not allowing enough chilling time. I’ve been guilty of being too impatient, but trust me, let it chill completely. If you try to cut it too soon, you’ll have a melty mess on your hands, and it won’t hold its shape at all. If you can wait, enjoy a cup of tea while it sets the perfect size!
Lastly, over-melting the chocolate is an easy trap to fall into. Keep the heat low and stay near your saucepan, stirring gently. If you walk away, you risk burning it! I’ve burned chocolate before, and cleaning that mess is a nightmare. Keep that lovely golden brown color intact!
(See the next page below to continue…)