
Another pitfall is rushing the whipping process of the heavy cream. It’s tempting to just mix it quickly, but taking the time to whip it to the right consistency—soft peaks—is key. If you overwhip, you’ll end up with a grainy texture, and nobody wants that in their cheesecake!
I also recommend not skimping on the chilling time. I used to be impatient and cut into the cheesecake bars too soon, resulting in a filling that wasn’t fully set. Allowing ample time in the fridge is crucial for the bars to hold their shape and make slicing easier.
Lastly, make sure to use a sharp knife for cutting the cheesecake. Dull knives tend to squish the bars instead of giving a nice clean cut, which can ruin the beautiful presentation you’re aiming for!
Serving Suggestions
These No-Bake Biscoff Cheesecake Bars are deliciously rich on their own, but I love to serve them with fresh berries or a scoop of vanilla ice cream. The tartness of the berries complements the sweetness of the cheesecake perfectly, creating a delightful contrast of flavors in each bite.
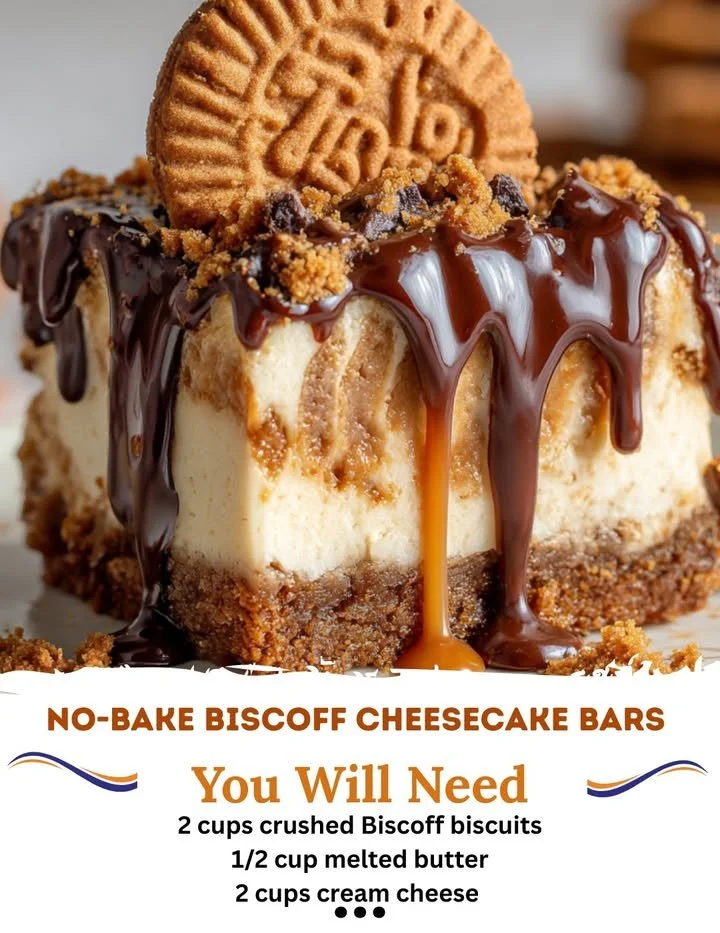
Sometimes, I whip up a simple chocolate ganache to drizzle over the bars for an extra indulgent touch. The chocolate adds another layer of flavor that pairs wonderfully with the caramel notes of the Biscoff. It’s an easy way to elevate the dessert for special occasions!
If I’m a bit pressed for time but still want to impress, I opt for serving these bars with a dollop of freshly whipped cream or a sprinkle of crushed Biscoff cookies on top. It creates a fun texture and adds a little crunch!
Variations & Customizations
One of the fun parts about these cheesecake bars is how customizable they can be! For chocolate lovers, you can easily fold in mini chocolate chips into the cream cheese filling for a delightful surprise in every bite. I’ve tried this variation and it added a delightful little twist without overpowering the Biscoff flavor.
For a seasonal touch, consider adding pumpkin puree and spices during the fall. It transforms the cheesecake into a cozy pumpkin Biscoff treat that’s perfect for Thanksgiving gatherings. Just reduce the amount of Biscoff spread slightly to keep it balanced.
And if you’re watching your sugar intake, you can swap the powdered sugar for a sugar substitute. I’ve done this successfully, and it still tasted great! You might have to adjust the sweetness level, but you can easily tweak it to your preference.
How to Store, Freeze & Reheat
Storing these No-Bake Biscoff Cheesecake Bars is super easy! I simply cover the bars with plastic wrap and keep them in the fridge where they’ll stay fresh for up to a week—if they last that long! The flavors only seem to get better after a day or two in the fridge, making them an ideal make-ahead dessert.
If you want to freeze them, I highly recommend cutting the bars into squares before freezing. Just wrap each square in plastic wrap and store them in an airtight container. They’ll keep well for up to three months! When I’m in the mood for a treat, I just take one out of the freezer, let it thaw in the fridge for a couple of hours, and it’s as delicious as the day I made it.
Reheating isn’t necessary for these bars, but if you happen to try it, a quick 10-second blast in the microwave will soften the Biscoff spread on top for a warm, gooey treat. Just be careful not to overheat it—you want every flavor to shine.
Conclusion
I hope you enjoy making these No-Bake Biscoff Cheesecake Bars as much as I do! They bring a little sweetness into any day, whether it’s a quiet afternoon at home or a big family celebration. So grab your ingredients, bring some friends over, and indulge in this delightful treat. Happy baking!