
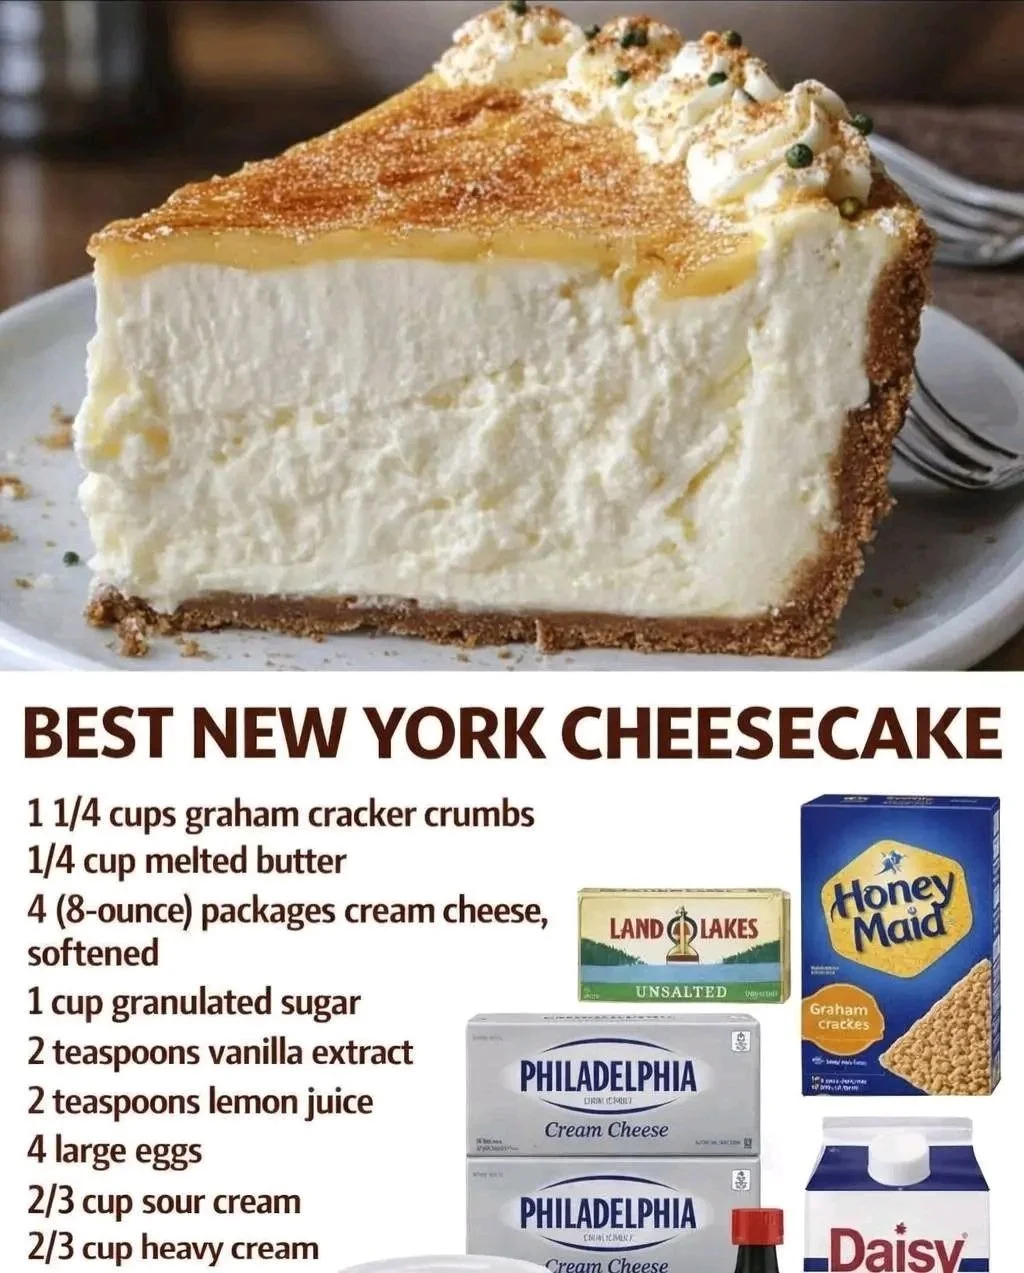
My quest for the perfect New York cheesecake began with a disappointing slice from a restaurant—it was grainy, dense, and nothing like the creamy dream I remembered. Determined, I spent months testing in my kitchen, filling the air with the rich, comforting scent of toasting graham crackers and sweet, tangy cream cheese. The moment I pulled this version from the oven—tall, pale gold, and without a single crack—I knew I’d found it. That first silky, luxuriously smooth bite was pure triumph, a classic recipe made accessible right at home.
Why You’ll Love This Recipe
You will love this recipe because it demystifies the iconic diner dessert. It guides you to a flawlessly smooth, dense yet creamy texture with that signature slight tang, all perched on a buttery, crisp crust. It’s a project that rewards patience with incredible results, making you feel like a master baker. This is the cheesecake you’ll proudly serve for birthdays, holidays, or anytime you crave a slice of pure, unadulterated indulgence.See the ingredients in the next page below…)
Ingredients
For the Graham Cracker Crust:
- 2 cups (about 200g) graham cracker crumbs (from 16-18 whole sheets)
- 1/3 cup (67g) granulated sugar
- 1/2 cup (1 stick / 113g) unsalted butter, melted
- Pinch of fine sea salt
For the Filling:
- 4 (8-ounce / 226g) blocks full-fat Philadelphia cream cheese, at room temperature
- 1 1/2 cups (300g) granulated sugar
- 4 large eggs plus 2 large egg yolks, at room temperature
- 1 cup (240g) full-fat sour cream, at room temperature
- 1/4 cup (30g) all-purpose flour
- 2 teaspoons pure vanilla extract
- 1 teaspoon fresh lemon juice
- Pinch of fine sea salt
Equipment Needed
- 9-inch or 10-inch springform pan
- Heavy-duty aluminum foil
- Stand mixer or hand mixer and large bowl
- Food processor (for crumbs) or a zip-top bag and rolling pin
- Roasting pan or large baking dish (for water bath)
- Medium mixing bowl and spatula
- Cooling rack
Step-by-Step Instructions
We start with the foundation: the crust. I pulse my graham crackers in the food processor until they’re fine, sandy crumbs. In a bowl, I mix the crumbs, sugar, and salt, then pour in the melted butter. When you squeeze a handful, it should hold together like damp sand. I press this mixture firmly and evenly into the bottom and about halfway up the sides of my springform pan. I use the bottom of a measuring cup to really tamp it down—a loose crust will crumble when sliced. I then bake this at 325°F (165°C) for 10 minutes to set it. This par-baking prevents a soggy bottom and makes a world of difference. I let it cool completely on a rack while I prepare the filling. Don’t rush this; a hot pan will start cooking your filling on contact.(See the next page below to continue steps…)
Now, for the most critical rule: room temperature everything. I take my cream cheese, eggs, and sour cream out at least two hours ahead. Cold cream cheese will never become smooth, leading to a lumpy batter. In the bowl of my stand mixer fitted with the paddle attachment, I beat the cream cheese on medium-low speed for a full minute until it’s utterly smooth and pliable. I then add the sugar and beat for another 2-3 minutes, scraping down the bowl often, until the mixture is creamy and no longer gritty. This step incorporates air and ensures the sugar is fully dissolved, which is key for a smooth texture.
With the mixer on low, I add the eggs and egg yolks one at a time, letting each disappear completely before adding the next. Overbeating here incorporates too much air and can cause cracks. Once the eggs are in, I add the sour cream, vanilla, lemon juice, and salt, mixing just to combine. Finally, I sprinkle the flour over the batter and mix on low for the final 30 seconds, just until no white streaks remain. The batter should be velvety, glossy, and lump-free. I pour it over the cooled crust and gently tap the pan on the counter to release any large air bubbles.
Here’s the secret weapon: the water bath. I wrap the bottom and up the sides of my springform pan tightly with two layers of heavy-duty foil to prevent water seeping in. I place the pan in a large roasting pan, set it on the oven rack, and then pour boiling water into the roasting pan until it comes about halfway up the sides of the springform. The steam creates a gentle, even heat that cooks the cheesecake slowly, preventing cracks and ensuring that legendary creamy texture. I bake it at 325°F for about 70-90 minutes. It’s done when the edges are set but the center still has a slight, gentle jiggle—like Jell-O. It will firm up as it cools.
Pro Tips for Best Results
I’ve tested mixing methods, and using a paddle attachment on a stand mixer (or hand beaters) on a medium-low to low speed is absolutely essential. I once tried using a whisk attachment on high to “fluff” it up, and it incorporated too much air. That cheesecake puffed up dramatically in the oven and then fell, creating a dense texture and a giant crack. Low and slow mixing is the mantra for a smooth, dense New York-style crumb.
The water bath is non-negotiable for a crack-free top. I tried skipping it once, thinking I could just turn the oven off and let it cool inside. The top browned too quickly, the edges overcooked, and a massive crack split the center. The steam from the water bath is your insurance policy. If you’re nervous about leaks, you can also place the springform pan inside an oven bag before putting it in the water bath for foolproof protection.
Patience during cooling is the final, crucial step. When the baking time is up, I turn off the oven, crack the door open with a wooden spoon, and let the cheesecake cool in the oven for one hour. This gradual temperature change prevents shocking the delicate custard. Then, I remove it from the water bath, take off the foil, and let it cool on the counter to room temperature (another 2 hours). Only then do I refrigerate it, uncovered, for at least 12 hours, but preferably 24. This long chill sets the texture perfectly and makes slicing clean a dream.(See the next page below to continue…)
Common Mistakes to Avoid
My first big mistake was using cold ingredients. In my early baking days, I figured a few minutes on the counter was enough. The cold cream cheese stayed lumpy no matter how long I beat it, and the final cake had tiny bits of unincorporated cheese throughout. Now, I plan ahead. True room temperature means the cream cheese is soft all the way through when gently pressed. Trust me, this one step prevents so much frustration.
Overmixing after adding the eggs is a silent saboteur. When you add the eggs, you’re essentially building an emulsion. Beating on high speed or for too long incorporates excess air bubbles that expand in the oven and then collapse, leading to cracks and a less-dense texture. I mix on the lowest speed possible and only until each egg yolk vanishes. I also scrape the bowl down thoroughly between additions to ensure even mixing.
Do not overbake. The “jiggle test” is your best friend. I used to bake mine until the center looked completely set, which meant it was overdone by the time it cooled. It became dry and grainy. You want the center to jiggle like soft-set pudding when you gently shake the pan. The residual heat will carry it to perfection. Remember, it continues to cook as it cools in the turned-off oven.
Rushing the chilling process is the final pitfall. I once needed a cheesecake for a party and only chilled it for 6 hours. When I sliced it, it was still slightly soft in the center and messy to serve. The flavor also hadn’t fully developed. The long, slow chill in the fridge is when the magic happens—the flavors meld, and the texture becomes firm and sliceable. It’s worth the wait. Plan to make this cake two days before you need it.
Serving Suggestions
I adore serving this cheesecake in its pure, unadorned glory. A simple slice on a white plate allows the classic flavor to shine. The clean, crisp crust and the rich, tangy filling are a perfect balance. Sometimes, I’ll just add a tiny dollop of barely-sweetened whipped cream on the side for a touch of lightness, but it truly needs nothing at all.
For a classic New York diner presentation, I warm up a simple homemade strawberry or raspberry sauce. I don’t like it too sweet—just berries, a little sugar, and lemon juice cooked down until syrupy. I serve the sauce on the side so everyone can drizzle to their liking. A few fresh berries on top make it look gorgeous and add a bright, fresh contrast to the rich cake.
In the fall, I love a caramel apple variation. I’ll top the chilled cheesecake with a layer of salted caramel sauce and then a pile of thinly sliced apples that I’ve sautéed in butter with a bit of cinnamon. It’s decadent and festive. For a more elegant touch, a dark chocolate ganache drizzle and a few curls of white chocolate create a stunning black-and-white effect.
Variations & Customizations
For a stunning marble cheesecake, I reserve about one cup of the plain batter. To that, I mix in 4 ounces of melted and slightly cooled semi-sweet chocolate. After pouring the plain batter into the crust, I dollop the chocolate batter on top and swirl it with a knife. It bakes up beautifully and satisfies both vanilla and chocolate lovers in one dessert.
If you love a citrus twist, you can add the zest of one lemon or orange to the batter. The fresh zest adds a wonderful brightness without making the cheesecake sour. For a true Key Lime Cheesecake, you could substitute the sour cream with an equal amount of key lime juice and add zest, though the texture will be slightly tangier and softer.
You can also play with the crust. While graham cracker is classic, I’ve made fantastic versions using crushed gingersnaps (perfect for the holidays) or even chocolate wafer cookies. Just keep the same butter-to-crumb ratio. For a nutty depth, you can replace 1/2 cup of the graham crumbs with finely ground toasted pecans or almonds.
How to Store, Freeze & Reheat
Once fully chilled and set, I store the cheesecake in the springform pan, with the outer ring on, tightly wrapped in plastic wrap in the refrigerator. It will keep beautifully for up to 5 days. The flavor, in fact, often improves on days two and three. Always let slices sit at room temperature for about 20 minutes before serving to take the chill off and maximize creaminess.
To freeze, I chill the cheesecake completely, then remove it from the springform pan. I wrap the entire cake (or individual slices) tightly in a layer of plastic wrap, followed by a layer of heavy-duty aluminum foil. Placed in a freezer bag, it will keep for up to 2 months. Thaw it overnight in the refrigerator before serving. I don’t recommend freezing it with a fruit topping, as it can become watery.
Reheating is not typically needed, as cheesecake is served cold. However, if you’ve frozen a whole cake, the key is a slow, gradual thaw in the fridge. Do not try to speed it up on the counter, as condensation can make the top soggy. For a single frozen slice, you can thaw it in the refrigerator for a few hours or even enjoy it slightly frozen for a firmer, ice cream-like texture.
Conclusion
This New York cheesecake is more than a recipe; it’s a rewarding baking journey that ends with the most glorious, celebratory dessert. It has become my signature dish for special occasions, and the pride I feel when presenting that tall, creamy, uncracked beauty is unmatched. I hope this guide gives you the confidence to create your own perfect slice of nostalgia. Now, go bring that cream cheese to room temperature—your masterpiece awaits.