
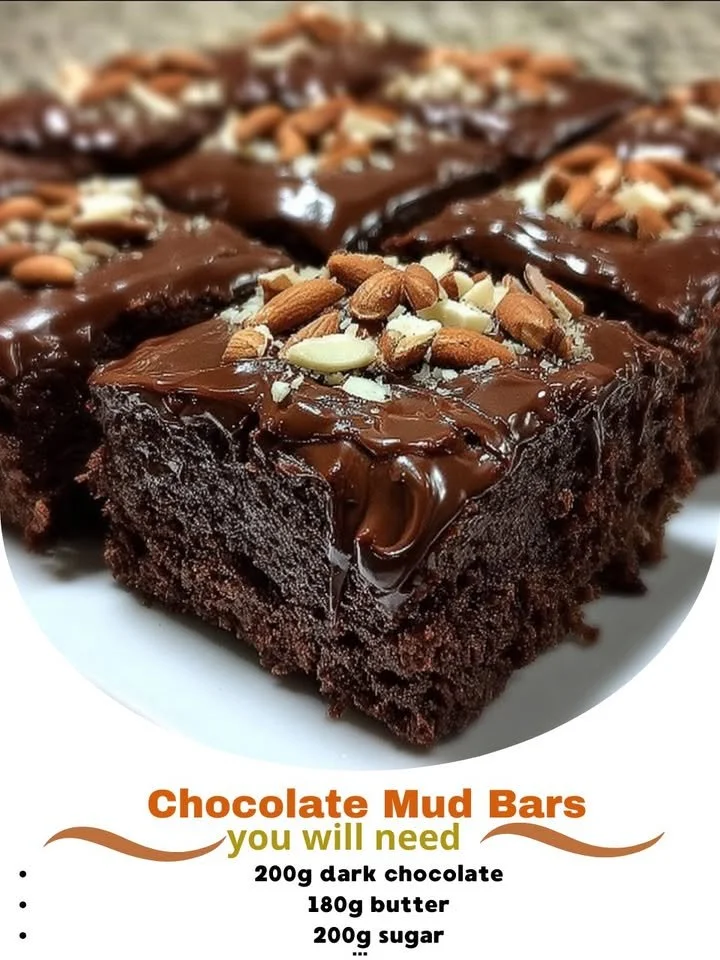
I’m thrilled to share my favorite recipe for Chocolate Mud Bars. These rich, fudgy bars are an indulgent treat that’s perfect for any occasion, whether it’s a cozy night in or a gathering with friends.
Why You’ll Love This Recipe
You’ll adore this recipe for Chocolate Mud Bars because it delivers a luscious chocolate flavor that melts in your mouth. The combination of gooey chocolate, a hint of espresso, and a rich texture is simply irresistible. Plus, they’re easy to make, and the aroma that fills your kitchen while they bake is something I look forward to every time! Whether you’re a chocolate lover or just looking to satisfy a sweet tooth, these bars won’t disappoint. (See the ingredients in the next page below…)
Ingredients
– 1 cup unsalted butter
– 2 cups granulated sugar
– 4 large eggs
– 1 teaspoon vanilla extract
– 1 cup all-purpose flour
– 1 cup unsweetened cocoa powder
– 1 teaspoon baking powder
– ½ teaspoon salt
– ½ cup semi-sweet chocolate chips
– ¼ cup brewed espresso (optional)
Equipment Needed
– 9×13-inch baking pan
– Mixing bowls
– Whisk or electric mixer
– Rubber spatula
– Measuring cups and spoons
– Parchment paper (optional)
Step-by-Step Instructions
To kick off this delicious journey, start by preheating your oven to 350°F (175°C). While that’s warming up, I like to line my baking pan with parchment paper, which makes for easy removal and cleanup later—trust me, it’s a game changer! Next, I melt the butter in a saucepan over low heat and then stir in the sugar until well combined. Let that lovely mixture cool slightly, then whisk in the eggs and vanilla extract until everything is beautifully blended together. The buttery, sugary goodness will already have your mouth watering! (See the next page below to continue steps…)
Now, in a separate bowl, I combine the flour, cocoa powder, baking powder, and salt. I find it helpful to sift these dry ingredients to prevent any clumps; the finer texture contributes to those delightful fudgy bars. Gradually fold the dry mixture into the wet ingredients using a rubber spatula, being careful not to overmix. When everything is just combined, I gently fold in the chocolate chips and, if I’m feeling adventurous, the brewed espresso, which really enhances the chocolate flavor.
Pour the batter into your prepared baking pan and spread it out evenly. This is where the magic begins! Bake in the preheated oven for about 25 to 30 minutes. I always check the doneness by inserting a toothpick into the center; it should come out with a few moist crumbs clinging to it—this indicates they’re perfectly fudgy. Once baked, let them cool in the pan for a bit, then transfer them to a wire rack to cool completely. The smell wafting through my kitchen is heavenly; I can hardly wait to cut into them!
Pro Tips for Best Results
One of my favorite tips for these Chocolate Mud Bars is to always use high-quality cocoa powder. I found that it truly makes a difference in the richness of the final product. My chocolate-loving friends always rave about these bars, and I can’t help but think it’s because of the cocoa!
Also, keep an eye on the baking time. I’ve tested this recipe multiple times, and if they’re in the oven just a moment too long, they lose that delicious gooey texture that makes them so special. Always pull them when they’re slightly underbaked; they’ll firm up as they cool.
Lastly, let them cool completely before cutting. I learned this the hard way—cutting them too soon resulted in a lovely mess rather than beautiful bars. When they cool, they hold their shape perfectly and create those satisfying, clean cuts that are oh-so-satisfying!
Common Mistakes to Avoid
One mistake I often see (and made myself early on) is not allowing the melted butter and sugar mixture to cool before adding the eggs. If you add the eggs too soon, you risk scrambling them! The key is to wait until it’s just warm to the touch—trust me, your eggs will thank you. (See the next page below to continue…)
Another common pitfall is overmixing the batter. It’s tempting to get everything perfectly smooth, but this can lead to a denser texture than we want. Just mix until you no longer see dry flour; lumps are totally fine!
Also, be cautious with your oven temperature. Ovens can be finicky, and if yours runs hot, you might end up with overbaked bars. I recommend using an oven thermometer for precision, just to be sure!
Serving Suggestions
When it comes to serving my Chocolate Mud Bars, I enjoy dusting the tops with a light sprinkle of powdered sugar for a touch of elegance. You can also serve them warm with a scoop of vanilla ice cream. The contrast between the warm, fudgy chocolate and the cold, creamy ice cream creates an irresistible dessert experience!
If I’m hosting guests, I like to garnish them with fresh berries or serve alongside a drizzle of chocolate sauce. It’s a simple touch that elevates the entire dish and makes it feel extra special.
Finally, don’t forget to take a moment and enjoy the sensory experience when you serve these bars. The deep chocolate color, the rich aroma, and the promise of that dense, gooey texture all come together to create an enticing dessert that your guests won’t forget!
Variations & Customizations
I love experimenting in my kitchen, so I’ve tried several fun variations of these Chocolate Mud Bars! One of my favorites is to add chopped nuts—walnuts or pecans add a delightful crunch and balance the fudginess of the bars perfectly. You can just stir in about a half cup of your preferred nuts along with the chocolate chips.
Another variation I enjoy involves adding flavored extracts. A splash of almond or orange extract can give the bars a unique twist without overpowering the chocolate essence. Just be careful with the amounts; a little goes a long way!
If I’m feeling really ambitious, I occasionally layer in some caramel or peanut butter before baking. I simply pour half the batter, drizzle your topping of choice, and then pour the remaining batter on top. It creates a rich, decadent surprise that’s always met with delight!
How to Store, Freeze & Reheat
To store my Chocolate Mud Bars, I wrap them in plastic wrap and follow that up with a layer of aluminum foil, keeping them fresh for days! Storing them at room temperature is best, and they can last up to a week—though I doubt they’ll last that long in your home!
If you decide you want to freeze some for later, make sure to cut them first. I usually place a few bars in an airtight container, separating layers with parchment paper. They freeze beautifully for up to three months. When I’m ready to enjoy them again, I simply let them thaw at room temperature or pop them in the microwave for a quick 15 seconds for that warm, gooey experience.
Reheating is simple if you prefer your bars warm. Just a few seconds in the microwave or a quick heat in the oven can bring back that delightful texture. It’s like turning back time for my dessert, and each bite remains as heavenly as the first!
Conclusion
There you have it—my cherished recipe for Chocolate Mud Bars that have found a permanent place in my heart (and kitchen). I hope you enjoy making and sharing these delightful treats as much as I do. Baking has a special way of bringing people together, and I can’t wait for you to create joyful memories with these bars. Happy baking!