
Equipment Needed
- 9×13 inch baking pan
- Medium saucepan
- Small saucepan or microwave-safe bowl
- Mixing bowls
- Whisk or electric mixer
- Spatula
- Toothpick or cake tester
Step-by-Step Instructions
First, preheat your oven according to the cake mix directions, usually 350°F (175°C). Grease and flour your 9×13 inch baking pan. In a large bowl, prepare the chocolate cake batter exactly as directed on the box. I like to add an extra splash of vanilla extract to the batter for more depth of flavor. Pour the batter into your prepared pan and smooth the top. Bake the cake according to the package directions, usually 28-33 minutes, or until a toothpick inserted into the center comes out clean. The smell of baking chocolate cake will fill your kitchen wonderfully.
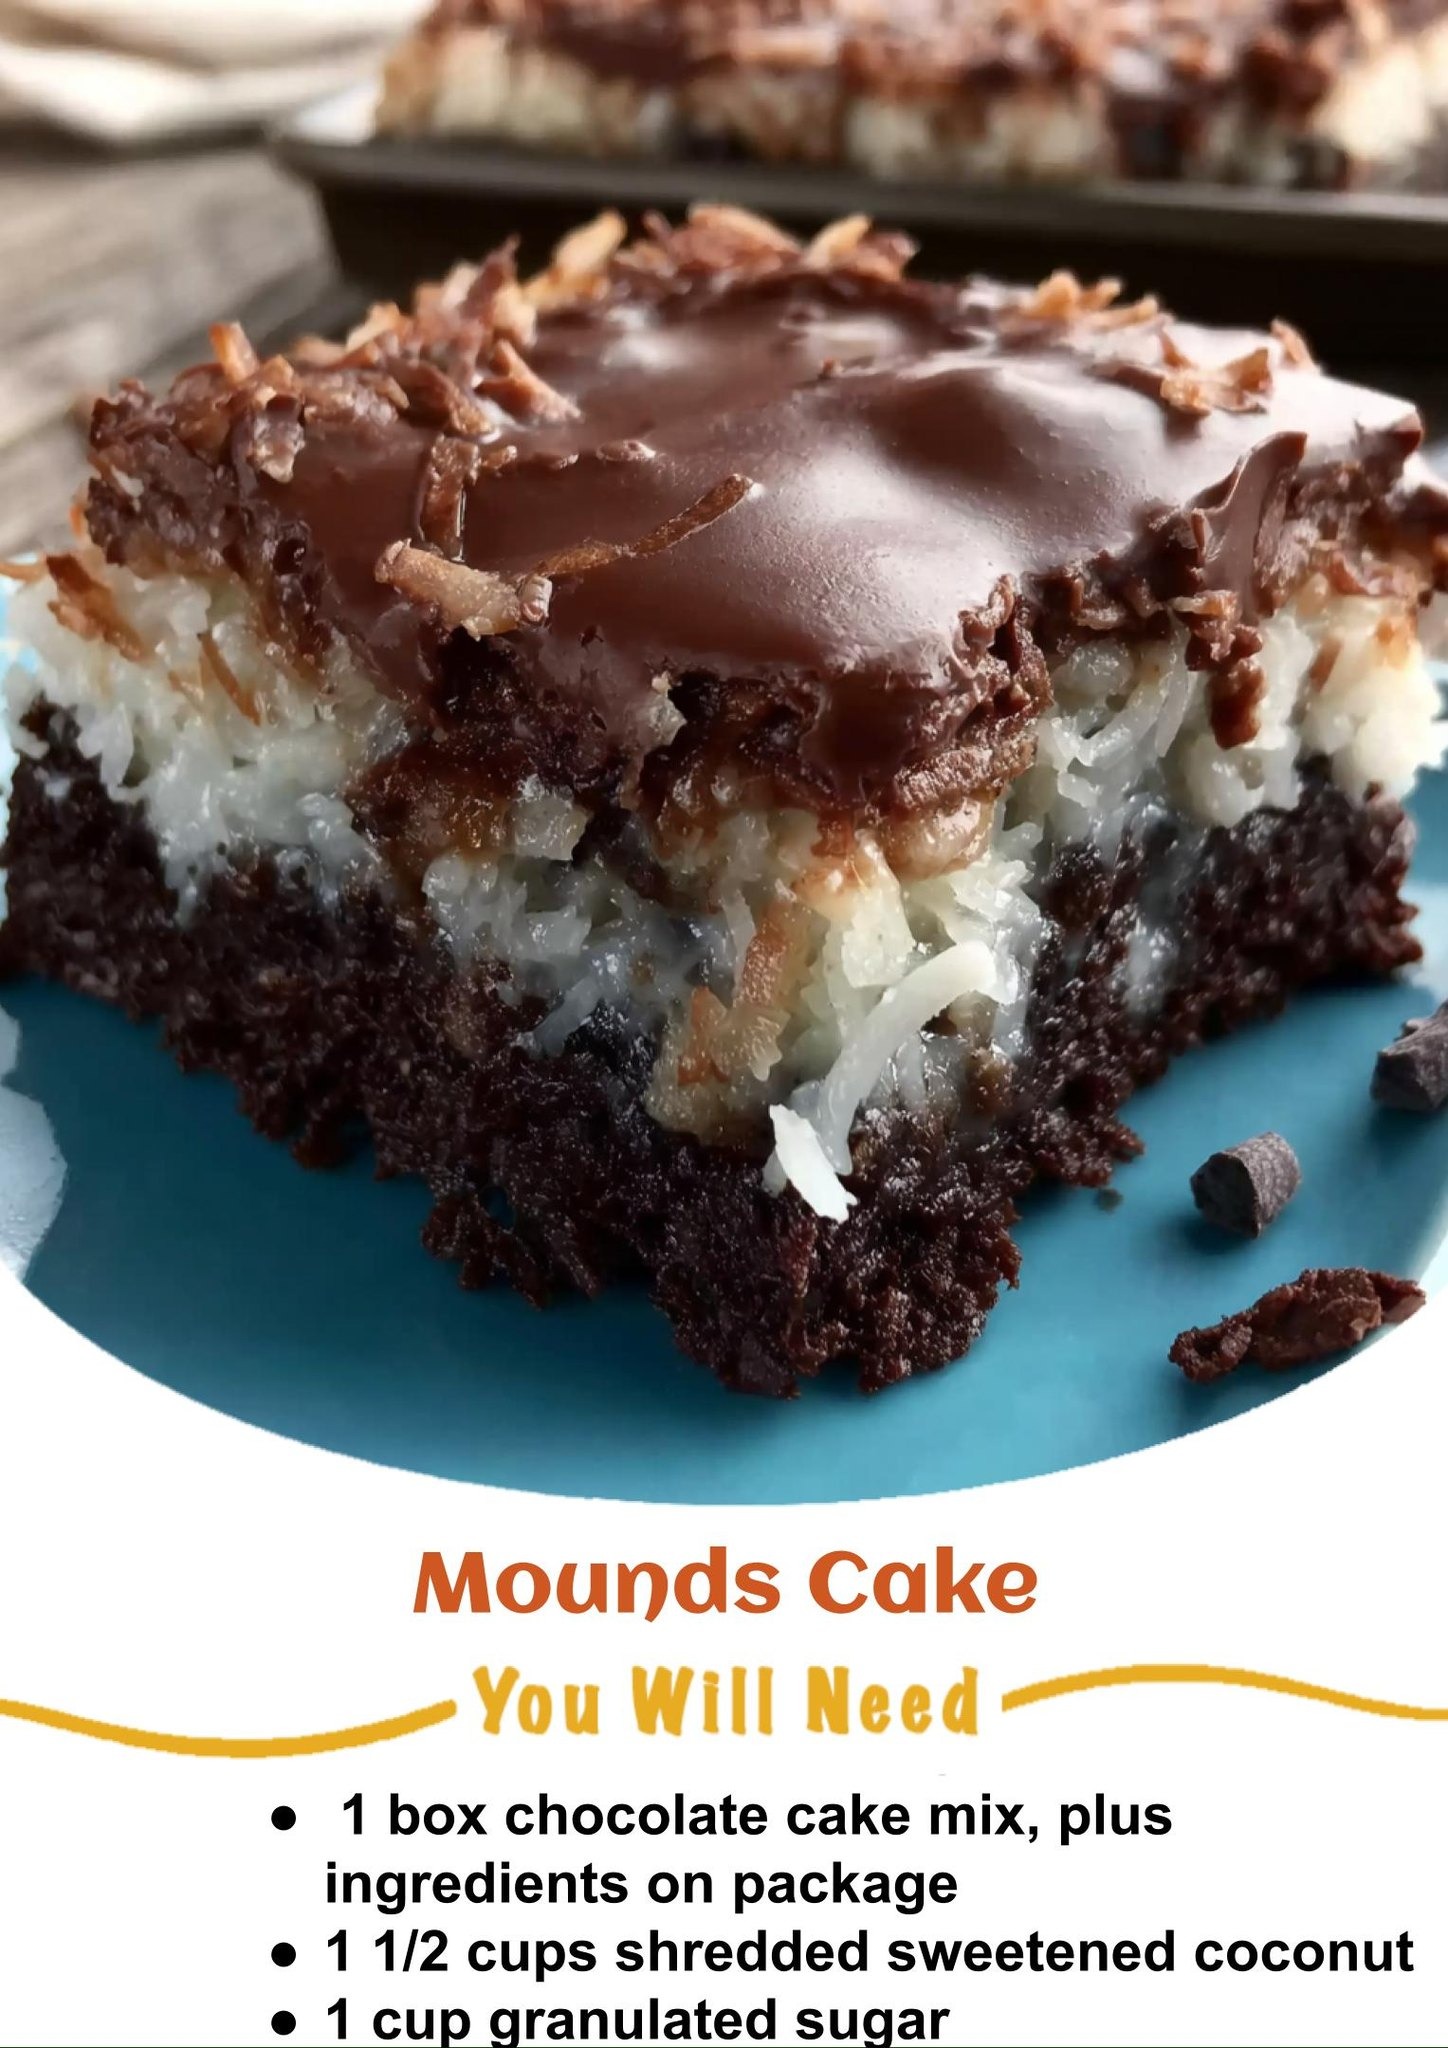
While the cake is baking, it’s time to make the legendary coconut filling. This is where the magic happens. In a medium saucepan over medium heat, combine the granulated sugar, evaporated milk, and butter. Stir constantly until the butter melts and the mixture comes to a gentle boil. Once boiling, reduce the heat to a simmer and cook, stirring frequently, for about 10-12 minutes. You’ll see it thicken slightly and turn a beautiful pale caramel color. Remove the pan from the heat. Immediately stir in the 2 cups of sweetened shredded coconut and the teaspoon of vanilla extract. The mixture will be thick, glossy, and incredibly fragrant.
Now for the transformative step. As soon as the cake comes out of the oven, use the handle of a wooden spoon or a chopstick to poke holes all over the top of the hot cake. You want lots of holes so the filling can seep down. Carefully and evenly pour the hot coconut filling over the hot cake. Use a spatula to spread it into an even layer, gently pushing it into the holes. The heat from the cake will help the filling settle in and bond with the crumb. Let the cake cool completely in the pan on a wire rack. This cooling is essential for the filling to set.(See the next page below to continue…)