
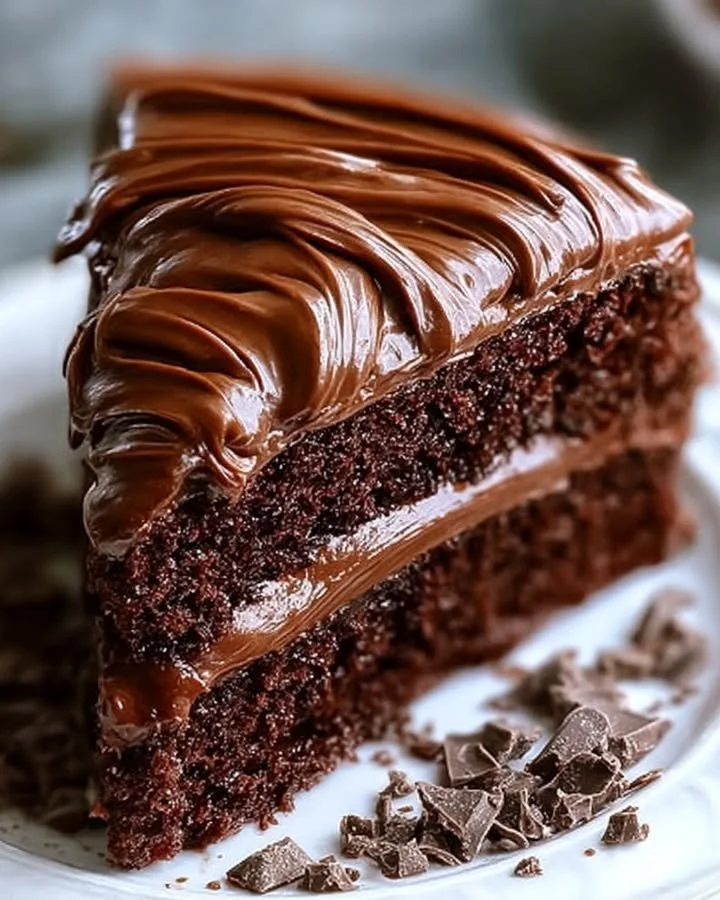
There’s something incredibly comforting about a chocolate cake that’s moist, rich, and utterly delicious. I remember the first time I bit into a slice of homemade chocolate cake—it was like a warm hug on a chilly day. After many trials in my kitchen, I’ve finally perfected my recipe for a moist and delicious chocolate cake that will have your taste buds dancing with joy. This cake is perfect for any occasion—it could easily steal the spotlight at a birthday celebration or become your go-to treat for those cozy afternoons when you just need a little chocolate pick-me-up.
Why You’ll Love This Recipe
I promise you’ll fall in love with this recipe right away. It’s straightforward, using simple ingredients that you probably already have in your pantry. The cake turns out incredibly moist and tender, with a deep chocolate flavor that isn’t too overpowering. It’s the kind of cake that calls for a second slice, and trust me, you won’t regret indulging! (See the ingredients in the next page below…)
Ingredients
– 1 ¾ cups all-purpose flour
– 2 cups granulated sugar
– ¾ cup unsweetened cocoa powder
– 1 ½ teaspoons baking powder
– 1 ½ teaspoons baking soda
– 1 teaspoon salt
– 2 large eggs
– 1 cup whole milk
– ½ cup vegetable oil
– 2 teaspoons vanilla extract
– 1 cup boiling water
Equipment Needed
– Mixing bowls
– Whisk
– Measuring cups and spoons
– 9×13 inch baking pan or two 9-inch round cake pans
– Parchment paper (optional)
– Cooling rack
Step-by-Step Instructions
First things first: preheat your oven to 350°F (175°C). Make sure to grease and flour your baking pan(s), or use parchment paper for easy removal. In a large bowl, mix the dry ingredients together—flour, sugar, cocoa powder, baking powder, baking soda, and salt. Then, in a separate bowl, whisk together the eggs, milk, vegetable oil, and vanilla extract. Once combined, pour the wet ingredients into the dry ingredients, stirring until everything is just mixed. The batter will be somewhat thick. Here’s my secret: add the boiling water last—this is what makes the cake so irresistibly moist! Just stir gently until it’s fully combined. (See the next page below to continue steps…)
Next, pour the batter into your prepared pans, ensuring an even distribution. If you’re using two round pans, you can use a kitchen scale to help measure the batter for even layers. Bake for 30-35 minutes, depending on your oven. Trust your nose! When the aroma fills your kitchen and a toothpick inserted in the center comes out clean, it’s done! Let the cakes cool in the pans for 10 minutes before transferring them onto a cooling rack to cool completely.
While the cakes are cooling, I suggest getting a head start on your frosting. A classic chocolate buttercream pairs beautifully with this cake. Simply beat together butter, cocoa powder, confectioner’s sugar, and a splash of milk until you reach the desired consistency. While you wait, relish in the delicious smell that fills your kitchen—it’s absolutely heavenly!
Once your cakes are cooled, it’s time for the fun part. If you’ve baked round cakes, level them out using a serrated knife, if necessary. Spread a generous layer of frosting between the two cakes and then cover the entire cake with frosting. Don’t be shy with the frosting—this cake deserves to be adored!
Pro Tips for Best Results
When I first started making this chocolate cake, I experimented with different types of cocoa powder. I found that Dutch-processed cocoa gives a richer flavor compared to the regular stuff, so if you have it on hand, definitely use that! Also, I like to use room temperature ingredients to help the batter blend better and yield a lighter cake.
One thing I learned the hard way is to be careful with over-mixing the batter. It’s best to mix just until you can no longer see the dry ingredients—this helps keep the cake light and airy rather than dense. I always set a timer while mixing so that I don’t lose track!
Finally, I urge you to taste your batter before you bake. A little spoonful of that raw goodness will tell you if you need to adjust the amount of vanilla or cocoa powder. Believe me, perfecting your batter will lead to a perfect cake!
Common Mistakes to Avoid
One mistake I see often is not measuring the flour correctly. It’s tempting to scoop straight from the bag, but that can lead to a dense cake. I always spoon flour into my measuring cup before leveling it off with a knife. This little tip can make a world of difference! (See the next page below to continue…)
Another common pitfall is underbaking the cake. Make sure to check for doneness by inserting a toothpick, but don’t be discouraged if it comes out slightly moist—what matters is avoiding the gooey batter stage. Ovens can vary in temperature, so it’s better to start checking a few minutes before the suggested baking time.
Lastly, make sure to let the cake cool completely before frosting. I know the smell can be enticing, and you might want to dive in right away—but trust me, a warm cake doesn’t hold frosting well. Patience is key for that stunning cake layer!
Serving Suggestions
When it comes to serving this delicious chocolate cake, I love to keep it simple. A dusting of powdered sugar on top or a drizzle of chocolate ganache can elevate the presentation without making it too fussy. Pairing it with a scoop of vanilla ice cream or a dollop of whipped cream adds a delightful contrast to the rich chocolate flavor.
For special occasions, I’ve experimented with adding a raspberry sauce on the side, which not only adds a splash of color but also a tartness that perfectly balances the sweetness of the cake. You could also dress it up with fresh berries on top for that perfect Instagram-worthy moment!
Lastly, why not serve it with a steaming cup of coffee or a glass of cold milk? There’s something nostalgic and soul-soothing about enjoying a slice of chocolate cake with a warm beverage that brings back those cherished childhood memories.
Variations & Customizations
Feeling adventurous? You can easily customize this chocolate cake to suit your taste! I once added a spoonful of espresso powder to the dry mix, which enhanced the chocolate flavor beautifully without making it taste like coffee. If you’re a fan of flavors, you could add orange zest for a delightful citrus twist or some peppermint extract for a refreshing touch.
Another fun idea is to play with fillings. I sometimes layer this cake with a chocolate mousse or even raspberry jam for a burst of fruitiness. You could try this out by evenly spreading a layer on top of the frosting before adding the second layer of cake for an extra surprise.
And let’s not forget about gluten-free options! I’ve received excellent feedback from friends who have used a 1:1 gluten-free flour blend in this recipe. It yields an equally delicious cake that everyone can enjoy.
How to Store, Freeze & Reheat
This chocolate cake keeps remarkably well! I usually store any leftover cake in an airtight container at room temperature for up to three days. If you have quite a bit leftover (which is rare, but it can happen!), you can refrigerate it for about a week. Just make sure it’s tightly wrapped to prevent drying out.
If you want to freeze portions, this cake freezes beautifully too! I’ve wrapped slices in plastic wrap and placed them in a freezer-safe bag. They can last up to three months. When you’re ready to enjoy a slice, simply thaw it at room temperature, and it’s as good as fresh!
Reheating a slice is simple. Microwaving for about 10-15 seconds does the trick, bringing back that warm, indulgent feeling. If you want a perfectly warm chocolate cake experience, it’s a great idea to pair that with some fresh frosting on top while it’s still warm!
Conclusion
I hope you’ll give this moist and delicious chocolate cake a try in your own kitchen. It’s more than just a dessert; it’s a way to create warm memories and share joy with loved ones. So, when that chocolate craving strikes, or you’re looking to celebrate something special, remember this easy recipe. Here’s to many delightful chocolate cake moments ahead—happy baking!