
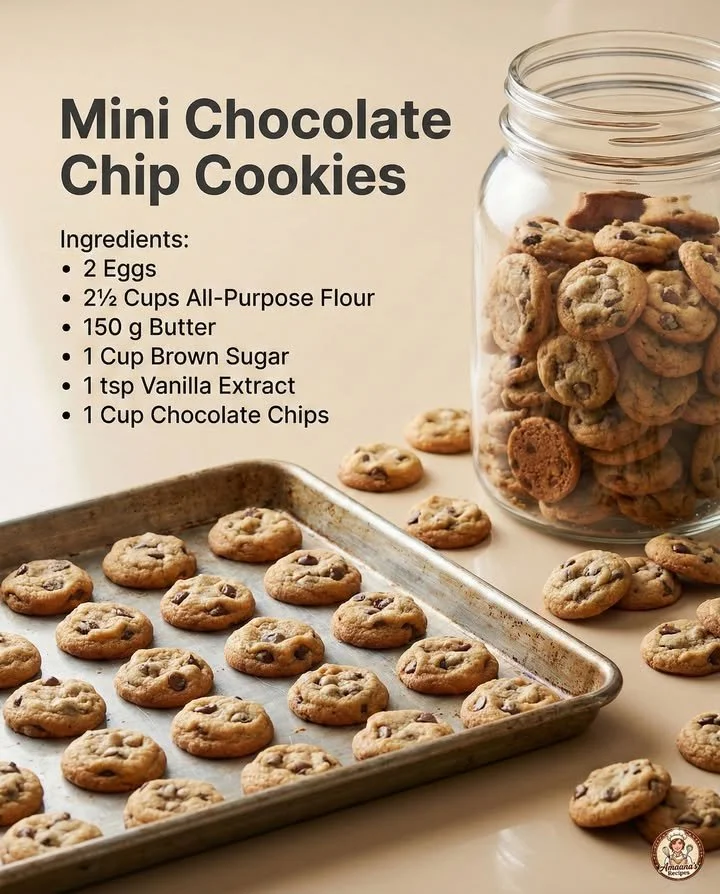
Welcome to my cozy kitchen! Today, I’m excited to share my favorite recipe for Mini Chocolate Chip Cookies. There’s just something magical about the smell of cookies baking that fills the air with warmth and nostalgia. Whether you’re looking to enjoy a sweet treat or share a plateful with loved ones, these mini cookies are sure to win hearts and satisfy cravings. So, let’s roll up our sleeves and get started on this delightful baking adventure!
Why You’ll Love This Recipe
You’re going to adore how quick and easy these little bite-sized delights are to whip up! With just a handful of ingredients, you’ll have a batch of soft, chewy, and utterly irresistible mini chocolate chip cookies in no time. Plus, because they’re mini, they’re the perfect size for snacking or popping into lunchboxes. Trust me—once you take a bite, you’ll understand why these cookies are a favorite in my household. (See the ingredients in the next page below…)
Ingredients
- 1 cup all-purpose flour
- 1/2 teaspoon baking soda
- 1/4 teaspoon salt
- 1/2 cup unsalted butter, softened
- 1/4 cup granulated sugar
- 1/4 cup brown sugar, packed
- 1 teaspoon vanilla extract
- 1 large egg yolk
- 1/2 cup mini chocolate chips
Equipment Needed
- Mixing bowl
- Whisk or spatula
- Measuring cups and spoons
- Baking sheet
- Parchment paper or silicone baking mat
- Wire rack
Step-by-Step Instructions
Let’s get to the fun part! First, preheat your oven to 350°F (175°C) and line a baking sheet with parchment paper or a silicone mat. In a mixing bowl, whisk together the flour, baking soda, and salt until well combined. In another bowl, cream together the softened butter, granulated sugar, and brown sugar until smooth and fluffy. I love the way the mixture turns a lighter shade as you beat the sugars and butter together—so satisfying! (See the next page below to continue steps…)
Next, add in the vanilla extract and the egg yolk, mixing until just combined. Then, gradually fold the dry ingredients into the wet mixture. Be gentle to keep the cookies nice and soft! Once everything is mixed, it’s time to stir in those mini chocolate chips. I often taste the dough at this point (just a little bit, of course!) because it’s honestly one of the best parts of baking.
Now, scoop small tablespoons of dough onto your prepared baking sheet, making sure to space them about two inches apart. They will spread a little, so give them some room to breathe. Bake in the preheated oven for about 8 to 10 minutes, or until the edges are lightly golden. The aroma wafting through my kitchen at this point is pure bliss!
Once baked, remove them from the oven and let the cookies cool for a few minutes on the baking sheet before transferring them to a wire rack. They might look a little too soft at first, but they’ll firm up as they cool. The anticipation of taking that first bite is part of the joy of baking!
Pro Tips for Best Results
From my experience, I’ve learned a few tricks to make these cookies turn out perfectly every time. First, I always use room temperature butter. This ensures that it incorporates seamlessly with the sugars to create that delightful fluffy texture. If your butter is too hard, don’t hesitate to microwave it for just a few seconds—be careful not to melt it, though!
Another tip I discovered through trial and error is to chill the dough for about 30 minutes before baking. This helps prevent the cookies from spreading too much, leading to a thicker, chewier cookie. Trust me, it’s worth the wait!
Lastly, if you want to take these cookies over the top, try adding a sprinkle of flaky sea salt on top right before baking. The contrast between the sweet chocolate and the salty finish is simply divine.
Common Mistakes to Avoid
Baking should be fun, but it can also be tricky! One mistake I made early on was overlooking the importance of measuring my ingredients accurately. It’s so tempting to just scoop and dump, but even minor differences can impact the texture of your cookies. I strongly recommend using kitchen scales or measuring cups for precision.(See the next page below to continue…)
Another common pitfall is over-baking the cookies. I’ve had my fair share of hardened hockey pucks because I lost track of time! Keep a close eye on your cookies, and remember: they will continue to firm up as they cool. Remove them from the oven when the edges are lightly golden, and trust the process.
Lastly, don’t forget to allow your cookies to cool down fully before stacking them. I once ended up with a sweet mess of melted chocolate and dough because I couldn’t resist the urge to pile them up too soon! Patience is key.
Serving Suggestions
These mini chocolate chip cookies are perfect for a variety of occasions. I love serving them warm with a glass of cold milk or a steaming cup of coffee. The combination of chewy cookies and your favorite beverage creates a delightful afternoon treat that feels like a warm hug!
Another lovely idea is to package them in cute little bags or boxes as gifts. They make for thoughtful presents for friends, family, or coworkers—talk about a sweet surprise! Plus, they’re great for parties or gatherings, standing out on a dessert table among other sweet treats.
If you’re feeling a bit fancy, try layering them in a glass with whipped cream and fresh berries for a delightful dessert parfait. The combinations are endless, and each bite is sure to evoke smiles and compliments.
Variations & Customizations
While I adore the classic mini chocolate chip cookie, there are so many fun ways to mix things up! One of my favorite variances is adding nuts, such as walnuts or pecans, for a delightful crunch. Just chop them finely and fold them into the dough with the chocolate chips.
Another fun twist is to swap half of the chocolate chips for butterscotch or white chocolate chips. This gives the cookies a completely different flavor profile while still keeping that delightful mininess intact. Trust me, they’re surprisingly delicious!
And don’t forget about flavors! You can add a bit of almond or mint extract for a unique twist that will impress friends and family. Experimentation is part of the joy of baking, so feel free to get creative!
How to Store, Freeze & Reheat
If you have any cookies left (which is rare in my kitchen!), storing them is simple. Just keep them in an airtight container at room temperature, and they’ll stay fresh for about a week. I often put a slice of bread in the container to keep them nice and soft—it’s a trick I learned from my grandma!
Freezing is another great option if you want to save some cookies for later. Just place them on a baking sheet and freeze until solid, then transfer them to a freezer-safe bag or container. They can be stored this way for up to three months. Whenever you crave a cookie, simply pull one out and let it come to room temperature—it’s like a surprise treat waiting for you!
To reheat, just pop them in the microwave for about 10 to 15 seconds, and they’ll taste just like fresh out of the oven. The smell alone will draw everyone into the kitchen, and who can resist that?
Conclusion
I hope you’re as excited to bake these Mini Chocolate Chip Cookies as I am! There’s something incredibly rewarding about sharing homemade goodies with those you love, and I promise these little gems will be a hit. So grab your ingredients, get your kitchen ready, and let’s bake up some happiness together! Happy baking!