
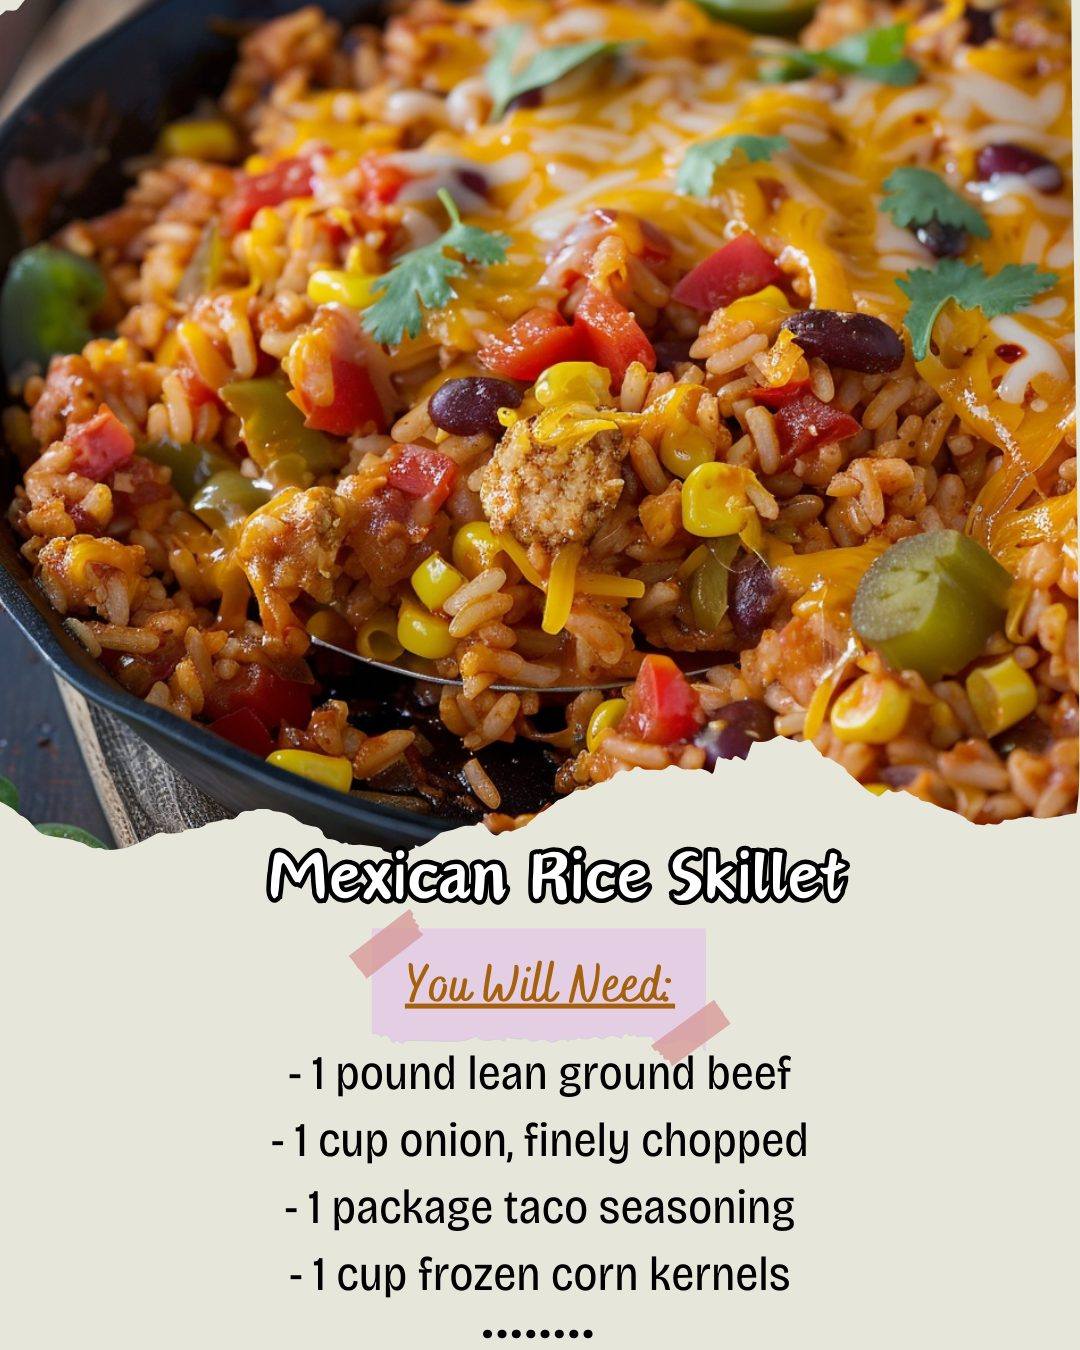
I first whipped up this Mexican Rice Skillet on one of those frantic Tuesday nights when everyone was hungry, the clock was ticking, and I needed something hearty, fast, and full of flavor. As the ground beef sizzled and the taco seasoning hit the hot pan, my kitchen filled with the most incredible aroma—a smoky, savory scent that promised a satisfying meal. In under 30 minutes, I had a vibrant, one-pan dinner with tender rice, juicy beef, sweet corn, and that perfect kick of spice. The first bite was a flavor fiesta, and the fact that it all came together in a single skillet with minimal cleanup? That was the real victory. It’s been my weeknight superhero ever since.
Why You’ll Love This Recipe
You are going to absolutely love this recipe because it delivers all the beloved flavors of your favorite Mexican-inspired takeout in a healthy, homemade, one-pan wonder. It’s incredibly fast, endlessly adaptable, and uses simple ingredients you probably already have in your pantry and freezer. The taco seasoning does all the heavy lifting for flavor, while the rice soaks up every bit of that delicious spiced broth. It’s a complete meal in a skillet that’s perfect for busy families, meal prep, or even a casual dinner with friends—promising maximum flavor with minimal effort and dirty dishes.
Ingredients
- 1 pound lean ground beef (I use 90/10 or 93/7)
- 1 cup finely chopped yellow onion (about 1 medium onion)
- 1 (1 ounce) package taco seasoning (or 2-3 tablespoons of your favorite blend)
- 1 cup frozen corn kernels (no need to thaw)
- 1 cup uncooked long-grain white rice (like jasmine or basmati)
- 1 (10 oz) can Rotel diced tomatoes & green chiles, undrained
- 1 ¾ cups beef broth or chicken broth
- 1 tablespoon olive oil
- Optional for serving: shredded cheese, sour cream, chopped cilantro, sliced jalapeños, lime wedges
(See the next page below to continue…)
Equipment Needed
- Large, deep skillet with a tight-fitting lid (a 12-inch cast iron or stainless steel skillet is perfect)
- Wooden spoon or spatula
- Measuring cups and spoons
- Can opener
Step-by-Step Instructions
I always start by getting my ingredients prepped and measured—this is a fast-moving recipe, so having everything ready is key. I finely chop my onion, measure out my rice and frozen corn, and open my can of Rotel and broth. Then, I heat the olive oil in my large skillet over medium-high heat. Once the oil is shimmering, I add the ground beef, breaking it up with my wooden spoon. I season it with just a small pinch of salt and pepper. I let it cook, undisturbed for a minute to get a nice sear, then continue breaking it up until it’s just browned through, but not cooked completely dry. The browning adds so much flavor to the foundation of the dish.
As soon as the beef is browned, I add the chopped onion right into the same skillet. I stir it all together and let it cook for about 3-4 minutes, until the onion starts to soften and turn translucent. You’ll smell that sweet onion aroma mixing with the savory beef. Then, I sprinkle the entire packet of taco seasoning over the beef and onion mixture. I stir constantly for about one minute, toasting the spices. This quick bloom in the hot fat unlocks their full, deep flavor and fills your kitchen with the most amazing scent.
Now, it’s time to build the skillet. I stir in the uncooked rice, making sure every grain gets coated in the spiced beef mixture. This toasts the rice slightly, which helps it stay separate and not get mushy. Next, I pour in the undrained can of Rotel (those juices are liquid gold!), the frozen corn, and the beef broth. I give everything a good stir, scraping up any delicious browned bits from the bottom of the pan. I bring the whole mixture to a lively boil. Once it’s bubbling vigorously, I immediately reduce the heat to low, cover the skillet tightly with its lid, and set a timer for 20 minutes.(See the next page below to continue…)
This is the hardest part: no peeking! I learned this the hard way. Lifting the lid lets precious steam escape, which can result in undercooked rice. I resist the urge and let it simmer gently, undisturbed. When the timer goes off, I turn off the heat but leave the lid on. I let it sit, covered, for a final 5-10 minutes. This resting time is non-negotiable—it allows the rice to finish steaming perfectly and absorb any remaining liquid, resulting in a fluffy, not soggy, texture. Then, I fluff it with a fork, and it’s ready to serve.
Pro Tips for Best Results
My first pro tip is to use the right rice. I’ve tested this with long-grain white rice, instant rice, and even brown rice. Long-grain white rice (like jasmine or basmati) works best. It cooks in the given time and absorbs the flavors beautifully without becoming gummy. Do not use instant or minute rice; it will turn to mush. If you want to use brown rice, you’ll need to increase the broth by about ½ cup and the cook time to 45-50 minutes.
Don’t skip toasting the taco seasoning. That one minute of stirring the dry spices with the beef and onion makes a world of difference. It cooks out any raw spice taste and deepens the flavor from simply “seasoned” to “rich and complex.” I’ve tried just dumping it in with the liquid, and the flavor is noticeably less vibrant. Trust me, this small step is a game-changer.
Finally, let it rest off the heat. I know you’ll be eager to dig in, but allowing the skillet to sit, covered, after cooking is the secret to perfect rice. The residual heat finishes the cooking process gently, steaming any last hard grains and allowing the rice to fully absorb the flavorful broth. This prevents a watery or crunchy bottom layer and gives you a consistently perfect texture throughout the entire skillet.
Common Mistakes to Avoid
The most common mistake is lifting the lid while the rice is cooking. I was so guilty of this the first time, wanting to stir and check progress. Every time you lift that lid, you release steam and lower the temperature inside the skillet, which can add 5-10 extra minutes to your cook time and risk unevenly cooked rice. Set that timer, walk away, and trust the process. The wait is worth it.(See the next page below to continue…)
Don’t use extra-lean beef without adjusting. If you use 99% lean ground beef or turkey, the pan can be too dry after browning. The taco seasoning needs a little fat to bloom properly. If using a very lean protein, add an extra tablespoon of olive oil to the skillet before adding the meat and onions. This ensures your spices toast nicely and don’t burn or clump.
Avoid stirring the rice after you’ve added the liquid and put the lid on. Stirring agitates the grains and breaks them down, releasing excess starch that can make your final dish gluey and thick instead of light and fluffy. Stir well when you add the broth, then leave it alone until the very end when you fluff it with a fork.
Finally, don’t forget the resting time. Serving it straight from the burner often means the bottom layer is perfectly cooked but the top can be a bit wet or the rice slightly underdone in the center. Letting it sit, covered, with the heat off allows the heat and moisture to redistribute evenly, giving you a perfect result from edge to edge.
Serving Suggestions
I love serving this right from the skillet, family-style, with all the toppings laid out like a mini taco bar. I set out bowls of shredded cheddar or Mexican blend cheese, cool sour cream, fresh chopped cilantro, diced avocado, and lime wedges. Letting everyone customize their own bowl makes dinner fun and interactive, especially for kids.
For a complete and easy meal, I’ll often serve it with a simple side of warmed tortillas (flour or corn) or sturdy tortilla chips for scooping. A quick side salad of shredded lettuce, tomato, and a lime vinaigrette or a simple bowl of black beans rounds everything out perfectly. It’s a satisfying dinner that feels special but couldn’t be simpler.
This skillet is also my secret weapon for meal prep. I divide it into single-serving containers and top with a little cheese. It reheats beautifully for lunches throughout the week. The flavors actually improve after a day or two in the fridge, making it a smart and delicious plan-ahead option.
Variations & Customizations
For a lighter version, I’ve made this with ground turkey or even shredded rotisserie chicken. For chicken, I’ll sauté the onions first, then add the seasoning and broth, and stir in the cooked chicken at the very end just to warm through. You can also add a can of drained and rinsed black beans or pinto beans when you add the corn for extra protein and fiber.
To switch up the veggies, try adding a diced bell pepper with the onion, or stir in a handful of fresh spinach right at the end of cooking until it wilts. If you love heat, use the “Hot” variety of Rotel, add a diced jalapeño with the onions, or use a spicy taco seasoning blend.
If you’re out of broth, you can use water, but I strongly recommend using at least one teaspoon of better-than-bouillon paste or an extra half packet of taco seasoning to make up for the lost flavor. The broth really builds depth, so a simple swap to water can leave the dish tasting a bit flat.
How to Store, Freeze & Reheat
This skillet stores wonderfully. Once cooled, I transfer it to an airtight container and keep it in the refrigerator for up to 4 days. The rice will continue to absorb moisture, so when reheating in the microwave or on the stovetop, I sprinkle a tablespoon or two of water or broth over the top to bring back the perfect moist, fluffy texture.
It freezes exceptionally well for longer storage. I portion it into freezer-safe bags or containers, leaving a little headspace, and freeze for up to 3 months. To thaw, I place it in the refrigerator overnight. It’s a fantastic freezer meal to have on hand for a last-minute dinner.
When reheating, I prefer the stovetop for the best texture. I add it back to a skillet with a splash of broth or water, cover it, and warm it over medium-low heat, stirring occasionally, until heated through. The microwave works in a pinch, but can sometimes make the rice a bit rubbery if zapped on high power.
Conclusion
This Mexican Rice Skillet is more than just a quick dinner to me; it’s a reliable, flavorful solution that never fails to please a crowd and makes my weeknights infinitely easier. It’s the dish I turn to when I need something delicious without the fuss, and it always brings a little festive joy to the table. I hope it becomes a trusted favorite in your kitchen, too, bringing you easy wins and happy, full bellies. Now, go grab that skillet—dinner is 30 minutes away.